Crossmint
Step-by-Step Guide
This guide shows you how to use Dynamic for authentication and as a signer for Crossmint Smart Wallets.
Create a Crossmint API Key
The first step is to obtain a client-side API key from Crossmint.
- Navigate to the “Integrate” section on the left navigation bar of the Crossmint console, and ensure you’re on the “API Keys” tab.
- Within the Client-side keys section, click the “Create new key” button in the top right.
- On the authorized origins section, enter
http://localhost:3000and click “Add origin”. - Next, check the scopes labeled
wallets.create,wallets.read,users.create. - Check the “JWT Auth” box.
- Finally, create your key and save it for subsequent steps.
Configure Dynamic Authentication for your API Key
After the key is generated, you need to set it to require Dynamic auth tokens for authorization.
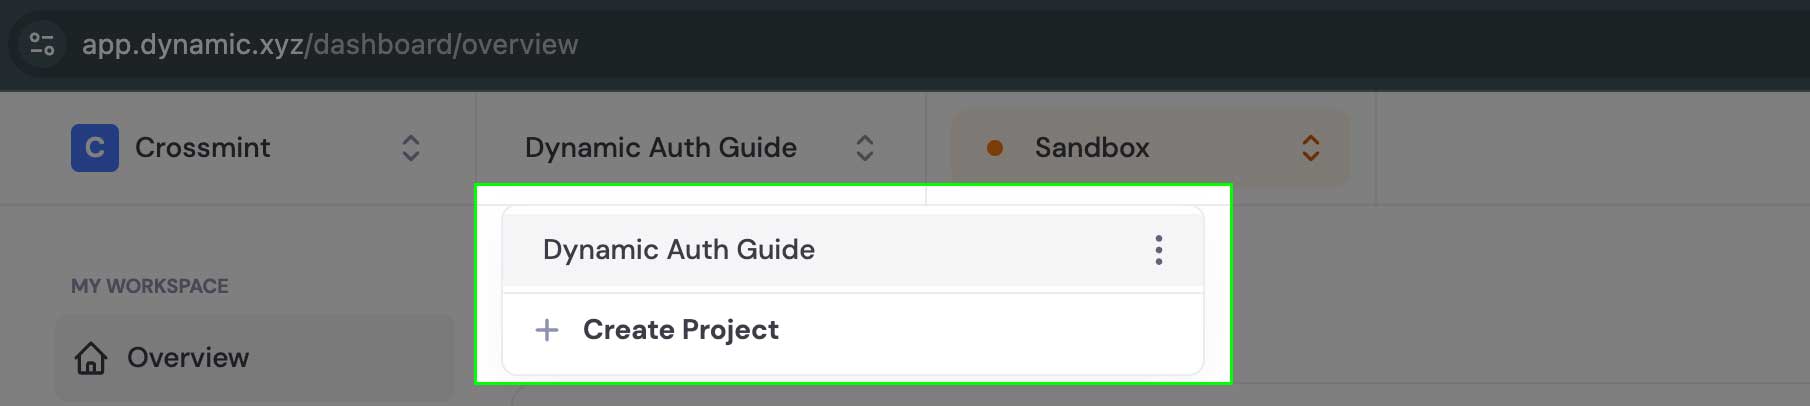
- Go to the Dynamic dashboard at https://app.dynamic.xyz/
- Select an existing project or create a new one
You need to make sure you’re using live keys for mainnets and sandbox keys for staging/testnets.
- Expand the “Developers” section in the left-hand navigation and select “SDK and API Keys” to find your Dynamic Environment ID.
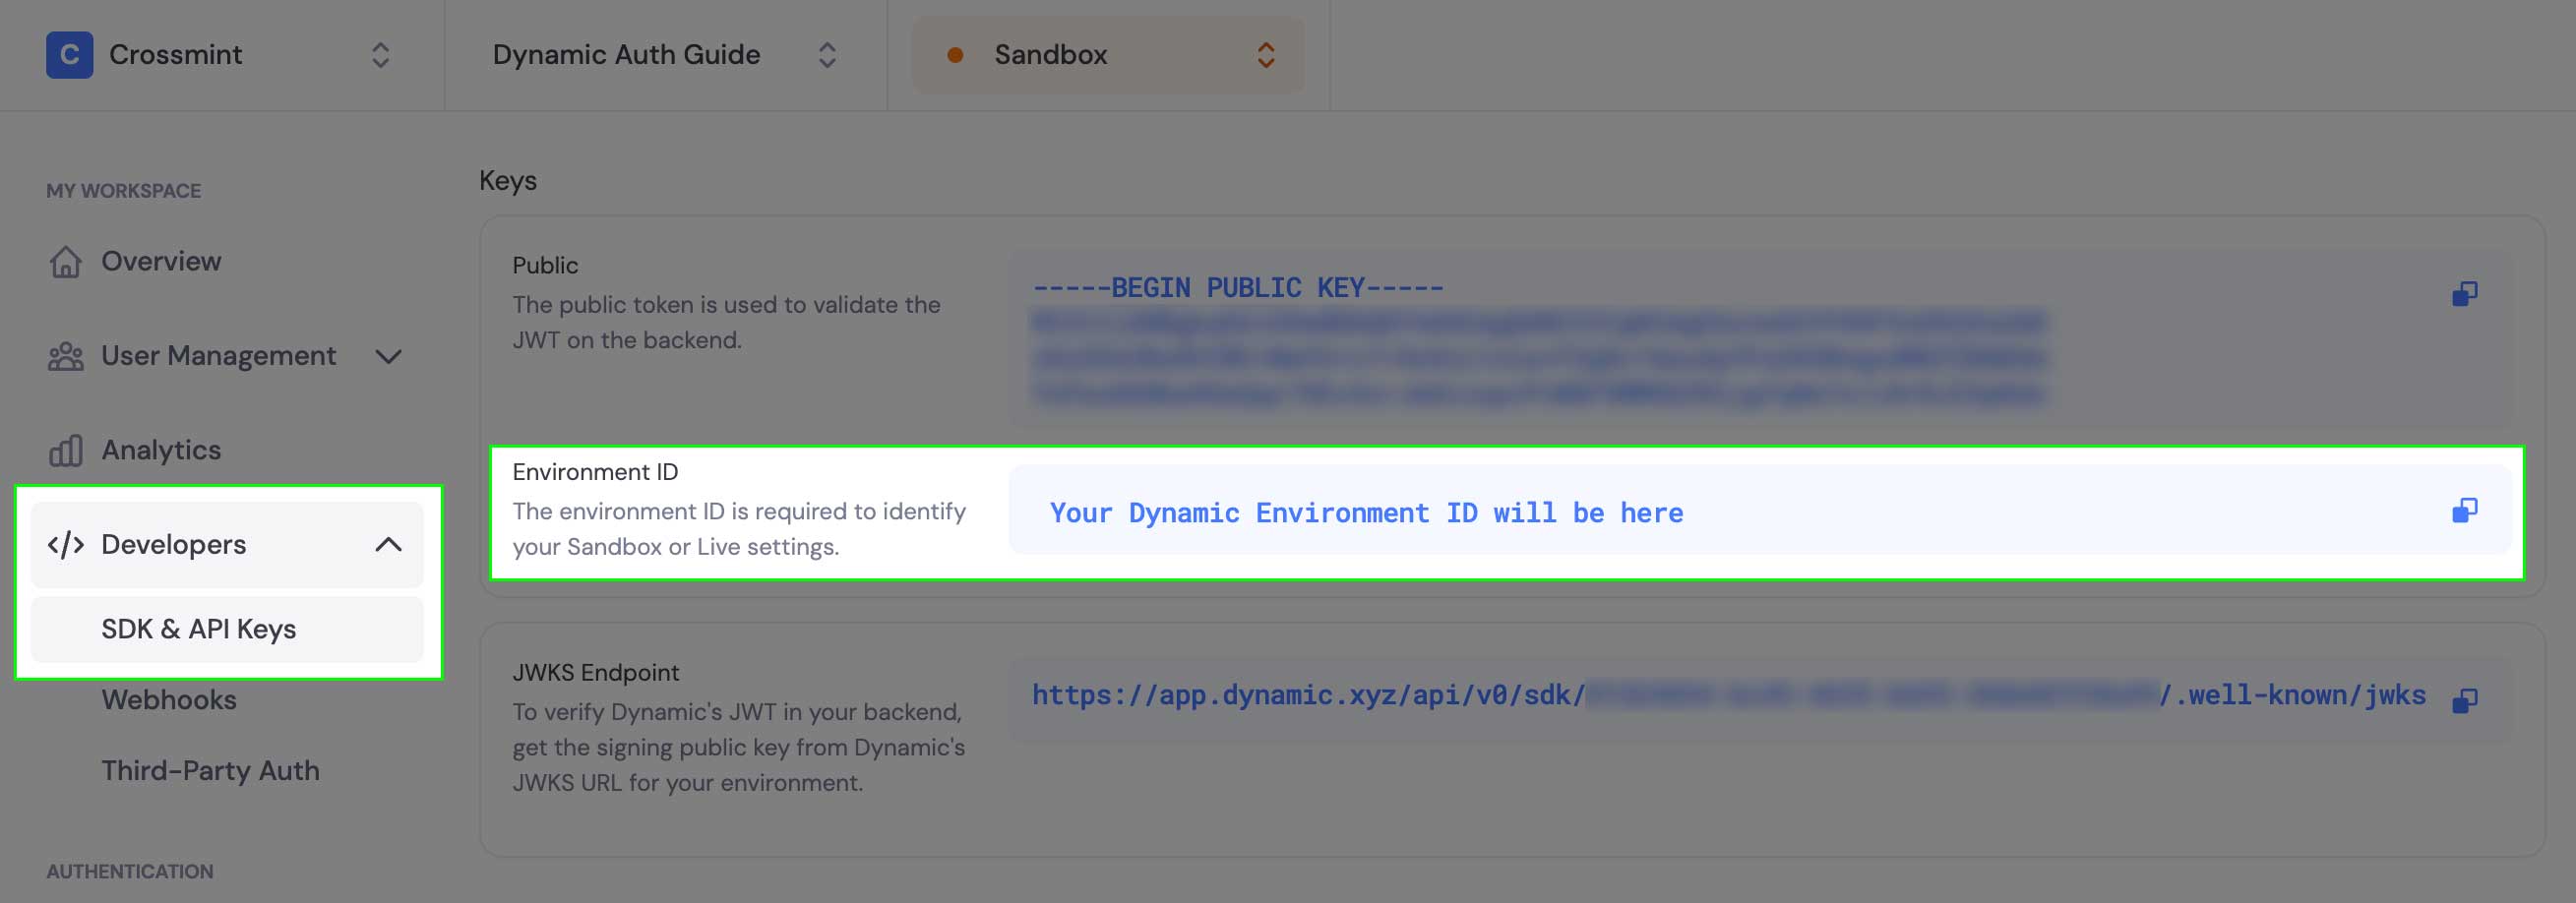
- Copy the Dynamic Environment ID and return to the Crossmint developer console
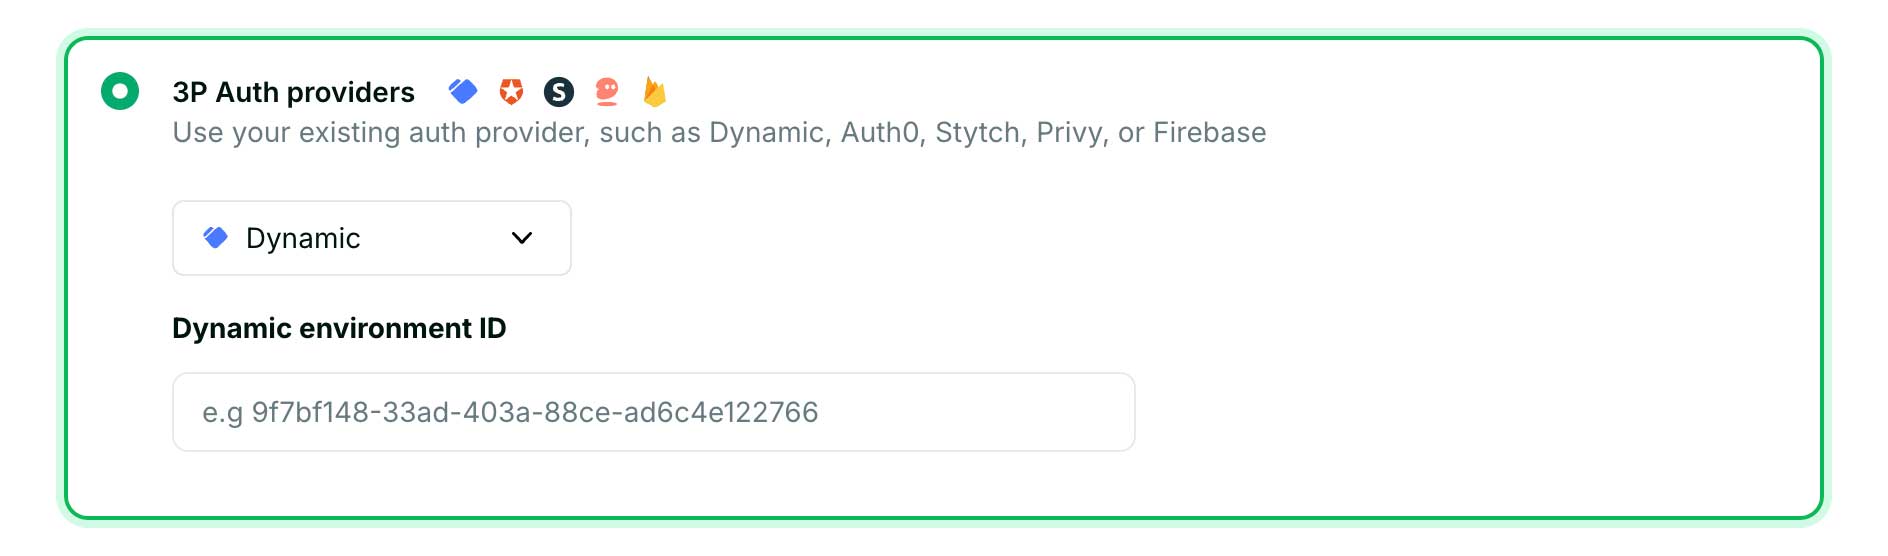
- Within the JWT authentication section, select “3P Auth providers” option, and then select Dynamic
- Add your Environment ID and save changes
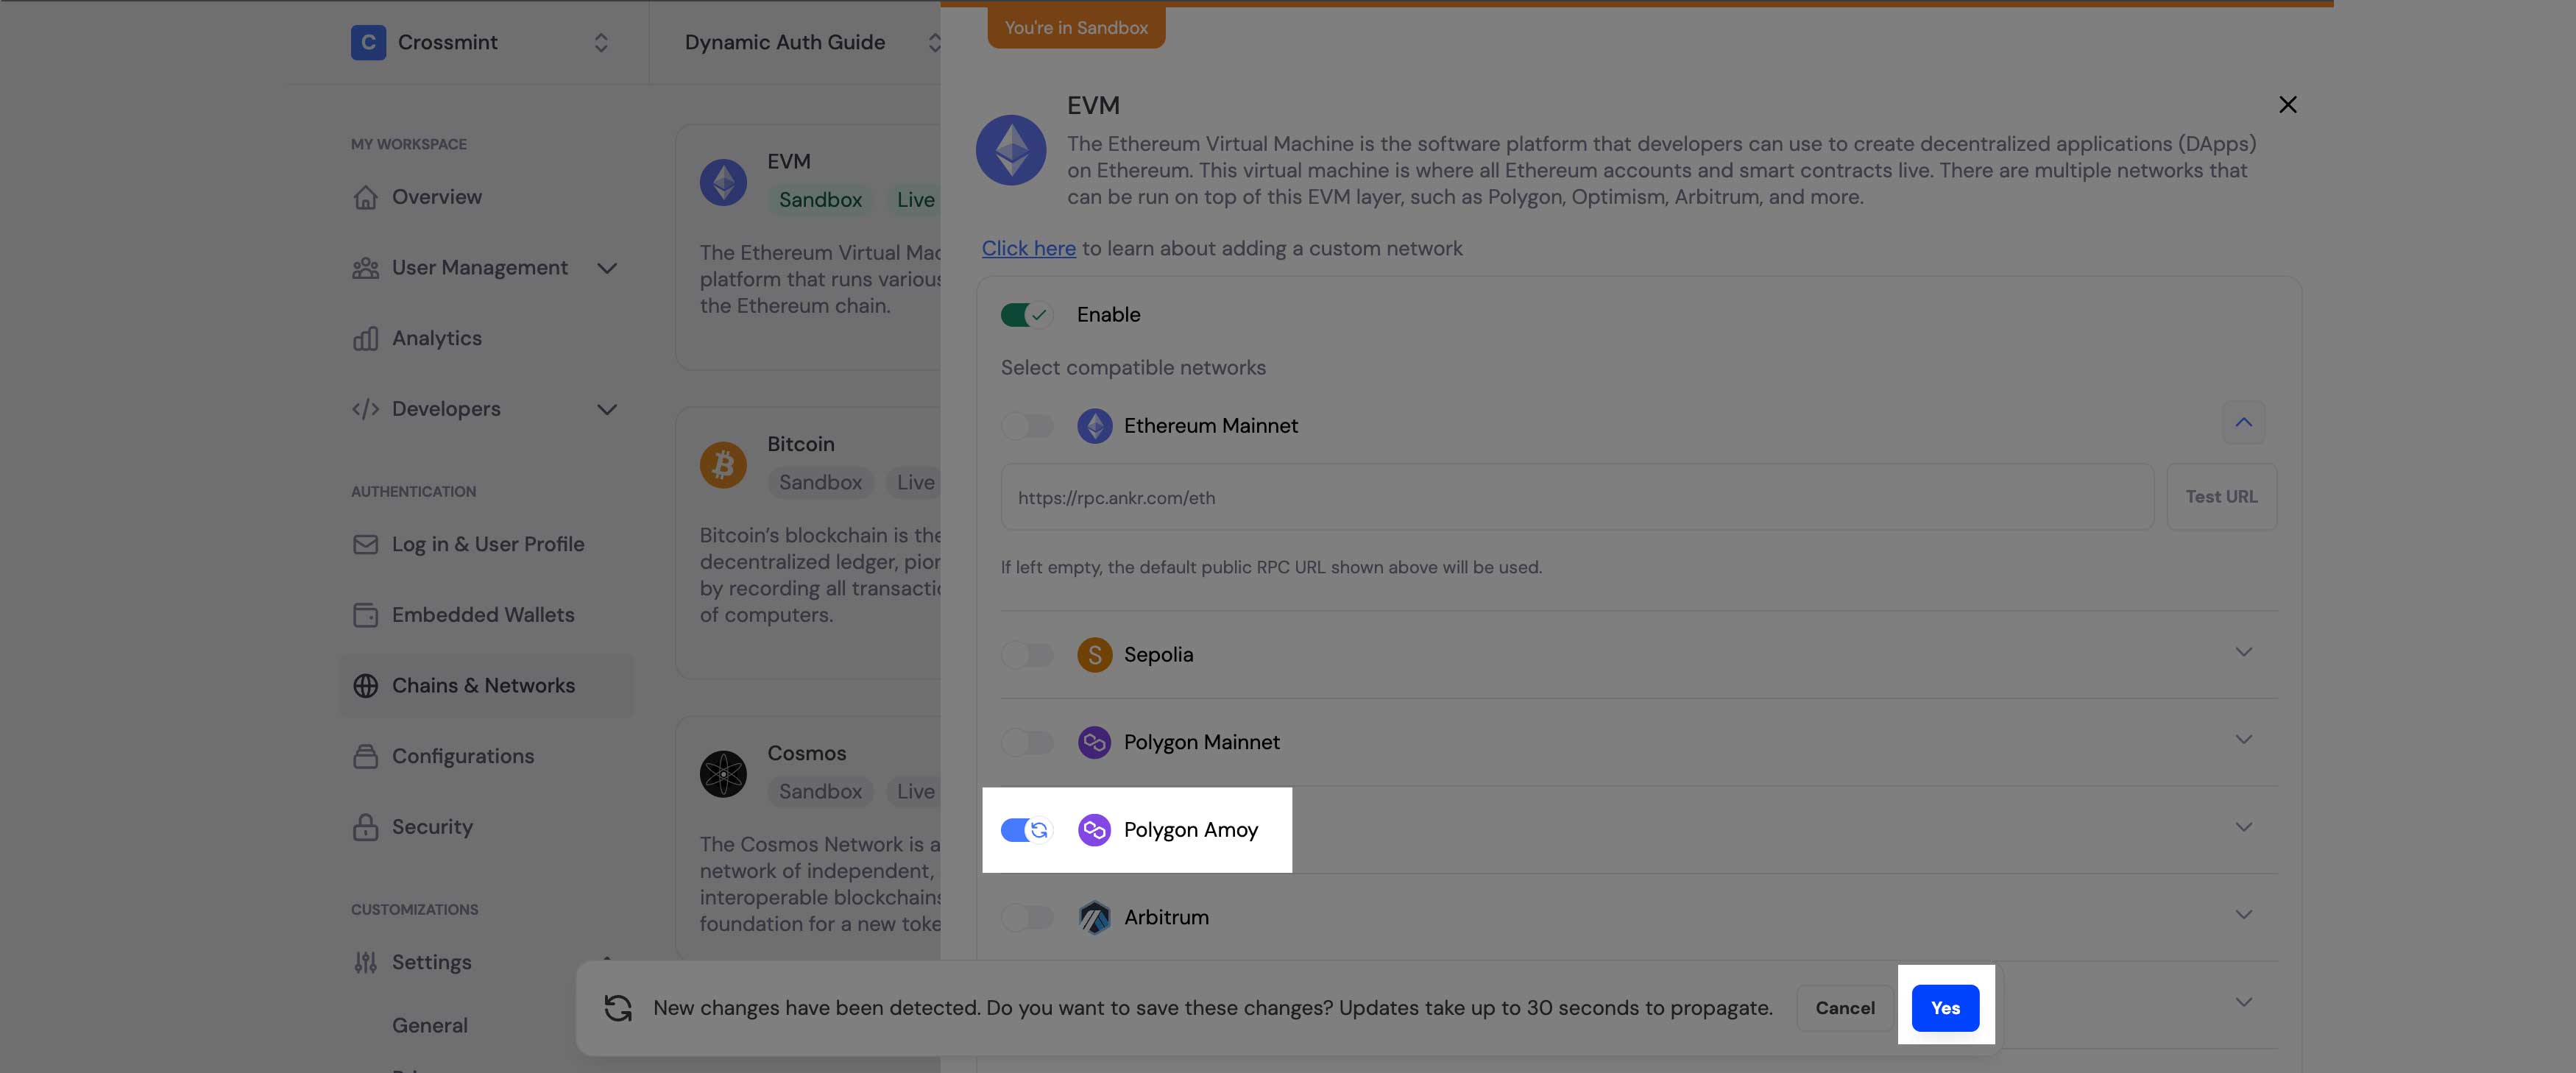
Configure Chain Support in Dynamic
To integrate Crossmint Smart Wallets with Dynamic as the auth provider, you need to configure the chain you want to use:
- With the same project selected, select the “Chains and Networks” option in the left-hand navigation
- Click the EVM option to reveal a drawer where you can toggle chain support on and off
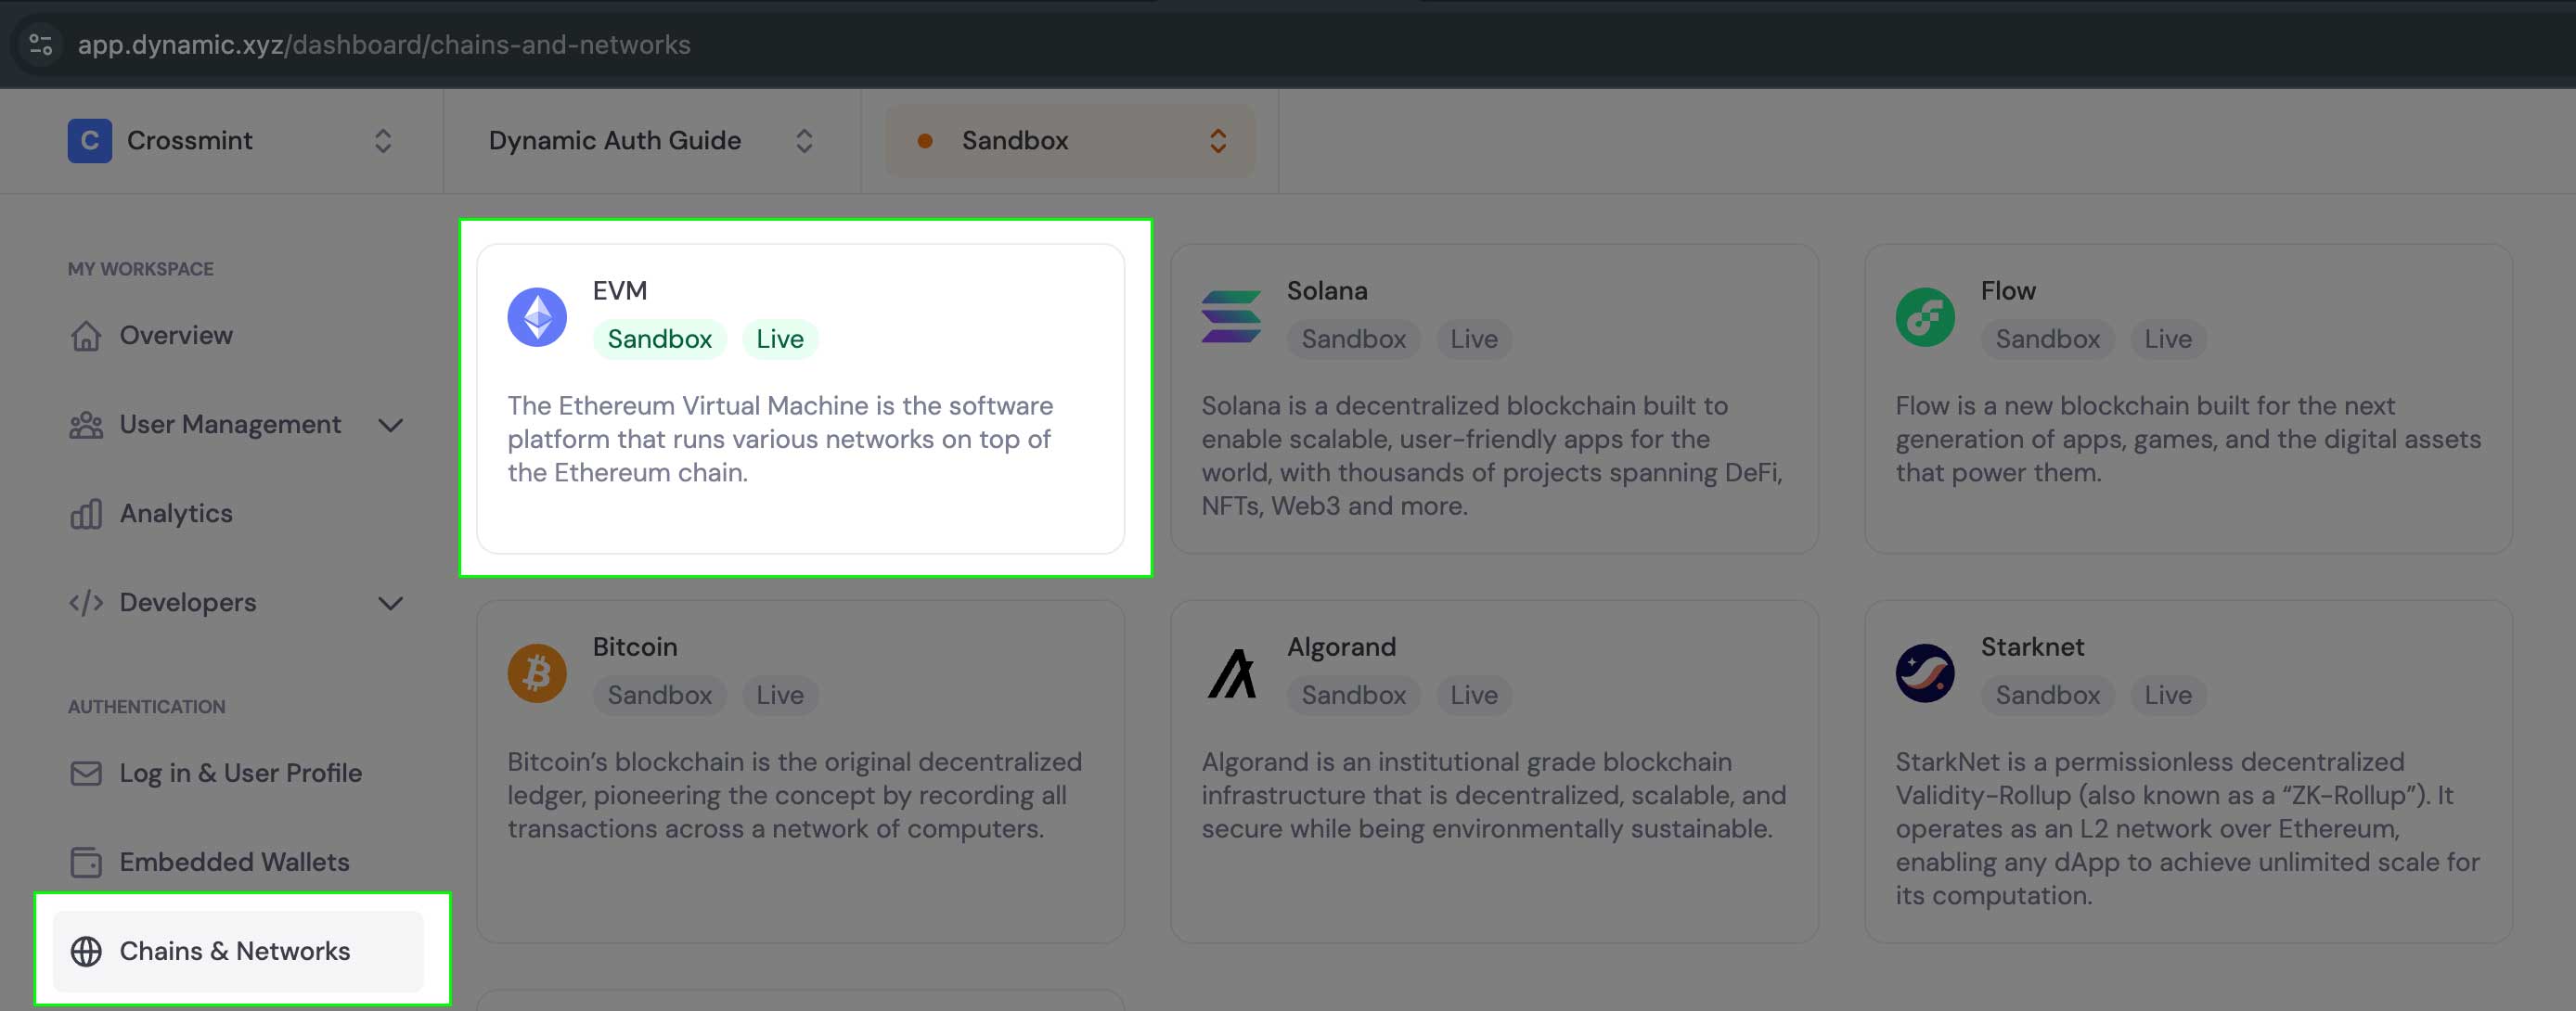
- Enable the desired chain for smart wallet support (in this example, we’ll use
polygon-amoy)
Install Required Dependencies
Install the Crossmint React UI SDK and dynamic packages:
Then, set up shadcn UI components:
Install the button and card components:
Configure Environment Variables
Add your Crossmint client-side API key and Dynamic Environment ID to your environment file:
Create the Provider Components
First, create a CrossmintDynamicProvider component that will wrap your application:
Now create a custom hook that connects Dynamic with Crossmint:
Update Your Layout
Update your app’s layout to use the CrossmintDynamicProvider:
Create UI Components
Create a component that uses the Dynamic connector and displays wallet information:
Create Your Main Page
Create your main page that uses the WalletCard component:
Launch and Test
- Start your development server:
- Visit http://localhost:3000 in your browser
- Click the Dynamic widget to start the authentication flow
- Follow the prompts to authenticate using Dynamic
- Once logged in, you should see both your Dynamic wallet address and your Crossmint Smart Wallet address
How It Works
The integration between Dynamic and Crossmint involves these key components:
- Authentication Flow:
- User connects wallet using Dynamic’s authentication
- Dynamic provides the wallet and authentication token (JWT)
- The Crossmint SDK uses the JWT from Dynamic to authenticate with Crossmint
- Wallet Creation:
- The
useDynamicConnectorhook retrieves the primary wallet from Dynamic - It gets the wallet client from the Dynamic wallet to use as a signer
- It creates a Crossmint Smart Wallet using the Dynamic wallet as the signer
- The
- Key Benefits:
- Users leverage their existing Dynamic authentication
- No new key management required
- The Dynamic wallet serves as a signer for the Crossmint Smart Wallet
- Cross-chain support through Crossmint’s infrastructure
Was this page helpful?