
 If you want to build AI applications using Dynamic, you're in good company! We already support the likes of [aixbt](https://aixbt.tech/), [CoDatta](https://codatta.io/) and [Mahojin](https://www.mahojin.ai/) among many more.
You can use our standard wallet connector to connect to your users' wallets and plug them into your AI applications client side, like [this example using GOAT and Eleven Labs](https://github.com/goat-sdk/goat/tree/main/typescript/examples/eleven-labs/dynamic).
You can also sign up for early access to agentic wallets when they are released:
# Create a new entry for an allowlist
Source: https://docs.dynamic.xyz/api-reference/allowlists/create-a-new-entry-for-an-allowlist
post /allowlists/{allowlistId}/entries
# Create new allowlist for a environment
Source: https://docs.dynamic.xyz/api-reference/allowlists/create-new-allowlist-for-a-environment
post /environments/{environmentId}/allowlists
# Delete an allowlist
Source: https://docs.dynamic.xyz/api-reference/allowlists/delete-an-allowlist
delete /allowlists/{allowlistId}
# Delete an allowlist entry
Source: https://docs.dynamic.xyz/api-reference/allowlists/delete-an-allowlist-entry
delete /allowlistEntries/{allowlistEntryId}
# Disable the allow list
Source: https://docs.dynamic.xyz/api-reference/allowlists/disable-the-allow-list
put /allowlists/{allowlistId}/disable
# Enable the allowlist
Source: https://docs.dynamic.xyz/api-reference/allowlists/enable-the-allowlist
put /allowlists/{allowlistId}/enable
# Get all allowlists for a environment
Source: https://docs.dynamic.xyz/api-reference/allowlists/get-all-allowlists-for-a-environment
get /environments/{environmentId}/allowlists
# Get all entries for an allowlist
Source: https://docs.dynamic.xyz/api-reference/allowlists/get-all-entries-for-an-allowlist
get /allowlists/{allowlistId}/entries
# Get allowlist by id
Source: https://docs.dynamic.xyz/api-reference/allowlists/get-allowlist-by-id
get /allowlists/{allowlistId}
# Update the outcome, scope, or name of an allowlist entry by ID
Source: https://docs.dynamic.xyz/api-reference/allowlists/update-the-outcome-scope-or-name-of-an-allowlist-entry-by-id
put /allowlists/{allowlistId}
# Get environments analyticsvisits
Source: https://docs.dynamic.xyz/api-reference/analytics/get-environments-analyticsvisits
get /environments/{environmentId}/analytics/visits
Fetch visit analytics
# Get environments analyticswallets
Source: https://docs.dynamic.xyz/api-reference/analytics/get-environments-analyticswallets
get /environments/{environmentId}/analytics/wallets
Fetch wallets breakdown
# Disables the Sanctions API
Source: https://docs.dynamic.xyz/api-reference/chainalysis/disables-the-sanctions-api
put /environments/{environmentId}/integrations/chainalysis/sanctions/disable
# Enable the Sanctions API
Source: https://docs.dynamic.xyz/api-reference/chainalysis/enable-the-sanctions-api
put /environments/{environmentId}/integrations/chainalysis/sanctions/enable
# Find the Chainalysis configuration for an environment.
Source: https://docs.dynamic.xyz/api-reference/chainalysis/find-the-chainalysis-configuration-for-an-environment
get /environments/{environmentId}/integrations/chainalysis
# Get tokens for passed chainName.
Source: https://docs.dynamic.xyz/api-reference/chains/get-tokens-for-passed-chainname
get /chains/{chainName}/tokens
# Create a new custom field for an environment
Source: https://docs.dynamic.xyz/api-reference/custom-fields/create-a-new-custom-field-for-an-environment
post /environments/{environmentId}/custom/fields
# Delete a specific custom field by its ID
Source: https://docs.dynamic.xyz/api-reference/custom-fields/delete-a-specific-custom-field-by-its-id
delete /custom/fields/{customFieldId}
# Get the custom fields for an environment
Source: https://docs.dynamic.xyz/api-reference/custom-fields/get-the-custom-fields-for-an-environment
get /environments/{environmentId}/custom/fields
# Retrieve a specific custom field by its ID
Source: https://docs.dynamic.xyz/api-reference/custom-fields/retrieve-a-specific-custom-field-by-its-id
get /custom/fields/{customFieldId}
# Update an existing custom field by its ID
Source: https://docs.dynamic.xyz/api-reference/custom-fields/update-an-existing-custom-field-by-its-id
put /custom/fields/{customFieldId}
# Create a custom network for an organization
Source: https://docs.dynamic.xyz/api-reference/custom-networks/create-a-custom-network-for-an-organization
post /organizations/{organizationId}/customNetworks
# Delete a custom network
Source: https://docs.dynamic.xyz/api-reference/custom-networks/delete-a-custom-network
delete /organizations/{organizationId}/customNetworks/{networkId}
# Get a specific custom network
Source: https://docs.dynamic.xyz/api-reference/custom-networks/get-a-specific-custom-network
get /organizations/{organizationId}/customNetworks/{networkId}
# Get all custom networks for an organization
Source: https://docs.dynamic.xyz/api-reference/custom-networks/get-all-custom-networks-for-an-organization
get /organizations/{organizationId}/customNetworks
# Update a custom network
Source: https://docs.dynamic.xyz/api-reference/custom-networks/update-a-custom-network
put /organizations/{organizationId}/customNetworks/{networkId}
# Create a new custom hostname for this environment
Source: https://docs.dynamic.xyz/api-reference/customhostnames/create-a-new-custom-hostname-for-this-environment
post /environments/{environmentId}/custom/hostnames
# Delete the custom hostname
Source: https://docs.dynamic.xyz/api-reference/customhostnames/delete-the-custom-hostname
delete /environments/{environmentId}/custom/hostnames/{customHostnameId}
# Get the custom hostnames for this environemnt
Source: https://docs.dynamic.xyz/api-reference/customhostnames/get-the-custom-hostnames-for-this-environemnt
get /environments/{environmentId}/custom/hostnames
# Delete a mobile deeplink URL by id
Source: https://docs.dynamic.xyz/api-reference/deeplinkurls/delete-a-mobile-deeplink-url-by-id
delete /deeplinkUrls/{deeplinkUrlId}
# Get all the whitelisted mobile deeplink URLs for a project environment
Source: https://docs.dynamic.xyz/api-reference/deeplinkurls/get-all-the-whitelisted-mobile-deeplink-urls-for-a-project-environment
get /environments/{environmentId}/deeplinkUrls
# Whitelists a mobile deeplink URL for this project environment
Source: https://docs.dynamic.xyz/api-reference/deeplinkurls/whitelists-a-mobile-deeplink-url-for-this-project-environment
post /environments/{environmentId}/deeplinkUrls
# Find an environment by ID
Source: https://docs.dynamic.xyz/api-reference/environments/find-an-environment-by-id
get /environments/{environmentId}
# Get keys for an environment given environmentId
Source: https://docs.dynamic.xyz/api-reference/environments/get-keys-for-an-environment-given-environmentid
get /environments/{environmentId}/keys
# Get Live and Sandbox environments by projectId
Source: https://docs.dynamic.xyz/api-reference/environments/get-live-and-sandbox-environments-by-projectid
get /projects/{projectId}/environments
# Get the unique number of visitors for an environment by environment ID
Source: https://docs.dynamic.xyz/api-reference/environments/get-the-unique-number-of-visitors-for-an-environment-by-environment-id
get /environments/{environmentId}/statistics/visitors
# Updates the environment settings
Source: https://docs.dynamic.xyz/api-reference/environments/updates-the-environment-settings
put /environments/{environmentId}
# Get environment events
Source: https://docs.dynamic.xyz/api-reference/events/get-environment-events
get /environments/{environmentId}/events
# Get event types
Source: https://docs.dynamic.xyz/api-reference/events/get-event-types
get /eventTypes
# Create a new export request for the project environment
Source: https://docs.dynamic.xyz/api-reference/exports/create-a-new-export-request-for-the-project-environment
post /environments/{environmentId}/exports
# Download an export by ID
Source: https://docs.dynamic.xyz/api-reference/exports/download-an-export-by-id
get /environments/{environmentId}/exports/{exportId}/download
# Get an export using the ID
Source: https://docs.dynamic.xyz/api-reference/exports/get-an-export-using-the-id
get /environments/{environmentId}/exports/{exportId}
# Get the exports for an environment
Source: https://docs.dynamic.xyz/api-reference/exports/get-the-exports-for-an-environment
get /environments/{environmentId}/exports
# Check if the external provided JWT is valid for the specified environment
Source: https://docs.dynamic.xyz/api-reference/externaljwt/check-if-the-external-provided-jwt-is-valid-for-the-specified-environment
post /environments/{environmentId}/externalJwt/check
# Creates a new gate for the project environment
Source: https://docs.dynamic.xyz/api-reference/gates/creates-a-new-gate-for-the-project-environment
post /environments/{environmentId}/gates
# Delete a gate
Source: https://docs.dynamic.xyz/api-reference/gates/delete-a-gate
delete /environments/{environmentId}/gates/{gateId}
# Disable the gate for the environment
Source: https://docs.dynamic.xyz/api-reference/gates/disable-the-gate-for-the-environment
put /environments/{environmentId}/gates/{gateId}/disable
# Enable the gate for the environment
Source: https://docs.dynamic.xyz/api-reference/gates/enable-the-gate-for-the-environment
put /environments/{environmentId}/gates/{gateId}/enable
# Get the gates for an environment
Source: https://docs.dynamic.xyz/api-reference/gates/get-the-gates-for-an-environment
get /environments/{environmentId}/gates
# Gets a gate
Source: https://docs.dynamic.xyz/api-reference/gates/gets-a-gate
get /environments/{environmentId}/gates/{gateId}
# Updates a gate
Source: https://docs.dynamic.xyz/api-reference/gates/updates-a-gate
put /environments/{environmentId}/gates/{gateId}
# Creates the global wallet settings for the environment
Source: https://docs.dynamic.xyz/api-reference/globalwallets/creates-the-global-wallet-settings-for-the-environment
post /environments/{environmentId}/globalWallet/settings
# Disabled global wallet for this environment
Source: https://docs.dynamic.xyz/api-reference/globalwallets/disabled-global-wallet-for-this-environment
put /environments/{environmentId}/globalWallet/disable
# Enable global wallet for this environment
Source: https://docs.dynamic.xyz/api-reference/globalwallets/enable-global-wallet-for-this-environment
put /environments/{environmentId}/globalWallet/enable
# Get the global wallet settings for environment
Source: https://docs.dynamic.xyz/api-reference/globalwallets/get-the-global-wallet-settings-for-environment
get /environments/{environmentId}/globalWallet/settings
# Updates the global wallet settings for the environment
Source: https://docs.dynamic.xyz/api-reference/globalwallets/updates-the-global-wallet-settings-for-the-environment
put /environments/{environmentId}/globalWallet/settings
# Creates an invite to the organization
Source: https://docs.dynamic.xyz/api-reference/invites/creates-an-invite-to-the-organization
post /organizations/{organizationId}/invites
# Delete invite for user
Source: https://docs.dynamic.xyz/api-reference/invites/delete-invite-for-user
delete /invites/{inviteId}
# Fetches all the Invites the belong to the organization
Source: https://docs.dynamic.xyz/api-reference/invites/fetches-all-the-invites-the-belong-to-the-organization
get /organizations/{organizationId}/invites
# Get all the user invites
Source: https://docs.dynamic.xyz/api-reference/invites/get-all-the-user-invites
get /invites
# Update invite for user (accept/reject)
Source: https://docs.dynamic.xyz/api-reference/invites/update-invite-for-user-acceptreject
put /invites/{inviteId}
# Delete user membership from being an admin of an organization
Source: https://docs.dynamic.xyz/api-reference/members/delete-user-membership-from-being-an-admin-of-an-organization
delete /members/{memberId}
# Get all users that are admins for an organization
Source: https://docs.dynamic.xyz/api-reference/members/get-all-users-that-are-admins-for-an-organization
get /organizations/{organizationId}/members
# Get Membership Environment IDs
Source: https://docs.dynamic.xyz/api-reference/members/get-membership-environment-ids
get /membershipEnvironmentIds
Retrieve the list of project environments that the user is a member of.
# Update a given members role
Source: https://docs.dynamic.xyz/api-reference/members/update-a-given-members-role
put /members/{memberId}
# Delete all MFA Devices for the user
Source: https://docs.dynamic.xyz/api-reference/mfa/delete-all-mfa-devices-for-the-user
delete /users/{userId}/mfa
# Disable the given mfa device for the organization
Source: https://docs.dynamic.xyz/api-reference/mfasettings/disable-the-given-mfa-device-for-the-organization
put /organizations/{organizationId}/mfaSettings/{mfaDeviceType}/disable
# Enable the given mfa device for the organization
Source: https://docs.dynamic.xyz/api-reference/mfasettings/enable-the-given-mfa-device-for-the-organization
put /organizations/{organizationId}/mfaSettings/{mfaDeviceType}/enable
# Get all mfa settings for an organization
Source: https://docs.dynamic.xyz/api-reference/mfasettings/get-all-mfa-settings-for-an-organization
get /organizations/{organizationId}/mfaSettings
# Create a new name service for the environment and chain
Source: https://docs.dynamic.xyz/api-reference/nameservices/create-a-new-name-service-for-the-environment-and-chain
post /environments/{environmentId}/nameService/{chainName}
# delete the name service for the environment and chain
Source: https://docs.dynamic.xyz/api-reference/nameservices/delete-the-name-service-for-the-environment-and-chain
delete /environments/{environmentId}/nameService/{chainName}
# Disabled name service for this environment and chain
Source: https://docs.dynamic.xyz/api-reference/nameservices/disabled-name-service-for-this-environment-and-chain
put /environments/{environmentId}/nameService/{chainName}/disable
# Enable name service for this environment and chain
Source: https://docs.dynamic.xyz/api-reference/nameservices/enable-name-service-for-this-environment-and-chain
put /environments/{environmentId}/nameService/{chainName}/enable
# Get the name service for the environment and chain
Source: https://docs.dynamic.xyz/api-reference/nameservices/get-the-name-service-for-the-environment-and-chain
get /environments/{environmentId}/nameService/{chainName}
# Get the unsigned chain-specific message needed to be signed by the wallet owner using the wallet private key
Source: https://docs.dynamic.xyz/api-reference/nameservices/get-the-unsigned-chain-specific-message-needed-to-be-signed-by-the-wallet-owner-using-the-wallet-private-key
post /environments/{environmentId}/nameService/{chainName}/signingMessage
# Add coupon to subscription
Source: https://docs.dynamic.xyz/api-reference/organizations/add-coupon-to-subscription
put /organizations/{organizationId}/billing/subscription/coupon
# Creates organization
Source: https://docs.dynamic.xyz/api-reference/organizations/creates-organization
post /organizations
# Fetches all the active organizations that the user has access to
Source: https://docs.dynamic.xyz/api-reference/organizations/fetches-all-the-active-organizations-that-the-user-has-access-to
get /organizations
# Find an organization by ID
Source: https://docs.dynamic.xyz/api-reference/organizations/find-an-organization-by-id
get /organizations/{organizationId}
# Find the subscription of an organization using its ID
Source: https://docs.dynamic.xyz/api-reference/organizations/find-the-subscription-of-an-organization-using-its-id
get /organizations/{organizationId}/billing/subscription
# Update an organization by ID
Source: https://docs.dynamic.xyz/api-reference/organizations/update-an-organization-by-id
put /organizations/{organizationId}
# Upgrade organziation to advanced plan
Source: https://docs.dynamic.xyz/api-reference/organizations/upgrade-organziation-to-advanced-plan
put /organizations/{organizationId}/billing/upgrade
# Adds an allowed origin for this project environment
Source: https://docs.dynamic.xyz/api-reference/origins/adds-an-allowed-origin-for-this-project-environment
post /environments/{environmentId}/origins
# Delete a origin by id
Source: https://docs.dynamic.xyz/api-reference/origins/delete-a-origin-by-id
delete /origins/{originId}
# Get all the allowed origins for a project environment
Source: https://docs.dynamic.xyz/api-reference/origins/get-all-the-allowed-origins-for-a-project-environment
get /environments/{environmentId}/origins
# Introduction
Source: https://docs.dynamic.xyz/api-reference/overview
## Introduction
Dynamic provides a robust API that allows developers to securely access their
dashboard environment's data and programmatically update settings relevant to
their Dynamic-powered application.
## Authentication
All APIs in this section require a bearer token used to authenticate requests
and make sure the caller is authorized to access the resources in the requests.
Please follow these steps:
#### Get an API token from Dashboard
1. Go to the your environment's dashboard
[Developer Tab](https://app.dynamic.xyz/dashboard/developer/api)
2. In the "API Token" section, click on "Create Token"
3. Provide a name for the token. The best practice here would be to name the
token after the system you intend to use this token with. A few examples:
"Mycompany Admin", "Ben's personal token", or "background-job service".
4. **Make sure to copy the API token** before closing the modal. This is the
last time you will have access to the plaintext API token! Dynamic DOES NOT
have access to the plaintext API token anywhere. If you lose this API token,
you will need to create a new one.
5. The token should start with the prefix `dyn_` followed by 56 alphanumeric
characters.
#### Using the API token
Use the token generated through dashboard to programmatically access Dynamic's
API by adding it to the `Authentication` header of your HTTP request.
Example:
```bash curl
curl \
--location 'https://app.dynamic.xyz/api/v0/environments/<
If you want to build AI applications using Dynamic, you're in good company! We already support the likes of [aixbt](https://aixbt.tech/), [CoDatta](https://codatta.io/) and [Mahojin](https://www.mahojin.ai/) among many more.
You can use our standard wallet connector to connect to your users' wallets and plug them into your AI applications client side, like [this example using GOAT and Eleven Labs](https://github.com/goat-sdk/goat/tree/main/typescript/examples/eleven-labs/dynamic).
You can also sign up for early access to agentic wallets when they are released:
# Create a new entry for an allowlist
Source: https://docs.dynamic.xyz/api-reference/allowlists/create-a-new-entry-for-an-allowlist
post /allowlists/{allowlistId}/entries
# Create new allowlist for a environment
Source: https://docs.dynamic.xyz/api-reference/allowlists/create-new-allowlist-for-a-environment
post /environments/{environmentId}/allowlists
# Delete an allowlist
Source: https://docs.dynamic.xyz/api-reference/allowlists/delete-an-allowlist
delete /allowlists/{allowlistId}
# Delete an allowlist entry
Source: https://docs.dynamic.xyz/api-reference/allowlists/delete-an-allowlist-entry
delete /allowlistEntries/{allowlistEntryId}
# Disable the allow list
Source: https://docs.dynamic.xyz/api-reference/allowlists/disable-the-allow-list
put /allowlists/{allowlistId}/disable
# Enable the allowlist
Source: https://docs.dynamic.xyz/api-reference/allowlists/enable-the-allowlist
put /allowlists/{allowlistId}/enable
# Get all allowlists for a environment
Source: https://docs.dynamic.xyz/api-reference/allowlists/get-all-allowlists-for-a-environment
get /environments/{environmentId}/allowlists
# Get all entries for an allowlist
Source: https://docs.dynamic.xyz/api-reference/allowlists/get-all-entries-for-an-allowlist
get /allowlists/{allowlistId}/entries
# Get allowlist by id
Source: https://docs.dynamic.xyz/api-reference/allowlists/get-allowlist-by-id
get /allowlists/{allowlistId}
# Update the outcome, scope, or name of an allowlist entry by ID
Source: https://docs.dynamic.xyz/api-reference/allowlists/update-the-outcome-scope-or-name-of-an-allowlist-entry-by-id
put /allowlists/{allowlistId}
# Get environments analyticsvisits
Source: https://docs.dynamic.xyz/api-reference/analytics/get-environments-analyticsvisits
get /environments/{environmentId}/analytics/visits
Fetch visit analytics
# Get environments analyticswallets
Source: https://docs.dynamic.xyz/api-reference/analytics/get-environments-analyticswallets
get /environments/{environmentId}/analytics/wallets
Fetch wallets breakdown
# Disables the Sanctions API
Source: https://docs.dynamic.xyz/api-reference/chainalysis/disables-the-sanctions-api
put /environments/{environmentId}/integrations/chainalysis/sanctions/disable
# Enable the Sanctions API
Source: https://docs.dynamic.xyz/api-reference/chainalysis/enable-the-sanctions-api
put /environments/{environmentId}/integrations/chainalysis/sanctions/enable
# Find the Chainalysis configuration for an environment.
Source: https://docs.dynamic.xyz/api-reference/chainalysis/find-the-chainalysis-configuration-for-an-environment
get /environments/{environmentId}/integrations/chainalysis
# Get tokens for passed chainName.
Source: https://docs.dynamic.xyz/api-reference/chains/get-tokens-for-passed-chainname
get /chains/{chainName}/tokens
# Create a new custom field for an environment
Source: https://docs.dynamic.xyz/api-reference/custom-fields/create-a-new-custom-field-for-an-environment
post /environments/{environmentId}/custom/fields
# Delete a specific custom field by its ID
Source: https://docs.dynamic.xyz/api-reference/custom-fields/delete-a-specific-custom-field-by-its-id
delete /custom/fields/{customFieldId}
# Get the custom fields for an environment
Source: https://docs.dynamic.xyz/api-reference/custom-fields/get-the-custom-fields-for-an-environment
get /environments/{environmentId}/custom/fields
# Retrieve a specific custom field by its ID
Source: https://docs.dynamic.xyz/api-reference/custom-fields/retrieve-a-specific-custom-field-by-its-id
get /custom/fields/{customFieldId}
# Update an existing custom field by its ID
Source: https://docs.dynamic.xyz/api-reference/custom-fields/update-an-existing-custom-field-by-its-id
put /custom/fields/{customFieldId}
# Create a custom network for an organization
Source: https://docs.dynamic.xyz/api-reference/custom-networks/create-a-custom-network-for-an-organization
post /organizations/{organizationId}/customNetworks
# Delete a custom network
Source: https://docs.dynamic.xyz/api-reference/custom-networks/delete-a-custom-network
delete /organizations/{organizationId}/customNetworks/{networkId}
# Get a specific custom network
Source: https://docs.dynamic.xyz/api-reference/custom-networks/get-a-specific-custom-network
get /organizations/{organizationId}/customNetworks/{networkId}
# Get all custom networks for an organization
Source: https://docs.dynamic.xyz/api-reference/custom-networks/get-all-custom-networks-for-an-organization
get /organizations/{organizationId}/customNetworks
# Update a custom network
Source: https://docs.dynamic.xyz/api-reference/custom-networks/update-a-custom-network
put /organizations/{organizationId}/customNetworks/{networkId}
# Create a new custom hostname for this environment
Source: https://docs.dynamic.xyz/api-reference/customhostnames/create-a-new-custom-hostname-for-this-environment
post /environments/{environmentId}/custom/hostnames
# Delete the custom hostname
Source: https://docs.dynamic.xyz/api-reference/customhostnames/delete-the-custom-hostname
delete /environments/{environmentId}/custom/hostnames/{customHostnameId}
# Get the custom hostnames for this environemnt
Source: https://docs.dynamic.xyz/api-reference/customhostnames/get-the-custom-hostnames-for-this-environemnt
get /environments/{environmentId}/custom/hostnames
# Delete a mobile deeplink URL by id
Source: https://docs.dynamic.xyz/api-reference/deeplinkurls/delete-a-mobile-deeplink-url-by-id
delete /deeplinkUrls/{deeplinkUrlId}
# Get all the whitelisted mobile deeplink URLs for a project environment
Source: https://docs.dynamic.xyz/api-reference/deeplinkurls/get-all-the-whitelisted-mobile-deeplink-urls-for-a-project-environment
get /environments/{environmentId}/deeplinkUrls
# Whitelists a mobile deeplink URL for this project environment
Source: https://docs.dynamic.xyz/api-reference/deeplinkurls/whitelists-a-mobile-deeplink-url-for-this-project-environment
post /environments/{environmentId}/deeplinkUrls
# Find an environment by ID
Source: https://docs.dynamic.xyz/api-reference/environments/find-an-environment-by-id
get /environments/{environmentId}
# Get keys for an environment given environmentId
Source: https://docs.dynamic.xyz/api-reference/environments/get-keys-for-an-environment-given-environmentid
get /environments/{environmentId}/keys
# Get Live and Sandbox environments by projectId
Source: https://docs.dynamic.xyz/api-reference/environments/get-live-and-sandbox-environments-by-projectid
get /projects/{projectId}/environments
# Get the unique number of visitors for an environment by environment ID
Source: https://docs.dynamic.xyz/api-reference/environments/get-the-unique-number-of-visitors-for-an-environment-by-environment-id
get /environments/{environmentId}/statistics/visitors
# Updates the environment settings
Source: https://docs.dynamic.xyz/api-reference/environments/updates-the-environment-settings
put /environments/{environmentId}
# Get environment events
Source: https://docs.dynamic.xyz/api-reference/events/get-environment-events
get /environments/{environmentId}/events
# Get event types
Source: https://docs.dynamic.xyz/api-reference/events/get-event-types
get /eventTypes
# Create a new export request for the project environment
Source: https://docs.dynamic.xyz/api-reference/exports/create-a-new-export-request-for-the-project-environment
post /environments/{environmentId}/exports
# Download an export by ID
Source: https://docs.dynamic.xyz/api-reference/exports/download-an-export-by-id
get /environments/{environmentId}/exports/{exportId}/download
# Get an export using the ID
Source: https://docs.dynamic.xyz/api-reference/exports/get-an-export-using-the-id
get /environments/{environmentId}/exports/{exportId}
# Get the exports for an environment
Source: https://docs.dynamic.xyz/api-reference/exports/get-the-exports-for-an-environment
get /environments/{environmentId}/exports
# Check if the external provided JWT is valid for the specified environment
Source: https://docs.dynamic.xyz/api-reference/externaljwt/check-if-the-external-provided-jwt-is-valid-for-the-specified-environment
post /environments/{environmentId}/externalJwt/check
# Creates a new gate for the project environment
Source: https://docs.dynamic.xyz/api-reference/gates/creates-a-new-gate-for-the-project-environment
post /environments/{environmentId}/gates
# Delete a gate
Source: https://docs.dynamic.xyz/api-reference/gates/delete-a-gate
delete /environments/{environmentId}/gates/{gateId}
# Disable the gate for the environment
Source: https://docs.dynamic.xyz/api-reference/gates/disable-the-gate-for-the-environment
put /environments/{environmentId}/gates/{gateId}/disable
# Enable the gate for the environment
Source: https://docs.dynamic.xyz/api-reference/gates/enable-the-gate-for-the-environment
put /environments/{environmentId}/gates/{gateId}/enable
# Get the gates for an environment
Source: https://docs.dynamic.xyz/api-reference/gates/get-the-gates-for-an-environment
get /environments/{environmentId}/gates
# Gets a gate
Source: https://docs.dynamic.xyz/api-reference/gates/gets-a-gate
get /environments/{environmentId}/gates/{gateId}
# Updates a gate
Source: https://docs.dynamic.xyz/api-reference/gates/updates-a-gate
put /environments/{environmentId}/gates/{gateId}
# Creates the global wallet settings for the environment
Source: https://docs.dynamic.xyz/api-reference/globalwallets/creates-the-global-wallet-settings-for-the-environment
post /environments/{environmentId}/globalWallet/settings
# Disabled global wallet for this environment
Source: https://docs.dynamic.xyz/api-reference/globalwallets/disabled-global-wallet-for-this-environment
put /environments/{environmentId}/globalWallet/disable
# Enable global wallet for this environment
Source: https://docs.dynamic.xyz/api-reference/globalwallets/enable-global-wallet-for-this-environment
put /environments/{environmentId}/globalWallet/enable
# Get the global wallet settings for environment
Source: https://docs.dynamic.xyz/api-reference/globalwallets/get-the-global-wallet-settings-for-environment
get /environments/{environmentId}/globalWallet/settings
# Updates the global wallet settings for the environment
Source: https://docs.dynamic.xyz/api-reference/globalwallets/updates-the-global-wallet-settings-for-the-environment
put /environments/{environmentId}/globalWallet/settings
# Creates an invite to the organization
Source: https://docs.dynamic.xyz/api-reference/invites/creates-an-invite-to-the-organization
post /organizations/{organizationId}/invites
# Delete invite for user
Source: https://docs.dynamic.xyz/api-reference/invites/delete-invite-for-user
delete /invites/{inviteId}
# Fetches all the Invites the belong to the organization
Source: https://docs.dynamic.xyz/api-reference/invites/fetches-all-the-invites-the-belong-to-the-organization
get /organizations/{organizationId}/invites
# Get all the user invites
Source: https://docs.dynamic.xyz/api-reference/invites/get-all-the-user-invites
get /invites
# Update invite for user (accept/reject)
Source: https://docs.dynamic.xyz/api-reference/invites/update-invite-for-user-acceptreject
put /invites/{inviteId}
# Delete user membership from being an admin of an organization
Source: https://docs.dynamic.xyz/api-reference/members/delete-user-membership-from-being-an-admin-of-an-organization
delete /members/{memberId}
# Get all users that are admins for an organization
Source: https://docs.dynamic.xyz/api-reference/members/get-all-users-that-are-admins-for-an-organization
get /organizations/{organizationId}/members
# Get Membership Environment IDs
Source: https://docs.dynamic.xyz/api-reference/members/get-membership-environment-ids
get /membershipEnvironmentIds
Retrieve the list of project environments that the user is a member of.
# Update a given members role
Source: https://docs.dynamic.xyz/api-reference/members/update-a-given-members-role
put /members/{memberId}
# Delete all MFA Devices for the user
Source: https://docs.dynamic.xyz/api-reference/mfa/delete-all-mfa-devices-for-the-user
delete /users/{userId}/mfa
# Disable the given mfa device for the organization
Source: https://docs.dynamic.xyz/api-reference/mfasettings/disable-the-given-mfa-device-for-the-organization
put /organizations/{organizationId}/mfaSettings/{mfaDeviceType}/disable
# Enable the given mfa device for the organization
Source: https://docs.dynamic.xyz/api-reference/mfasettings/enable-the-given-mfa-device-for-the-organization
put /organizations/{organizationId}/mfaSettings/{mfaDeviceType}/enable
# Get all mfa settings for an organization
Source: https://docs.dynamic.xyz/api-reference/mfasettings/get-all-mfa-settings-for-an-organization
get /organizations/{organizationId}/mfaSettings
# Create a new name service for the environment and chain
Source: https://docs.dynamic.xyz/api-reference/nameservices/create-a-new-name-service-for-the-environment-and-chain
post /environments/{environmentId}/nameService/{chainName}
# delete the name service for the environment and chain
Source: https://docs.dynamic.xyz/api-reference/nameservices/delete-the-name-service-for-the-environment-and-chain
delete /environments/{environmentId}/nameService/{chainName}
# Disabled name service for this environment and chain
Source: https://docs.dynamic.xyz/api-reference/nameservices/disabled-name-service-for-this-environment-and-chain
put /environments/{environmentId}/nameService/{chainName}/disable
# Enable name service for this environment and chain
Source: https://docs.dynamic.xyz/api-reference/nameservices/enable-name-service-for-this-environment-and-chain
put /environments/{environmentId}/nameService/{chainName}/enable
# Get the name service for the environment and chain
Source: https://docs.dynamic.xyz/api-reference/nameservices/get-the-name-service-for-the-environment-and-chain
get /environments/{environmentId}/nameService/{chainName}
# Get the unsigned chain-specific message needed to be signed by the wallet owner using the wallet private key
Source: https://docs.dynamic.xyz/api-reference/nameservices/get-the-unsigned-chain-specific-message-needed-to-be-signed-by-the-wallet-owner-using-the-wallet-private-key
post /environments/{environmentId}/nameService/{chainName}/signingMessage
# Add coupon to subscription
Source: https://docs.dynamic.xyz/api-reference/organizations/add-coupon-to-subscription
put /organizations/{organizationId}/billing/subscription/coupon
# Creates organization
Source: https://docs.dynamic.xyz/api-reference/organizations/creates-organization
post /organizations
# Fetches all the active organizations that the user has access to
Source: https://docs.dynamic.xyz/api-reference/organizations/fetches-all-the-active-organizations-that-the-user-has-access-to
get /organizations
# Find an organization by ID
Source: https://docs.dynamic.xyz/api-reference/organizations/find-an-organization-by-id
get /organizations/{organizationId}
# Find the subscription of an organization using its ID
Source: https://docs.dynamic.xyz/api-reference/organizations/find-the-subscription-of-an-organization-using-its-id
get /organizations/{organizationId}/billing/subscription
# Update an organization by ID
Source: https://docs.dynamic.xyz/api-reference/organizations/update-an-organization-by-id
put /organizations/{organizationId}
# Upgrade organziation to advanced plan
Source: https://docs.dynamic.xyz/api-reference/organizations/upgrade-organziation-to-advanced-plan
put /organizations/{organizationId}/billing/upgrade
# Adds an allowed origin for this project environment
Source: https://docs.dynamic.xyz/api-reference/origins/adds-an-allowed-origin-for-this-project-environment
post /environments/{environmentId}/origins
# Delete a origin by id
Source: https://docs.dynamic.xyz/api-reference/origins/delete-a-origin-by-id
delete /origins/{originId}
# Get all the allowed origins for a project environment
Source: https://docs.dynamic.xyz/api-reference/origins/get-all-the-allowed-origins-for-a-project-environment
get /environments/{environmentId}/origins
# Introduction
Source: https://docs.dynamic.xyz/api-reference/overview
## Introduction
Dynamic provides a robust API that allows developers to securely access their
dashboard environment's data and programmatically update settings relevant to
their Dynamic-powered application.
## Authentication
All APIs in this section require a bearer token used to authenticate requests
and make sure the caller is authorized to access the resources in the requests.
Please follow these steps:
#### Get an API token from Dashboard
1. Go to the your environment's dashboard
[Developer Tab](https://app.dynamic.xyz/dashboard/developer/api)
2. In the "API Token" section, click on "Create Token"
3. Provide a name for the token. The best practice here would be to name the
token after the system you intend to use this token with. A few examples:
"Mycompany Admin", "Ben's personal token", or "background-job service".
4. **Make sure to copy the API token** before closing the modal. This is the
last time you will have access to the plaintext API token! Dynamic DOES NOT
have access to the plaintext API token anywhere. If you lose this API token,
you will need to create a new one.
5. The token should start with the prefix `dyn_` followed by 56 alphanumeric
characters.
#### Using the API token
Use the token generated through dashboard to programmatically access Dynamic's
API by adding it to the `Authentication` header of your HTTP request.
Example:
```bash curl
curl \
--location 'https://app.dynamic.xyz/api/v0/environments/< By default, you can use Dynamics credentials to send SMS messages to your users. However, if you want to send beyond US & Canada, you will need to set up your own Twilio account. In order to do this, you toggle off "Use Dynamic's credentials" and a section will open up for you, where you can enter your own credentials.
## SMS & Embedded Wallets
When you enable SMS sign-up, you can also enable embedded wallets for your users. This means that when a user signs up with their phone number, they will also receive a wallet that they can use to interact with your application.
In order to ensure your end users are adequately protected against attacks like sim swaps, we highly encourage you to [enable account MFA (TOTP) via Google Authenticator](/authentication-methods/mfa).
By default, you can use Dynamics credentials to send SMS messages to your users. However, if you want to send beyond US & Canada, you will need to set up your own Twilio account. In order to do this, you toggle off "Use Dynamic's credentials" and a section will open up for you, where you can enter your own credentials.
## SMS & Embedded Wallets
When you enable SMS sign-up, you can also enable embedded wallets for your users. This means that when a user signs up with their phone number, they will also receive a wallet that they can use to interact with your application.
In order to ensure your end users are adequately protected against attacks like sim swaps, we highly encourage you to [enable account MFA (TOTP) via Google Authenticator](/authentication-methods/mfa).
 Next we'll need to let the user change between languages, and it's as simple as the following:
```tsx
const {locale} = useDynamicContext();
const handleOnClick = (localeProvided) => {
if (localeProvided === 'it') {
locale.changeLanguage('it');
} else {
locale.changeLanguage('en');
}
};
return (
);
```
That's it! You now know how to customize the text in the SDK to your heart's content.
## Further Reading
Make sure to check out the full reference for the locale object [here](/react-sdk/objects/locale).
# UI Customization Overview
Source: https://docs.dynamic.xyz/design-customizations/customizing-ui
Next we'll need to let the user change between languages, and it's as simple as the following:
```tsx
const {locale} = useDynamicContext();
const handleOnClick = (localeProvided) => {
if (localeProvided === 'it') {
locale.changeLanguage('it');
} else {
locale.changeLanguage('en');
}
};
return (
);
```
That's it! You now know how to customize the text in the SDK to your heart's content.
## Further Reading
Make sure to check out the full reference for the locale object [here](/react-sdk/objects/locale).
# UI Customization Overview
Source: https://docs.dynamic.xyz/design-customizations/customizing-ui
 |
|  |
Let's create a button that, when clicked, will automatically open the Ethereum tab.
```tsx
import React from "react";
import { useDynamicContext } from "@dynamic-labs/sdk-react-core";
/**
* Component for a button that opens the Ethereum tab by default.
*/
const ConnectWithEthereum: React.FC = () => {
const { setShowAuthFlow, setSelectedTabIndex } = useDynamicContext();
/**
* Handles the button click event by setting the default tab to Ethereum and showing the authentication flow.
*/
const onClickHandler = (): void => {
setSelectedTabIndex(1); // Set the selected tab index to 1, which corresponds to the Ethereum tab
setShowAuthFlow(true);
};
return ;
};
export default ConnectWithEthereum;
```
# Adapt UI With Views
Source: https://docs.dynamic.xyz/design-customizations/views
## What is it?
Views are used to customize the kind of UI that shows up at any point in time in your application, specifically giving you complete control over the signup/login options you show your user.
## How does it work?
Views are used primarily in the overrides prop of the [DynamicContextProvider](/react-sdk/providers/dynamiccontextprovider). You pass in an array of configurations for each view you want to customize, each view has its own set of options.
## Types of Views
### Authentication Method Options (Login)
The `SdkViewType.Login` is used to adjust the login/signup UI options programmatically.
When using the login view, you add an object to the views array. This object should have `type: SdkViewType.Login` and `sections` which is an array of SdkViewSection objects.
### SdkViewSection structure
|
Let's create a button that, when clicked, will automatically open the Ethereum tab.
```tsx
import React from "react";
import { useDynamicContext } from "@dynamic-labs/sdk-react-core";
/**
* Component for a button that opens the Ethereum tab by default.
*/
const ConnectWithEthereum: React.FC = () => {
const { setShowAuthFlow, setSelectedTabIndex } = useDynamicContext();
/**
* Handles the button click event by setting the default tab to Ethereum and showing the authentication flow.
*/
const onClickHandler = (): void => {
setSelectedTabIndex(1); // Set the selected tab index to 1, which corresponds to the Ethereum tab
setShowAuthFlow(true);
};
return ;
};
export default ConnectWithEthereum;
```
# Adapt UI With Views
Source: https://docs.dynamic.xyz/design-customizations/views
## What is it?
Views are used to customize the kind of UI that shows up at any point in time in your application, specifically giving you complete control over the signup/login options you show your user.
## How does it work?
Views are used primarily in the overrides prop of the [DynamicContextProvider](/react-sdk/providers/dynamiccontextprovider). You pass in an array of configurations for each view you want to customize, each view has its own set of options.
## Types of Views
### Authentication Method Options (Login)
The `SdkViewType.Login` is used to adjust the login/signup UI options programmatically.
When using the login view, you add an object to the views array. This object should have `type: SdkViewType.Login` and `sections` which is an array of SdkViewSection objects.
### SdkViewSection structure
 1. Click "Create new project"
2. Enter Project Name.
## Organizations
Organizations are a way to group projects together. Organizations are billed distinctly, and each organization can have multiple projects.
### Creating a new organization
In the navigation bar, click on the Organization dropdown menu (first on the left):
1. Click "Create new project"
2. Enter Project Name.
## Organizations
Organizations are a way to group projects together. Organizations are billed distinctly, and each organization can have multiple projects.
### Creating a new organization
In the navigation bar, click on the Organization dropdown menu (first on the left):
 1. Click "Create organization" at the bottom of the dropdown
2. Enter Organization Name and Website URL
And you're done. You now have a new organization that you can use. You will need
to invite members of your team to this organization if you would like to work
with them there.
# Rate Limits
Source: https://docs.dynamic.xyz/developer-dashboard/rate-limits
Dynamic rate limit policies
Dynamic enforces rate limits based upon IP address, project environment, and certain endpoints to protect against attacks and to prevent abuse of Dynamic's platform. These limits are subject to change.
## Errors
Requests returning a `429` status code have been rate limited.
```json
{
"message": "Rate limit exceeded",
"code": 429
}
```
## Rate limit categories
* IP-based rate limits
* Project environment-based rate limits
* Endpoint-based rate limits
## SDK rate limits
All endpoints used by the SDK prefixed by `/sdk` are subject to the following limits.
* 100 requests per minute per IP
* 10000 requests per minute per project environment
### Endpoints
| Endpoint | Paths | Limited by | Rate Limit |
| ---------------- | ------------------------------------------------------------------------------------------------------------------------------------------------------------------------------------------------------------------------------------------------------------------------------------------ | ---------- | ------------------------ |
| Nonce | /:environmentId/nonce | IP Address | 10 requests per 1 minute |
| Connect | /:environmentId/connect | IP Address | 10 requests per 1 minute |
| Signin | /:environmentId/verify
1. Click "Create organization" at the bottom of the dropdown
2. Enter Organization Name and Website URL
And you're done. You now have a new organization that you can use. You will need
to invite members of your team to this organization if you would like to work
with them there.
# Rate Limits
Source: https://docs.dynamic.xyz/developer-dashboard/rate-limits
Dynamic rate limit policies
Dynamic enforces rate limits based upon IP address, project environment, and certain endpoints to protect against attacks and to prevent abuse of Dynamic's platform. These limits are subject to change.
## Errors
Requests returning a `429` status code have been rate limited.
```json
{
"message": "Rate limit exceeded",
"code": 429
}
```
## Rate limit categories
* IP-based rate limits
* Project environment-based rate limits
* Endpoint-based rate limits
## SDK rate limits
All endpoints used by the SDK prefixed by `/sdk` are subject to the following limits.
* 100 requests per minute per IP
* 10000 requests per minute per project environment
### Endpoints
| Endpoint | Paths | Limited by | Rate Limit |
| ---------------- | ------------------------------------------------------------------------------------------------------------------------------------------------------------------------------------------------------------------------------------------------------------------------------------------ | ---------- | ------------------------ |
| Nonce | /:environmentId/nonce | IP Address | 10 requests per 1 minute |
| Connect | /:environmentId/connect | IP Address | 10 requests per 1 minute |
| Signin | /:environmentId/verify/:environmentId/emailVerifications/signin
/:environmentId/smsVerifications/signin
/:environmentId/providers/:providerType/signin
/:environmentId/telegram/signin
/:environmentId/farcaster/signin
/:environmentId/externalAuth/signin | IP Address | 10 requests per 1 minute | | OTP | /:environmentId/emailVerifications/create
/:environmentId/emailVerifications/retry
/:environmentId/smsVerifications/create
/:environmentId/smsVerifications/retry | IP Address | 10 requests per 1 minute | | MFA | /:environmentId/users/mfa/register/totp
/:environmentId/users/mfa/auth/totp
/:environmentId/users/mfa/register/passkey
/:environmentId/users/mfa/auth/passkey
/:environmentId/users/mfa/recovery
/:environmentId/users/mfa/auth/recovery | IP Address | 5 requests per 1 minute | | Token balances | /:environmentId/chains/:chainName/balances | IP Address | 20 requests per 1 minute | | Embedded wallets | /:environmentId/users/embeddedWallets
/:environmentId/users/embeddedWallets/walletAccounts
/:environmentId/users/embeddedWallets/sessionKey | IP Address | 20 requests per 1 minute | | Update user | /:environmentId/users | IP Address | 5 requests per 1 minute | | Delete user | /:environmentId/users | IP Address | 2 requests per 1 minute | ## Developer rate limits All endpoints used by Developers are subject to the following rate limits. * 1500 requests per minute per IP * 3000 requests per minute per project environment ### Endpoints | Endpoint | Path | Limited by | Rate Limit | | ---------------------- | -------------------------------------------------------------------------------------------------------------------- | ---------- | ------------------------- | | Bulk create user | /environments/:environmentId/users/bulk | IP Address | 150 requests per 1 minute | | Create embedded wallet | /environments/:environmentId/users/embeddedWallets
/environments/:environmentId/users/embeddedWallets/farcaster | IP Address | 300 requests per 1 minute | | Organization invites | /organizations/:organizationId/invites | IP Address | 20 requests per 1 minute | ## Webhooks See [webhooks limits](/developer-dashboard/webhooks#limits) for more information. # Sandbox vs Live Source: https://docs.dynamic.xyz/developer-dashboard/sandbox-vs-live Every project you create in Dynamic comes with a Sandbox and a Live environment. Both these environments behave similarly but we've customized the Sandbox environment to make it ideal for testing and exploring features. ### Two Key Differences 1. **Everything is free**: all Dynamic features on Sandbox are free. Whether you choose to upgrade to our Advanced tier or not, all the features that we offer will be available for you to test and explore. 2. **Sandbox is limited to 100 users**: your Sandbox environment is intended to help you test configurations and features and is not intended to be live on your site. We therefore have limited Sandbox to 100 users. After 100 users, you will not be able to authenticate new wallets unless you delete users.
 # Security Settings
Source: https://docs.dynamic.xyz/developer-dashboard/security
We take security seriously at Dynamic and most of the work we do is behind the scenes so you don't have to worry about it. We will surface some security features that can be configured.
Today, we have 2 features that you can configure
1. CORS origin urls
2. JWT expiration time
### Allowed CORS Origin
Adding origins for
[CORS](https://developer.mozilla.org/en-US/docs/Web/HTTP/CORS) to your project
environment (sandbox and live) protects your environment from unauthorized
websites using your public environment key.
Any origins added to an environment will allow only those domains to make API
requests via our SDK.
# Security Settings
Source: https://docs.dynamic.xyz/developer-dashboard/security
We take security seriously at Dynamic and most of the work we do is behind the scenes so you don't have to worry about it. We will surface some security features that can be configured.
Today, we have 2 features that you can configure
1. CORS origin urls
2. JWT expiration time
### Allowed CORS Origin
Adding origins for
[CORS](https://developer.mozilla.org/en-US/docs/Web/HTTP/CORS) to your project
environment (sandbox and live) protects your environment from unauthorized
websites using your public environment key.
Any origins added to an environment will allow only those domains to make API
requests via our SDK.
 # SDK and API Keys
Source: https://docs.dynamic.xyz/developer-dashboard/tokens-api-keys
This page hosts the keys that you'll need to setup the SDK, validate the JWT, and generate tokens for API usage.
To access this page, navigate to the
[developer](https://app.dynamic.xyz/dashboard/developer/api) page in your
dashboard.
#### Environment ID
The environment ID is the key used for our platform to identify your SDK and
associate the users to your project environment. Each project has 2 keys, one
for Sandbox and one for Live. Whenever you want to setup a new instance of the
SDK, you simply need to copy the Environment ID and copy it into the settings
prop in the SDK.
```ts TypeScript
import {
DynamicContextProvider,
DynamicWidget,
} from "@dynamic-labs/sdk-react-core";
const App = () => (
# SDK and API Keys
Source: https://docs.dynamic.xyz/developer-dashboard/tokens-api-keys
This page hosts the keys that you'll need to setup the SDK, validate the JWT, and generate tokens for API usage.
To access this page, navigate to the
[developer](https://app.dynamic.xyz/dashboard/developer/api) page in your
dashboard.
#### Environment ID
The environment ID is the key used for our platform to identify your SDK and
associate the users to your project environment. Each project has 2 keys, one
for Sandbox and one for Live. Whenever you want to setup a new instance of the
SDK, you simply need to copy the Environment ID and copy it into the settings
prop in the SDK.
```ts TypeScript
import {
DynamicContextProvider,
DynamicWidget,
} from "@dynamic-labs/sdk-react-core";
const App = () => (

 Whether you need React, React Native or Next.js, whether you want to use Ethers or Viem, whether you want to use Wagmi or not, we've got you covered. Simply run `npx create-dynamic-app@latest` and follow the prompts!
# Banxa
Source: https://docs.dynamic.xyz/fiat-onboarding/banxa
## Summary
At Dynamic, we make it incredibly simple to add a Fiat onramp solution to your SDK integration. We are currently working with [Banxa](https://banxa.com/) and other great onramp solutions will be made available soon.
### Usage
To enable an onramp solution:
1. Go to your developer dashboard and find the [Onramp Providers](https://app.dynamic.xyz/dashboard/configurations#onramp) tab.
2. **Review and agree** to Banxa's Terms and Conditions.
3. Once confirmed, enable the Banxa onramp provider.
1. Note: if you enable it on Sandbox, then you'll be using Test Order. Reference Banxa's test information so you can easily [test in sandbox.](https://docs.banxa.com/docs/order-flow)

You're done. In the Dynamic widget, users will now see a "Buy" button that will open up a fiat onramper iFrame.
# Bring Your Own Onramp
Source: https://docs.dynamic.xyz/fiat-onboarding/bring-your-own
## Introduction
If you want to embed any onramp provider in the widget, we've got your back! In this example we'll integrate [the Coinbase onramp](https://www.coinbase.com/en-gb/developer-platform/products/onramp) but the principle is exactly the same for any other.
## Pre-requisites
We assume you already have Dynamic integrated into a React based app, and are using the Dynamic Widget. The plan is to override the existing Buy button in the user profile page of the widget, so make sure you have [onramps enabled in your Dynamic dashboard]() for that to show up.
## Full Demo
You can find the full example app of this implementation code [here](https://github.com/dynamic-labs/custom-onramp-example/), and the deployment at [https://custom-onramp-example.vercel.app/](https://custom-onramp-example.vercel.app/).
## Implementation
### Install dependancies
The only other library we will need is the Coinbase Pay javascript SDK:
```bash
npm i @coinbase/cbpay-js
```
### Scaffold our override file
Create a new file in your codebase called `customOnramp.js`. In it let's add the imports and declarations needed to get started:
```javascript
// Method to initialize the Coinbase Pay instance.
import { initOnRamp } from "@coinbase/cbpay-js";
// We want to only run things once, and this variable will help.
let isSetupInitiated = false;
// Empty function that we will fill out in the next section.
export const setupCoinbaseButtonOverride = (options) => {
}
```
For the following sections, unless otherwise told, place the code inside the now empty `setupCoinbaseButtonOverride` function.
### Setup the pay instance
Inside the setupCoinbaseButtonOverride, let's set up a few things, including the CB pay instance:
```javascript
// Stop if it already ran
if (isSetupInitiated) {
return;
}
// Set our flag to say the function has initiated
isSetupInitiated = true;
// Destructure the options needed for the onramp
const {
appId,
addresses,
assets,
debug = false
} = options;
// Variable to hold the instance
let onrampInstance = null;
// Initialize the onramp
initOnRamp({
appId,
widgetParameters: {
addresses,
assets,
},
// Transaction callback
onSuccess: () => {
if (debug) console.log('Coinbase transaction successful');
},
// Widget close callback
onExit: () => {
if (debug) console.log('Coinbase widget closed');
},
// General event callback
onEvent: (event) => {
if (debug) console.log('Coinbase event:', event);
},
experienceLoggedIn: 'popup',
experienceLoggedOut: 'popup',
closeOnExit: true,
closeOnSuccess: true,
}, (_, instance) => {
// Set assign the instance to our variable
onrampInstance = instance;
if (debug) console.log('Coinbase instance initialized');
});
```
### Find the current Buy button
Add a new function (still inside setupCoinbaseButtonOverride) called `findButtonInShadowDOM` which is responsible for detecting the button in the shadow dom:
```javascript
const findButtonInShadowDOM = (root) => {
const shadows = root.querySelectorAll('*');
for (const element of shadows) {
if (element.shadowRoot) {
const button = element.shadowRoot.querySelector('[data-testid="buy-crypto-button"]');
if (button) {
return button;
}
const deepButton = findButtonInShadowDOM(element.shadowRoot);
if (deepButton) {
return deepButton;
}
}
}
return null;
};
```
### Override the current button
Add another new function (still inside setupCoinbaseButtonOverride) called `setupOverride` which is responsible replacing the existing button functionality with our own:
```javascript
const setupOverride = () => {
// Call our previously declared function
const button = findButtonInShadowDOM(document);
// We're ready to override the button
if (button && onrampInstance) {
if (debug) console.log('Found button and Coinbase instance ready');
// Remove disabled state
button.classList.remove('disabled');
button.removeAttribute('disabled');
// Remove all existing click handlers
const newButton = button.cloneNode(true);
button.parentNode?.replaceChild(newButton, button);
// Add our new click handler
newButton.addEventListener('click', (event) => {
event.preventDefault();
event.stopPropagation();
if (debug) console.log('Opening Coinbase widget');
onrampInstance?.open();
});
return true;
}
return false;
};
```
### Poll for the button and onramp
Since we need both the button to be present and the onramp instance to exist for us to complete the override, we must poll for that state:
```javascript
// Set the current time
const startTime = Date.now();
// Declare an interval of .5 seconds
const checkInterval = setInterval(() => {
// Run the override setup and if it succeeds or 30 seconds have passed...
if (setupOverride() || Date.now() - startTime > 30000) {
clearInterval(checkInterval);
if (Date.now() - startTime > 30000) {
if (debug) console.warn('Timeout reached while setting up Coinbase button override');
}
}
}, 500);
```
### Return a cleanup function
We need to remember to tear things down again when we're finished:
```javascript
return () => {
clearInterval(checkInterval);
onrampInstance?.destroy();
isSetupInitiated = false;
};
```
### Use setupCoinbaseButtonOverride
You've now finished with the setupCoinbaseButtonOverride method, so let's add it to one of our components. It doesn't matter to much which one as long as it's rendered at the same time as the Widget is. Note that it cannot be the same component you declare your DynamicContextProvider in, it must be inside the component tree.
#### Adding Dynamic & other imports
Here we'll do it in the same component (Main.js as we have our DynamicWidget). Let's do the relevant imports first, we're going to need a couple of hooks from Dynamic, as well as our setupCoinbaseButtonOverride:
```jsx
// Main.js
import { DynamicWidget, useDynamicContext, useIsLoggedIn } from "@dynamic-labs/sdk-react-core";
import { isEthereumWallet } from '@dynamic-labs/ethereum';
import { setupCoinbaseButtonOverride } from './customOnramp.js';
```
#### UseEffect, Dynamic hooks & widget
Next we'll scaffold the Main component itself and create an empty useEffect which depends on the relevant Dynamic hooks:
```jsx
export default const Main = () => {
// We need to know if user is logged in
const isLoggedIn = useIsLoggedIn();
// We need to know that the user has a wallet
const { primaryWallet } = useDynamicContext();
// We will fill this in next
useEffect(() => {
}, [isLoggedIn, primaryWallet])
return (
Whether you need React, React Native or Next.js, whether you want to use Ethers or Viem, whether you want to use Wagmi or not, we've got you covered. Simply run `npx create-dynamic-app@latest` and follow the prompts!
# Banxa
Source: https://docs.dynamic.xyz/fiat-onboarding/banxa
## Summary
At Dynamic, we make it incredibly simple to add a Fiat onramp solution to your SDK integration. We are currently working with [Banxa](https://banxa.com/) and other great onramp solutions will be made available soon.
### Usage
To enable an onramp solution:
1. Go to your developer dashboard and find the [Onramp Providers](https://app.dynamic.xyz/dashboard/configurations#onramp) tab.
2. **Review and agree** to Banxa's Terms and Conditions.
3. Once confirmed, enable the Banxa onramp provider.
1. Note: if you enable it on Sandbox, then you'll be using Test Order. Reference Banxa's test information so you can easily [test in sandbox.](https://docs.banxa.com/docs/order-flow)

You're done. In the Dynamic widget, users will now see a "Buy" button that will open up a fiat onramper iFrame.
# Bring Your Own Onramp
Source: https://docs.dynamic.xyz/fiat-onboarding/bring-your-own
## Introduction
If you want to embed any onramp provider in the widget, we've got your back! In this example we'll integrate [the Coinbase onramp](https://www.coinbase.com/en-gb/developer-platform/products/onramp) but the principle is exactly the same for any other.
## Pre-requisites
We assume you already have Dynamic integrated into a React based app, and are using the Dynamic Widget. The plan is to override the existing Buy button in the user profile page of the widget, so make sure you have [onramps enabled in your Dynamic dashboard]() for that to show up.
## Full Demo
You can find the full example app of this implementation code [here](https://github.com/dynamic-labs/custom-onramp-example/), and the deployment at [https://custom-onramp-example.vercel.app/](https://custom-onramp-example.vercel.app/).
## Implementation
### Install dependancies
The only other library we will need is the Coinbase Pay javascript SDK:
```bash
npm i @coinbase/cbpay-js
```
### Scaffold our override file
Create a new file in your codebase called `customOnramp.js`. In it let's add the imports and declarations needed to get started:
```javascript
// Method to initialize the Coinbase Pay instance.
import { initOnRamp } from "@coinbase/cbpay-js";
// We want to only run things once, and this variable will help.
let isSetupInitiated = false;
// Empty function that we will fill out in the next section.
export const setupCoinbaseButtonOverride = (options) => {
}
```
For the following sections, unless otherwise told, place the code inside the now empty `setupCoinbaseButtonOverride` function.
### Setup the pay instance
Inside the setupCoinbaseButtonOverride, let's set up a few things, including the CB pay instance:
```javascript
// Stop if it already ran
if (isSetupInitiated) {
return;
}
// Set our flag to say the function has initiated
isSetupInitiated = true;
// Destructure the options needed for the onramp
const {
appId,
addresses,
assets,
debug = false
} = options;
// Variable to hold the instance
let onrampInstance = null;
// Initialize the onramp
initOnRamp({
appId,
widgetParameters: {
addresses,
assets,
},
// Transaction callback
onSuccess: () => {
if (debug) console.log('Coinbase transaction successful');
},
// Widget close callback
onExit: () => {
if (debug) console.log('Coinbase widget closed');
},
// General event callback
onEvent: (event) => {
if (debug) console.log('Coinbase event:', event);
},
experienceLoggedIn: 'popup',
experienceLoggedOut: 'popup',
closeOnExit: true,
closeOnSuccess: true,
}, (_, instance) => {
// Set assign the instance to our variable
onrampInstance = instance;
if (debug) console.log('Coinbase instance initialized');
});
```
### Find the current Buy button
Add a new function (still inside setupCoinbaseButtonOverride) called `findButtonInShadowDOM` which is responsible for detecting the button in the shadow dom:
```javascript
const findButtonInShadowDOM = (root) => {
const shadows = root.querySelectorAll('*');
for (const element of shadows) {
if (element.shadowRoot) {
const button = element.shadowRoot.querySelector('[data-testid="buy-crypto-button"]');
if (button) {
return button;
}
const deepButton = findButtonInShadowDOM(element.shadowRoot);
if (deepButton) {
return deepButton;
}
}
}
return null;
};
```
### Override the current button
Add another new function (still inside setupCoinbaseButtonOverride) called `setupOverride` which is responsible replacing the existing button functionality with our own:
```javascript
const setupOverride = () => {
// Call our previously declared function
const button = findButtonInShadowDOM(document);
// We're ready to override the button
if (button && onrampInstance) {
if (debug) console.log('Found button and Coinbase instance ready');
// Remove disabled state
button.classList.remove('disabled');
button.removeAttribute('disabled');
// Remove all existing click handlers
const newButton = button.cloneNode(true);
button.parentNode?.replaceChild(newButton, button);
// Add our new click handler
newButton.addEventListener('click', (event) => {
event.preventDefault();
event.stopPropagation();
if (debug) console.log('Opening Coinbase widget');
onrampInstance?.open();
});
return true;
}
return false;
};
```
### Poll for the button and onramp
Since we need both the button to be present and the onramp instance to exist for us to complete the override, we must poll for that state:
```javascript
// Set the current time
const startTime = Date.now();
// Declare an interval of .5 seconds
const checkInterval = setInterval(() => {
// Run the override setup and if it succeeds or 30 seconds have passed...
if (setupOverride() || Date.now() - startTime > 30000) {
clearInterval(checkInterval);
if (Date.now() - startTime > 30000) {
if (debug) console.warn('Timeout reached while setting up Coinbase button override');
}
}
}, 500);
```
### Return a cleanup function
We need to remember to tear things down again when we're finished:
```javascript
return () => {
clearInterval(checkInterval);
onrampInstance?.destroy();
isSetupInitiated = false;
};
```
### Use setupCoinbaseButtonOverride
You've now finished with the setupCoinbaseButtonOverride method, so let's add it to one of our components. It doesn't matter to much which one as long as it's rendered at the same time as the Widget is. Note that it cannot be the same component you declare your DynamicContextProvider in, it must be inside the component tree.
#### Adding Dynamic & other imports
Here we'll do it in the same component (Main.js as we have our DynamicWidget). Let's do the relevant imports first, we're going to need a couple of hooks from Dynamic, as well as our setupCoinbaseButtonOverride:
```jsx
// Main.js
import { DynamicWidget, useDynamicContext, useIsLoggedIn } from "@dynamic-labs/sdk-react-core";
import { isEthereumWallet } from '@dynamic-labs/ethereum';
import { setupCoinbaseButtonOverride } from './customOnramp.js';
```
#### UseEffect, Dynamic hooks & widget
Next we'll scaffold the Main component itself and create an empty useEffect which depends on the relevant Dynamic hooks:
```jsx
export default const Main = () => {
// We need to know if user is logged in
const isLoggedIn = useIsLoggedIn();
// We need to know that the user has a wallet
const { primaryWallet } = useDynamicContext();
// We will fill this in next
useEffect(() => {
}, [isLoggedIn, primaryWallet])
return (

 * User is blocked in Dynamic SDK:
 **Add scope for users `jwt` when having specific NFT**
Gate setup:
* User needs to have specific NFT to have `admin` scope
**Add scope for users `jwt` when having specific NFT**
Gate setup:
* User needs to have specific NFT to have `admin` scope
 * User has an `admin` scope added to the `jwt`
```Text json
{
...
"scope": "admin",
...
}
```
### Working with scopes
To simplify working with scopes, we created a custom hook named `useDynamicScopes`. It allows checking for users scopes and checking if one or many of them are in users `jwt` token. Check the docs [here](/react-sdk/hooks/usedynamicscopes).
# Create Your Own Global Wallet Package
Source: https://docs.dynamic.xyz/global-wallets/create-your-own-package
# Overview
This enables developers to embed your global wallet into their applications. Dynamic Global Wallet supports both EIP-6963 and Solana Wallet Standard - and works in Rainbowkit, Family, and other wallet provider implementations.
The global wallet uses pop ups and encrypted messaging to handle actions like connecting, signing, and transactions. The wallet can be used with AA to sponsor gas and perform additional policy-related activities
* User has an `admin` scope added to the `jwt`
```Text json
{
...
"scope": "admin",
...
}
```
### Working with scopes
To simplify working with scopes, we created a custom hook named `useDynamicScopes`. It allows checking for users scopes and checking if one or many of them are in users `jwt` token. Check the docs [here](/react-sdk/hooks/usedynamicscopes).
# Create Your Own Global Wallet Package
Source: https://docs.dynamic.xyz/global-wallets/create-your-own-package
# Overview
This enables developers to embed your global wallet into their applications. Dynamic Global Wallet supports both EIP-6963 and Solana Wallet Standard - and works in Rainbowkit, Family, and other wallet provider implementations.
The global wallet uses pop ups and encrypted messaging to handle actions like connecting, signing, and transactions. The wallet can be used with AA to sponsor gas and perform additional policy-related activities
- [CSS Variables](/design-customizations/css/css-variables)
- [Custom CSS](/design-customizations/css/custom-css)
 3. Click "Verify and Continue" and sign the message from Namestone to verify your domain. Make sure that
your primary wallet (in the top right corner of the dashboard) is the wallet associated with your domain.
3. Click "Verify and Continue" and sign the message from Namestone to verify your domain. Make sure that
your primary wallet (in the top right corner of the dashboard) is the wallet associated with your domain.
 4. Once your domain is verified, you can close the drawer and click "Save" to enable personalized subdomains.
### Require Subdomains
The require subdomains toggle will ask your users to choose a subdomain when they sign up or register with a new wallet.
4. Once your domain is verified, you can close the drawer and click "Save" to enable personalized subdomains.
### Require Subdomains
The require subdomains toggle will ask your users to choose a subdomain when they sign up or register with a new wallet.
 ## Choosing subdomains
Users can view and change their subdomain in the Profile section of the DynamicWidget:
## Choosing subdomains
Users can view and change their subdomain in the Profile section of the DynamicWidget:


 ## Security
When users connect to third-party websites and initiate transactions, Dynamic automatically interacts with the Blockaid API ([www.blockaid.io](http://www.blockaid.io)) to run transaction simulations and verify that the associated URLs are safe and not malicious.
Please be aware that this feature has usage limits, and additional charges may apply for higher-volume usage. For details on scaling and pricing, please contact our support team.
## FAQ
### Headless and hooks support
Currently, global connectivity is not supported in headless mode or with hooks.
### Safety practices
For best safety practices, please refer to our security section above. In general:
* Educate users to check which web3 apps they connect to.
* Dynamic will be rolling out new integrations to warn users if they attempt to connect to malicious dApps in the near future.
### Using Account Abstraction with global wallets
Account Abstraction is compatible with global wallets. If using gas sponsorship, you should whitelist your own dApps/contracts. For more information, see our [Smart Wallets documentation](/smart-wallets/add-smart-wallets).
### What is a URI code?
A URI (Uniform Resource Identifier) code in the context of WalletConnect is a string that contains all the necessary information for a wallet to establish a connection with a dApp.
### Compatibility with other chains
Currently, global connectivity only work on EVM chains. Solana support may come in the future as more dApps support WalletConnect with Solana.
# Web3 Wallet Libraries
Source: https://docs.dynamic.xyz/global-wallets/web3-libraries
## RainbowKit
You can guide your partners to add your wallet as a recommended wallet in their app. To do so, they will create a custom connector, as described below, which will should your wallet. When clicked, the wallet will render a QR code, which will work with Dynamic's [QR scanning](/global-wallets/qr-scanning) feature.
### Step 1: Import `connectorsForWallets` and `getWalletConnectConnector`
```javascript
import { RainbowKitProvider, connectorsForWallets, Wallet, getWalletConnectConnector, darkTheme } from '@rainbow-me/rainbowkit';
```
### Step 2: Create a custom connector
```javascript
export interface MyWalletOptions {
projectId: string;
}
export const legionkey = ({ projectId }: MyWalletOptions): Wallet => ({
id: 'legion-key',
name: 'LegionKey',
iconUrl: './images/legion-key.png',
iconBackground: '#985d3c',
mobile: {
getUri: (uri: string) => uri,
},
qrCode: {
getUri: (uri: string) => uri,
instructions: {
learnMoreUrl: 'https://my-wallet/learn-more',
steps: [
{
description:
'We recommend putting My Wallet on your home screen for faster access to your wallet.',
step: 'install',
title: 'Open the My Wallet app',
},
{
description:
'After you scan, a connection prompt will appear for you to connect your wallet.',
step: 'scan',
title: 'Tap the scan button',
},
],
},
},
extension: {
instructions: {
learnMoreUrl: 'https://my-wallet/learn-more',
steps: [
{
description:
'We recommend pinning My Wallet to your taskbar for quicker access to your wallet.',
step: 'install',
title: 'Install the My Wallet extension',
},
{
description:
'Be sure to back up your wallet using a secure method. Never share your secret phrase with anyone.',
step: 'create',
title: 'Create or Import a Wallet',
},
{
description:
'Once you set up your wallet, click below to refresh the browser and load up the extension.',
step: 'refresh',
title: 'Refresh your browser',
},
],
},
},
createConnector: getWalletConnectConnector({ projectId }),
});
```
### Step 3: Config the connectors
```javascript
const connectors = connectorsForWallets(
[
{
groupName: 'Recommended',
wallets: [legionkey],
},
{
groupName: 'Common',
wallets: [rainbowWallet, walletConnectWallet],
},
],
{
appName: 'My RainbowKit App',
projectId: 'YOUR_PROJECT_ID',
}
);
```
### Step 4: Add to the Rainbowkit Configuration
```javascript
const config = createConfig({
connectors,
...
});
```
## ReOwn AppKit (formally WalletConnect)
To integrate ReOwn AppKit (formally WalletConnect), follow these steps to submit your wallet as an official wallet into the ReOwn ecosystem:
### Step 1: Create an account on reown.com
* Visit [reown.com](https://reown.com) and sign up for a new account if you don't already have one.
* Verify your email address and complete the account setup process.
### Step 2: Create a new walletKit project
* Log in to your ReOwn account.
* Navigate to the dashboard and look for the option to create a new walletKit project.
* Fill in the required information about your wallet, including its name, description, and supported networks.
### Step 3: Submit your wallet for review
* Once your walletKit project is set up, you'll need to submit your wallet for review.
* Provide all necessary documentation, including your wallet's features, security measures, and any other relevant information.
* Ensure that your wallet meets all of ReOwn's guidelines and requirements for official wallets.
### Step 4: Once approved, it will show up in any AppKit list
* After submission, the ReOwn team will review your wallet.
* When approved, your wallet will be added to the official ReOwn ecosystem.
* It will then appear in AppKit lists, making it easily discoverable for users across various dApps that implement ReOwn AppKit.
* Edit the WalletKit project ID in the Dynamic Dashboard [here](https://app.dynamic.xyz/dashboard/log-in-user-profile/#walletconnect).
By following these steps, you'll integrate your wallet with ReOwn AppKit, increasing its visibility and accessibility within the ReOwn ecosystem.
# Go Live Checklist
Source: https://docs.dynamic.xyz/go-live-checklist
## Security
When users connect to third-party websites and initiate transactions, Dynamic automatically interacts with the Blockaid API ([www.blockaid.io](http://www.blockaid.io)) to run transaction simulations and verify that the associated URLs are safe and not malicious.
Please be aware that this feature has usage limits, and additional charges may apply for higher-volume usage. For details on scaling and pricing, please contact our support team.
## FAQ
### Headless and hooks support
Currently, global connectivity is not supported in headless mode or with hooks.
### Safety practices
For best safety practices, please refer to our security section above. In general:
* Educate users to check which web3 apps they connect to.
* Dynamic will be rolling out new integrations to warn users if they attempt to connect to malicious dApps in the near future.
### Using Account Abstraction with global wallets
Account Abstraction is compatible with global wallets. If using gas sponsorship, you should whitelist your own dApps/contracts. For more information, see our [Smart Wallets documentation](/smart-wallets/add-smart-wallets).
### What is a URI code?
A URI (Uniform Resource Identifier) code in the context of WalletConnect is a string that contains all the necessary information for a wallet to establish a connection with a dApp.
### Compatibility with other chains
Currently, global connectivity only work on EVM chains. Solana support may come in the future as more dApps support WalletConnect with Solana.
# Web3 Wallet Libraries
Source: https://docs.dynamic.xyz/global-wallets/web3-libraries
## RainbowKit
You can guide your partners to add your wallet as a recommended wallet in their app. To do so, they will create a custom connector, as described below, which will should your wallet. When clicked, the wallet will render a QR code, which will work with Dynamic's [QR scanning](/global-wallets/qr-scanning) feature.
### Step 1: Import `connectorsForWallets` and `getWalletConnectConnector`
```javascript
import { RainbowKitProvider, connectorsForWallets, Wallet, getWalletConnectConnector, darkTheme } from '@rainbow-me/rainbowkit';
```
### Step 2: Create a custom connector
```javascript
export interface MyWalletOptions {
projectId: string;
}
export const legionkey = ({ projectId }: MyWalletOptions): Wallet => ({
id: 'legion-key',
name: 'LegionKey',
iconUrl: './images/legion-key.png',
iconBackground: '#985d3c',
mobile: {
getUri: (uri: string) => uri,
},
qrCode: {
getUri: (uri: string) => uri,
instructions: {
learnMoreUrl: 'https://my-wallet/learn-more',
steps: [
{
description:
'We recommend putting My Wallet on your home screen for faster access to your wallet.',
step: 'install',
title: 'Open the My Wallet app',
},
{
description:
'After you scan, a connection prompt will appear for you to connect your wallet.',
step: 'scan',
title: 'Tap the scan button',
},
],
},
},
extension: {
instructions: {
learnMoreUrl: 'https://my-wallet/learn-more',
steps: [
{
description:
'We recommend pinning My Wallet to your taskbar for quicker access to your wallet.',
step: 'install',
title: 'Install the My Wallet extension',
},
{
description:
'Be sure to back up your wallet using a secure method. Never share your secret phrase with anyone.',
step: 'create',
title: 'Create or Import a Wallet',
},
{
description:
'Once you set up your wallet, click below to refresh the browser and load up the extension.',
step: 'refresh',
title: 'Refresh your browser',
},
],
},
},
createConnector: getWalletConnectConnector({ projectId }),
});
```
### Step 3: Config the connectors
```javascript
const connectors = connectorsForWallets(
[
{
groupName: 'Recommended',
wallets: [legionkey],
},
{
groupName: 'Common',
wallets: [rainbowWallet, walletConnectWallet],
},
],
{
appName: 'My RainbowKit App',
projectId: 'YOUR_PROJECT_ID',
}
);
```
### Step 4: Add to the Rainbowkit Configuration
```javascript
const config = createConfig({
connectors,
...
});
```
## ReOwn AppKit (formally WalletConnect)
To integrate ReOwn AppKit (formally WalletConnect), follow these steps to submit your wallet as an official wallet into the ReOwn ecosystem:
### Step 1: Create an account on reown.com
* Visit [reown.com](https://reown.com) and sign up for a new account if you don't already have one.
* Verify your email address and complete the account setup process.
### Step 2: Create a new walletKit project
* Log in to your ReOwn account.
* Navigate to the dashboard and look for the option to create a new walletKit project.
* Fill in the required information about your wallet, including its name, description, and supported networks.
### Step 3: Submit your wallet for review
* Once your walletKit project is set up, you'll need to submit your wallet for review.
* Provide all necessary documentation, including your wallet's features, security measures, and any other relevant information.
* Ensure that your wallet meets all of ReOwn's guidelines and requirements for official wallets.
### Step 4: Once approved, it will show up in any AppKit list
* After submission, the ReOwn team will review your wallet.
* When approved, your wallet will be added to the official ReOwn ecosystem.
* It will then appear in AppKit lists, making it easily discoverable for users across various dApps that implement ReOwn AppKit.
* Edit the WalletKit project ID in the Dynamic Dashboard [here](https://app.dynamic.xyz/dashboard/log-in-user-profile/#walletconnect).
By following these steps, you'll integrate your wallet with ReOwn AppKit, increasing its visibility and accessibility within the ReOwn ecosystem.
# Go Live Checklist
Source: https://docs.dynamic.xyz/go-live-checklist
{status === "initial" && !error ? (
Create Dynamic-powered embedded wallets
) : newWallets && newWallets.length > 0 ? (
newWallets.map((wallet, index) => (
{wallet}
))
) : (
No wallets created yet or an error occurred.
)}

 ## Introduction to Farcaster
[Farcaster](https://www.farcaster.xyz/) is a protocol for building sufficiently decentralized social networks. Clients (such as [Warpcast](https://warpcast.com/)) build on top of Farcaster to provide the user interface and user experience for interacting with the decentralized network.
This is a beautiful relationship because the underlying social graph is shared by all the clients. This means that users can switch between clients without losing their social graph. It also means that clients can be built by different teams, each focusing on different aspects of the user experience.
Farcaster is not a blockchain. It is a protocol that stores the social graph on a blockchain, currently Optimism. If you're wondering what exactly it means when Farcaster defines itself as "sufficiently decentralized", Varun Srinivasan, one of the co-founders of Farcaster [describes it as](https://www.varunsrinivasan.com/2022/01/11/sufficient-decentralization-for-social-networks):
"A social network achieves sufficient decentralization if two users can find each other and communicate, even if the rest of the network wants to prevent it. This implies that users can always reach their audience, which can only be true if developers can build many clients on the network. If only one client existed, it could stop users from communicating. Achieving this only requires three decentralized features: the ability to claim a unique username, post messages under that name, and read messages from any valid name."
Due to this decentralized and permissionless nature, Farcaster has been able to introduce a number of features that are not possible in traditional social networks, one being Frames which you can think of as "mini-apps". For example, you can purchase items directly from your social media feed or tip creators directly from your feed.
## Farcaster + Dynamic
Our mission is to create incredible onboarding experiences for anyone interacting with Web3. We believe that Farcaster is a key piece of the Web3 puzzle, and we are excited to be working with the Farcaster team to bring the best possible onboarding experience to users of Farcaster. You can do this in a number of different ways:
### Sign in with Farcaster
If you want to allow your users to sign into a dapp using their Farcaster identity, similar to how you would with Google or other, this is as easy as a toggle in the dashboard. You can learn about that [here](/guides/integrations/farcaster/sign-in-with-farcaster).
### Enable Write Access
You may want to create certain actions in Farcaster on behalf of your users. For example, you may want to post a message on their behalf. For this you will need your user to go through a write access flow, and you can learn about how to do that [here](/guides/integrations/farcaster/farcaster-write-access).
### Wallets in Frames
If you are building a Frame and want to allow users to interact in a way that requires a wallet, you can generate a wallet from just an email address on multiple chains. You can learn about that [here](/guides/integrations/farcaster/embedded-wallet-frame).
# Enable Write Access to Farcaster
Source: https://docs.dynamic.xyz/guides/integrations/farcaster/farcaster-write-access
## Introduction
This tutorial will help you enable Sign in with Farcaster in your application, as well as enabling write access to Farcaster on behalf of that user.
We've partnered with the wonderful team at Neynar on this use case who have implemented Dynamic as part of Sign in with Neynar. This means three things for you:
* it's completely plug and play, drop in the code snippet and ship
* warps are already sponsored by Neynar
* you get the best of Dynamic and Neynar in one go
## Video walkthrough
## Live demo
You can see this flow in action on the Neynar demo: [https://demo.neynar.com/](https://demo.neynar.com/). You can find the code for this demo [here](https://github.com/neynarxyz/farcaster-examples/tree/main/wownar).
## Step By Step Walkthrough
## Introduction to Farcaster
[Farcaster](https://www.farcaster.xyz/) is a protocol for building sufficiently decentralized social networks. Clients (such as [Warpcast](https://warpcast.com/)) build on top of Farcaster to provide the user interface and user experience for interacting with the decentralized network.
This is a beautiful relationship because the underlying social graph is shared by all the clients. This means that users can switch between clients without losing their social graph. It also means that clients can be built by different teams, each focusing on different aspects of the user experience.
Farcaster is not a blockchain. It is a protocol that stores the social graph on a blockchain, currently Optimism. If you're wondering what exactly it means when Farcaster defines itself as "sufficiently decentralized", Varun Srinivasan, one of the co-founders of Farcaster [describes it as](https://www.varunsrinivasan.com/2022/01/11/sufficient-decentralization-for-social-networks):
"A social network achieves sufficient decentralization if two users can find each other and communicate, even if the rest of the network wants to prevent it. This implies that users can always reach their audience, which can only be true if developers can build many clients on the network. If only one client existed, it could stop users from communicating. Achieving this only requires three decentralized features: the ability to claim a unique username, post messages under that name, and read messages from any valid name."
Due to this decentralized and permissionless nature, Farcaster has been able to introduce a number of features that are not possible in traditional social networks, one being Frames which you can think of as "mini-apps". For example, you can purchase items directly from your social media feed or tip creators directly from your feed.
## Farcaster + Dynamic
Our mission is to create incredible onboarding experiences for anyone interacting with Web3. We believe that Farcaster is a key piece of the Web3 puzzle, and we are excited to be working with the Farcaster team to bring the best possible onboarding experience to users of Farcaster. You can do this in a number of different ways:
### Sign in with Farcaster
If you want to allow your users to sign into a dapp using their Farcaster identity, similar to how you would with Google or other, this is as easy as a toggle in the dashboard. You can learn about that [here](/guides/integrations/farcaster/sign-in-with-farcaster).
### Enable Write Access
You may want to create certain actions in Farcaster on behalf of your users. For example, you may want to post a message on their behalf. For this you will need your user to go through a write access flow, and you can learn about how to do that [here](/guides/integrations/farcaster/farcaster-write-access).
### Wallets in Frames
If you are building a Frame and want to allow users to interact in a way that requires a wallet, you can generate a wallet from just an email address on multiple chains. You can learn about that [here](/guides/integrations/farcaster/embedded-wallet-frame).
# Enable Write Access to Farcaster
Source: https://docs.dynamic.xyz/guides/integrations/farcaster/farcaster-write-access
## Introduction
This tutorial will help you enable Sign in with Farcaster in your application, as well as enabling write access to Farcaster on behalf of that user.
We've partnered with the wonderful team at Neynar on this use case who have implemented Dynamic as part of Sign in with Neynar. This means three things for you:
* it's completely plug and play, drop in the code snippet and ship
* warps are already sponsored by Neynar
* you get the best of Dynamic and Neynar in one go
## Video walkthrough
## Live demo
You can see this flow in action on the Neynar demo: [https://demo.neynar.com/](https://demo.neynar.com/). You can find the code for this demo [here](https://github.com/neynarxyz/farcaster-examples/tree/main/wownar).
## Step By Step Walkthrough


 Option 2.
Use this public shared key to test it out: [https://rpc.shield3.com/v3/UlihwLJtYY9bWgkuLA6KS6liL6iTpXKqhWvPBl80/0x01/rpc](https://rpc.shield3.com/v3/UlihwLJtYY9bWgkuLA6KS6liL6iTpXKqhWvPBl80/0x01/rpc)
### Step 2 - Change the RPC URL
On the Dynamic.xyz dashboard go to [the EVM Configuration tab](https://app.dynamic.xyz/dashboard/configurations#evm).
Toggle on Ethereum Mainnet, then click the down arrow on the far right.
Option 2.
Use this public shared key to test it out: [https://rpc.shield3.com/v3/UlihwLJtYY9bWgkuLA6KS6liL6iTpXKqhWvPBl80/0x01/rpc](https://rpc.shield3.com/v3/UlihwLJtYY9bWgkuLA6KS6liL6iTpXKqhWvPBl80/0x01/rpc)
### Step 2 - Change the RPC URL
On the Dynamic.xyz dashboard go to [the EVM Configuration tab](https://app.dynamic.xyz/dashboard/configurations#evm).
Toggle on Ethereum Mainnet, then click the down arrow on the far right.

 ### Step 3 - Test it out!
You can now run your Dynamic Implementation normally and send a transaction while connected to Ethereum.
### Step 3 - Test it out!
You can now run your Dynamic Implementation normally and send a transaction while connected to Ethereum.
 1 - Unverified Contracts (Block | Flag | Alert)
If enabled, interactions with unverified contracts that cannot be decoded are forbidden. User can configure this policy to result in block, flag for MFA, or permit with an alert.
2 - OFAC SDN Block Native and ERC20 Transactions
Block native transfers, ERC20 transfers, and ERC20 approvals to OFAC addresses. As part of its enforcement efforts, OFAC publishes a list of individuals and companies owned or controlled by, or acting for or on behalf of, targeted countries. It also lists individuals, groups, and entities, such as terrorists and narcotics traffickers designated under programs that are not country-specific. Collectively, such individuals and companies are called “Specially Designated Nationals” or “SDNs.” Their assets are blocked and U.S. persons are generally prohibited from dealing with them.
3 - Native Transfers Spending Limits (Block | MFA)
If enabled, transactions with native values (ex. ETH) over a customizable threshold are forbidden. Users can configure this policy to result in a block, or flag for MFA.
4 - ERC20 Stablecoin Transfers Spending Limits (Block | MFA)
If enabled, transfers and approvals with verified stablecoins (ex. USDC, DAI, USDT) over a customizable threshold are forbidden. Users can configure this policy to result in a block, or flag for MFA.
5 - DEX Token Swap Protection
If enabled, token swaps are permitted with verified token pairs. Users can customize which pairs are allowed, and set a slippage limit to prevent trades that might result in MEV exploitation.
If you have additional requests for policies or custom use cases reach out to Shield3 at [info@shield3.com](mailto:info@shield3.com), join the Support Telegram or fill out the Survey
## Custom Error Codes
When Shield3 blocks or flags a transaction the RPC url returns a custom error message. The format is as follows:
```json
{
"jsonrpc": "2.0",
"error": {
"code": "-XXXXXX",
"message": "ERROR MESSAGE HERE"
},
"id": XX
}
```
These include:
**Transaction Blocked \[code -9999982]**
* Raised when policy engine results in block.
**Transaction Flagged for MFA \[code -9999981]**
* Raised when MFA result from policy engine.
* Webhook is sent to user’s configured webhook.
**RPC Call Failed \[code -9999980]**
* Raised when proxy call to user’s RPC fails.
**Invalid API Key \[code -9999979]**
* Raised when API key does not match any account.
**Invalid Node \[code -9999977]**
* Raised when network in RPC url does not match a valid network (0x01, 0x05, etc).
**Uncaught Error in Shield3 \[code -9999976]**
* Something went wrong, raises alert at Shield3 internally as well.
# Telegram Auto-Wallets
Source: https://docs.dynamic.xyz/guides/integrations/telegram/telegram-auto-wallets
Create a wallet in a single-click from your telegram mini-app.
## Introduction
1 - Unverified Contracts (Block | Flag | Alert)
If enabled, interactions with unverified contracts that cannot be decoded are forbidden. User can configure this policy to result in block, flag for MFA, or permit with an alert.
2 - OFAC SDN Block Native and ERC20 Transactions
Block native transfers, ERC20 transfers, and ERC20 approvals to OFAC addresses. As part of its enforcement efforts, OFAC publishes a list of individuals and companies owned or controlled by, or acting for or on behalf of, targeted countries. It also lists individuals, groups, and entities, such as terrorists and narcotics traffickers designated under programs that are not country-specific. Collectively, such individuals and companies are called “Specially Designated Nationals” or “SDNs.” Their assets are blocked and U.S. persons are generally prohibited from dealing with them.
3 - Native Transfers Spending Limits (Block | MFA)
If enabled, transactions with native values (ex. ETH) over a customizable threshold are forbidden. Users can configure this policy to result in a block, or flag for MFA.
4 - ERC20 Stablecoin Transfers Spending Limits (Block | MFA)
If enabled, transfers and approvals with verified stablecoins (ex. USDC, DAI, USDT) over a customizable threshold are forbidden. Users can configure this policy to result in a block, or flag for MFA.
5 - DEX Token Swap Protection
If enabled, token swaps are permitted with verified token pairs. Users can customize which pairs are allowed, and set a slippage limit to prevent trades that might result in MEV exploitation.
If you have additional requests for policies or custom use cases reach out to Shield3 at [info@shield3.com](mailto:info@shield3.com), join the Support Telegram or fill out the Survey
## Custom Error Codes
When Shield3 blocks or flags a transaction the RPC url returns a custom error message. The format is as follows:
```json
{
"jsonrpc": "2.0",
"error": {
"code": "-XXXXXX",
"message": "ERROR MESSAGE HERE"
},
"id": XX
}
```
These include:
**Transaction Blocked \[code -9999982]**
* Raised when policy engine results in block.
**Transaction Flagged for MFA \[code -9999981]**
* Raised when MFA result from policy engine.
* Webhook is sent to user’s configured webhook.
**RPC Call Failed \[code -9999980]**
* Raised when proxy call to user’s RPC fails.
**Invalid API Key \[code -9999979]**
* Raised when API key does not match any account.
**Invalid Node \[code -9999977]**
* Raised when network in RPC url does not match a valid network (0x01, 0x05, etc).
**Uncaught Error in Shield3 \[code -9999976]**
* Something went wrong, raises alert at Shield3 internally as well.
# Telegram Auto-Wallets
Source: https://docs.dynamic.xyz/guides/integrations/telegram/telegram-auto-wallets
Create a wallet in a single-click from your telegram mini-app.
## Introduction
 If the user is linked with Telegram, they are automatically logged in.
If not, a splash modal prompts the user to confirm if they have an account. Based on the user's response, they are either are prompted to log in or a new account is automatically created and logged in.
This ensures app owners can maintain a single user identity, avoiding duplicate accounts.
If the user is linked with Telegram, they are automatically logged in.
If not, a splash modal prompts the user to confirm if they have an account. Based on the user's response, they are either are prompted to log in or a new account is automatically created and logged in.
This ensures app owners can maintain a single user identity, avoiding duplicate accounts.
 ## Introduction
Telegram Mini Apps (or TMAs) are web applications that run inside the Telegram messenger.
Dynamic works out of the box with TMAs, all you need to do is get your app scaffolded, and add Dynamic by following the quickstart guide.
## Introduction
Telegram Mini Apps (or TMAs) are web applications that run inside the Telegram messenger.
Dynamic works out of the box with TMAs, all you need to do is get your app scaffolded, and add Dynamic by following the quickstart guide.
 The next step you might want to take is to update the contact if the user adds more details to their Dynamic profile i.e. wallet addresses etc. We will cover this in a further guide, so stay tuned!
# Webhooks using a serverless function
Source: https://docs.dynamic.xyz/guides/webhooks-serverless
This guide will teach you how to catch events from Dynamic webhooks using a serverless function.
## Prerequisites
* A [Dynamic](https://dynamic.xyz) account
* An [AWS](https://aws.amazon.com/) account
## Step 1: Scaffold a serverless function
You can do this directly through AWS, but we prefer to use [Serverless](https://www.serverless.com/) which creates a helpful layer of abstraction on top of Lambda.
First install their framework:
```bash
npm install -g serverless
```
Then run their setup command:
```bash
serverless
```
You will need to plug in your AWS credentials during setup, which you can find in your AWS console.
When asked which template you want to use, select `AWS - Node.js - HTTP API` as this tutorial will be using Node.js.
If you cd into the directory that was created, you should see an `index.js` file which is where we will be writing our code.
It will look something like this:
```javascript
module.exports.handler = async (event) => {
return {
statusCode: 200,
body: JSON.stringify(
{
message: "Go Serverless v3.0! Your function executed successfully!",
input: event,
},
null,
2
),
};
};
```
## Step 2: Create our webhook inside Dynamic
We need to create a webhook inside Dynamic that will send a POST request to our serverless function whenever a new user signs up.
To do this we can visit [the webhooks section of the dashboard](https://app.dynamic.xyz/dashboard/developer/webhooks) and click "Create Webhook". It will ask you for a URL and to mark the events you want to listen to.
For now we can use a fake URL, which we can generate from [webhook.site](https://webhook.site/). This will give us a URL that we can use to test our webhook, and will show us the data that is being sent to it.
For the events, you should make sure user.created is selected, and that's it! Save away and a test event will be sent to your URL.
## Step 3: Adapt the function to receive a Dynamic webhook event
Let's say in this instance We are most interested in [the user object](/api-reference/schemas/User), as this is returned by the user.created event. You can find the full list of events [here](/developer-dashboard/eventTypes).
As you'll see from the event reference, the only required field on the object is the ID, so if you want to collect more information you'll need to make sure you're doing [Info Capture](/users/information-capture) on signup.
The next step you might want to take is to update the contact if the user adds more details to their Dynamic profile i.e. wallet addresses etc. We will cover this in a further guide, so stay tuned!
# Webhooks using a serverless function
Source: https://docs.dynamic.xyz/guides/webhooks-serverless
This guide will teach you how to catch events from Dynamic webhooks using a serverless function.
## Prerequisites
* A [Dynamic](https://dynamic.xyz) account
* An [AWS](https://aws.amazon.com/) account
## Step 1: Scaffold a serverless function
You can do this directly through AWS, but we prefer to use [Serverless](https://www.serverless.com/) which creates a helpful layer of abstraction on top of Lambda.
First install their framework:
```bash
npm install -g serverless
```
Then run their setup command:
```bash
serverless
```
You will need to plug in your AWS credentials during setup, which you can find in your AWS console.
When asked which template you want to use, select `AWS - Node.js - HTTP API` as this tutorial will be using Node.js.
If you cd into the directory that was created, you should see an `index.js` file which is where we will be writing our code.
It will look something like this:
```javascript
module.exports.handler = async (event) => {
return {
statusCode: 200,
body: JSON.stringify(
{
message: "Go Serverless v3.0! Your function executed successfully!",
input: event,
},
null,
2
),
};
};
```
## Step 2: Create our webhook inside Dynamic
We need to create a webhook inside Dynamic that will send a POST request to our serverless function whenever a new user signs up.
To do this we can visit [the webhooks section of the dashboard](https://app.dynamic.xyz/dashboard/developer/webhooks) and click "Create Webhook". It will ask you for a URL and to mark the events you want to listen to.
For now we can use a fake URL, which we can generate from [webhook.site](https://webhook.site/). This will give us a URL that we can use to test our webhook, and will show us the data that is being sent to it.
For the events, you should make sure user.created is selected, and that's it! Save away and a test event will be sent to your URL.
## Step 3: Adapt the function to receive a Dynamic webhook event
Let's say in this instance We are most interested in [the user object](/api-reference/schemas/User), as this is returned by the user.created event. You can find the full list of events [here](/developer-dashboard/eventTypes).
As you'll see from the event reference, the only required field on the object is the ID, so if you want to collect more information you'll need to make sure you're doing [Info Capture](/users/information-capture) on signup.
{error &&
);
};
```
## Best Practices
1. **Always confirm deletion**: Include a confirmation step before proceeding with account deletion.
2. **Clear explanation**: Clearly explain what data will be deleted and that the action is permanent.
## Hook Types and Functions
The `useDeleteUserAccount` hook provides:
* `deleteUser`: Function to initiate account deletion
* `isLoading`: Boolean indicating if deletion is in progress
* `error`: Error object if deletion fails
# Headless Email Signup
Source: https://docs.dynamic.xyz/headless/headless-email
## Introduction
This guide will help you let a user signup/login with email, without any of our UI components. We've split the guide into two tabs as you'll see below. The first uses our SDK hooks (but none of the UI components) - we recommend this choice if you can. The second tab shows you how to handle email login without any SDK interaction at all i.e. API only.
## Tutorial
Error: {error.message}
}
{!!user && (
)
}
```
Authenticated user:
{JSON.stringify(user, null, 2)}
)}
Signup with Email
setEmail(e.target.value)} placeholder="Enter your email" value={email} /> {verifying && (
setOTP(e.target.value)}
placeholder="Enter your OTP"
value={OTP}
/>
)}
{JWT && Your JWT is: {JWT}
}
{isLoggedIn ?
:
Choose which type of key you want to reveal from the embedded wallet
{result}Please log in to continue.
}
);
};
```
# Headless MFA
Source: https://docs.dynamic.xyz/headless/headless-mfa
Headless MFA only supports one verfied MFA device. Adding a second device will results in a 401
## Introduction
This guide will show you how to add MFA to your app using your own custom UI. You can also refer to the general MFA guide [here](/authentication-methods/mfa) to learn more about this feature (note that this guide is for account level MFA, rather than transaction level MFA).
For a working example, see: [https://codesandbox.io/p/sandbox/kh8g8s](https://codesandbox.io/p/sandbox/kh8g8s)
## General Flow
1. User logs in
2. User is redirected to the MFA view
3. User adds a device
4. User is redirected to the OTP view
5. User enters the OTP
6. User is redirected to the backup codes view
7. User acknowledges the backup codes
The user must accept the backup codes before the MFA flow is complete.
## Step-by-Step Implementation
### Step 1: Import Necessary Modules and Components
Start by importing the required modules and components:
```typescript
import { EthereumWalletConnectors } from "@dynamic-labs/ethereum";
import { FC, useEffect, useState, ReactElement, useMemo, useRef } from "react";
import {
DynamicContextProvider,
DynamicWidget,
useDynamicContext,
useIsLoggedIn,
useMfa,
useSyncMfaFlow,
} from "@dynamic-labs/sdk-react-core";
import { MFADevice } from "@dynamic-labs/sdk-api-core";
import QRCodeUtil from "qrcode";
```
### Step 2: Define Types
Define the types for the MFA registration data.
```typescript
type MfaRegisterData = {
uri: string;
secret: string;
};
```
### Step 3: Create the `MfaView` Component
This component handles the main logic for MFA, including device management, QR code generation, OTP submission, and backup codes.
```typescript
export const MfaView = () => {
const [userDevices, setUserDevices] = useState([]);
const [mfaRegisterData, setMfaRegisterData] = useState();
const [currentView, setCurrentView] = useState("devices");
const [backupCodes, setBackupCodes] = useState([]);
const [error, setError] = useState();
const isLogged = useIsLoggedIn();
const {
addDevice,
authDevice,
getUserDevices,
getRecoveryCodes,
completeAcknowledgement,
} = useMfa();
const refreshUserDevices = async () => {
const devices = await getUserDevices();
setUserDevices(devices);
};
const { userWithMissingInfo, handleLogOut } = useDynamicContext();
useEffect(() => {
if (isLogged) {
refreshUserDevices();
}
}, [isLogged]);
useSyncMfaFlow({
handler: async () => {
if (userWithMissingInfo?.scope?.includes("requiresAdditionalAuth")) {
getUserDevices().then(async (devices) => {
if (devices.length === 0) {
setError(undefined);
const { uri, secret } = await addDevice();
setMfaRegisterData({ secret, uri });
setCurrentView("qr-code");
} else {
setError(undefined);
setMfaRegisterData(undefined);
setCurrentView("otp");
}
});
} else {
getRecoveryCodes().then(setBackupCodes);
setCurrentView("backup-codes");
}
},
});
const onAddDevice = async () => {
setError(undefined);
const { uri, secret } = await addDevice();
setMfaRegisterData({ secret, uri });
setCurrentView("qr-code");
};
const onQRCodeContinue = async () => {
setError(undefined);
setMfaRegisterData(undefined);
setCurrentView("otp");
};
const onOtpSubmit = async (code: string) => {
try {
await authDevice(code);
getRecoveryCodes().then(setBackupCodes);
setCurrentView("backup-codes");
refreshUserDevices();
} catch (e) {
setError(e.message);
}
};
return (
);
}
```
**Explanation:**
* **HeadlessMfaView:**
* Checks if the user is logged in or has missing information that requires additional authentication.
* If the user is logged in, it renders the `MfaView` component.
* If the user is not logged in, it renders the `LogIn` component.
* **App:**
* Your main app entry point.
* Make sure to set you environment id.
### Conclusion
By following this detailed breakdown, you should have a clear understanding of how the provided code implements a headless MFA solution using a custom UI. Each part of the code is explained, including the purpose of each component, hook, and function. This should help you understand the overall flow and how to customize it for your needs.
# Headless Overview
Source: https://docs.dynamic.xyz/headless/headless-overview
## Defining "headless"
While you can use the API to entirely decouple a frontend from Dynamic and still enable onboarding experiences, headless in this case refers to the ability to use the Dynamic SDK without our UI components.
This allows you to build your own UI components and still use the Dynamic SDK to manage the data and logic of your onboarding experience.
## Why go headless?
The Dynamic UI components handle a ton of edge cases, are actively maintained, and are designed to be easy to use while being completely flexible.
However, if for any reason these components are not fitting your use case, you might want to go headless.
## Getting started
You should still follow [the getting started guide](/quickstart) to add the SDK to your project.
Once your app is wrapped with the DynamicContextProvider, you can now start to use our hooks and context to build your own UI components.
This section outlines guides for each part of the onboarding experience, and how to build them headlessly. Specifically, they mimic building the same components as the Dynamic UI components, but with your own UI.
## Guides
* [Headless Email Signup/Login](/headless/headless-email)
* [Headless SMS Signup/Login](/headless/headless-sms)
* [Headless Social Signup/Login](/headless/headless-social)
* [Headless Export for Embedded Wallets](/headless/headless-embedded-reveal)
# Headless SMS signup
Source: https://docs.dynamic.xyz/headless/headless-sms
### Overview
Leveraging Dynamic's React package, this guide will help you create a sign in / sign up flow based on an sms login form.
We use [the `useConnectWithOtp` hook](/react-sdk/hooks/useconnectwithotp) to expose two methods: `connectWithSms` and `verifyOneTimePassword`.
The first method will send an SMS to the user's phone number, and the second will verify the OTP sent to the user's phone.
Once that's done, the user will be authenticated and you can access their information through the `useDynamicContext` hook!
### Dashboard Setup
#### SMS Signup/Login
The first thing you'll want to do is create a new Dynamic organization and setup Dashboard.
1. Sign up at app.dynamic.xyz
2. Fill in the modal to create your organization and project.
3. Under the Developer menu, go to SDK & APIs and fetch the Environment ID. Keep this as we'll need this key in a little bit.
Next we'll want to enable SMS signup/login:
For more information on how to configure SMS signup/login, check out our [SMS Signup/Login guide](/authentication-methods/email-social-sms).
### Configuring the SDK
Let's start by installing our packages. Follow our [Quickstart guide](/quickstart) for a detailed walkthrough.
When you're done, we'll update our App.js to include our environment ID in the setup and import the `DynamicContextProvider` and `EthereumWalletConnectors`.
You app.js file should look like this (note that we are only importing the EthereumWalletConnectors for now):
```jsx
import { DynamicContextProvider } from '@dynamic-labs/sdk-react-core';
import { EthereumWalletConnectors } from "@dynamic-labs/ethereum";
// Placeholder for our SMS signup/login form component
import ConnectWithSmsView from './ConnectWithSmsView';
function App() {
return (
);
}
export default App;
```
### SMS Signup/Login UI
Now that we have our environment, we can create our SMS signup/login form. We use the [`useConnectWithOtp` hook](/react-sdk/hooks/useconnectwithotp) to handle the SMS setup.
```tsx
import { FC, FormEventHandler } from 'react';
import { useConnectWithOtp, useDynamicContext } from '@dynamic-labs/sdk-react-core';
const ConnectWithSmsView: FC = () => {
const { user } = useDynamicContext()
const { connectWithSms, verifyOneTimePassword } = useConnectWithOtp();
const onSubmitSmsHandler: FormEventHandler = async (
event,
) => {
event.preventDefault();
const phone = {
dialCode: event.currentTarget.dialCode.value,
iso2: event.currentTarget.iso2.value,
phone: event.currentTarget.phone.value,
};
await connectWithSms(phone);
};
const onSubmitOtpHandler: FormEventHandler = async (
event,
) => {
event.preventDefault();
const otp = event.currentTarget.otp.value;
await verifyOneTimePassword(otp);
};
return (
```npm
npm i @dynamic-labs/sdk-react-core
```
```yarn
yarn add @dynamic-labs/sdk-react-core
```
This hook comes with a method called `signInWithSocialAccount` that you can utilize:
```tsx
import { FC } from 'react';
import {
DynamicWidget,
useDynamicContext,
useSocialAccounts,
} from '@dynamic-labs/sdk-react-core';
import { ProviderEnum } from '@dynamic-labs/types';
import { FarcasterIcon, GoogleIcon, TwitterIcon } from '@dynamic-labs/iconic';
const SocialSignIn = () => {
const { error, isProcessing, signInWithSocialAccount } = useSocialAccounts();
return (
);
};
const LoggedInUser = () => {
const { user } = useDynamicContext();
return (
<>
{error}
}
{currentView === "devices" && (
Devices
{JSON.stringify(userDevices, null, 2)}
Backup Codes
{codes.map((code) => ({code}
))} ); const LogIn = () => ( <>User not logged in!
Secret: {data.secret}
); }; const OTPView = ({ onSubmit }: { onSubmit: (code: string) => void }) => ( ); ``` **Explanation:** * **BackupCodesView:** * Displays the backup codes and provides an "Accept" button to acknowledge them. * **LogIn:** * Displays a message indicating that the user is not logged in and shows the `DynamicWidget` for login. * **QRCodeView:** * Displays the QR code for MFA setup and the secret key. Provides a "Continue" button to proceed to the OTP view. * **OTPView:** * Provides a form for the user to enter the OTP. On form submission, it calls the `onSubmit` function with the entered OTP. ### Step 5: Create the Main `HeadlessMfaView` Component This component checks if the user is logged in and displays the appropriate view. ```typescript export const HeadlessMfaView: FC = () => { const { user, userWithMissingInfo } = useDynamicContext(); return (
{user || userWithMissingInfo ?
);
};
export default function App() {
return (
{!!user && (
)
}
export default ConnectWithSmsView
```
# Headless Social Login
Source: https://docs.dynamic.xyz/headless/headless-social
This section shows you how to enable and implement social signup/login headlessly, using the Dynamic React SDK but without any of the UI components.
## Prerequisites
You must have at least one social provider enabled in the dashboard. For instructions on how to do this, check out [the configuring social providers section](/social-providers/overview).
## Implementation
You'll use [the `useSocialAccounts` hook](/react-sdk/hooks/usesocialaccounts) available from the `sdk-react-core` package:
Authenticated user:
{JSON.stringify(user, null, 2)}
)}
Log in or sign up
{isProcessing && Processing...} {error && {error.message}}user: {user?.email}
); }; export const HeadlessSocialSignInView: FC = () => { const { user } = useDynamicContext(); return (
{user ?
);
};
```
# Headless User Profile
Source: https://docs.dynamic.xyz/headless/headless-user-profile
## Introduction
This guide will help you to create a completely headless user profile including everything you see in the regular [Dynamic Widget UI component](/react-sdk/components/dynamicwidget)/[Dynamic Embedded Widget UI component](/react-sdk/components/dynamicembeddedwidget). If you'd like to see the Dynamic Widget/Embedded Widget in action, head over to [the live demo](https://demo.dynamic.xyz/).
## Prerequisites
Like with all this series of headless guides, "headless" is defined a way to use the Dynamic SDK without the need for Dynamic UI components (i.e. DynamicWidget, DynamicUserProfile).
You still need to add the SDK and set up the Dynamic Context Provider (complete [the quickstart](/quickstart) if you haven't done so already, or refer to [an example app](/example-apps))
### Setup
#### Show the user's profile based on whether they are logged in or not
How: Check if the user is logged in or not
Hook/Component: [useIsLoggedIn](/react-sdk/hooks/useisloggedin)
Notes: We start here assuming you have signup/login implemented already
```
import { useIsLoggedIn } from "@dynamic-labs/sdk-react-core";
const isLoggedIn = useIsLoggedIn();
return <>{isLoggedIn ?
{user?.firstName &&
);
```
#### Allow user to update their profile information
How: useUserUpdateRequest hook
Hook/Component: [useUserUpdateRequest](/react-sdk/hooks/useuserupdaterequest)
Notes: We include the validation for email updates here
```
import { useUserUpdateRequest, useOtpVerificationRequest } from "@dynamic-labs/sdk-react-core";
const { verifyOtp } = useOtpVerificationRequest();
const { updateUser } = useUserUpdateRequest();
const [showUpdateForm, setShowUpdateForm] = useState(false);
const [showVerifyForm, setShowVerifyEmailForm] = useState(false);
const updateUserInfoFormSubmit = async (e) => {
e.preventDefault();
try {
setLoading(true);
// Call the updateUser function with the new values entered by the user
const { isEmailVerificationRequired } = await updateUser({
firstName: e.target[0].value,
email: e.target[1].value,
});
// If email verification is required, show the email verification form
if (isEmailVerificationRequired) {
setShowVerifyEmailForm(true);
}
} catch (e) {
console.log("Error", e);
} finally {
setLoading(false);
setShowUpdateForm(false);
}
};
// Handler for the email verification form submission
const onVerifyEmailFormSubmit = async (e) => {
e.preventDefault();
try {
setLoading(true);
const verificationToken = e.target[0].value;
// Call the verifyEmail function with the entered verification token
await verifyOtp(verificationToken);
} catch (e) {
console.log("Error", e);
} finally {
setLoading(false);
// Hide the email verification form after the process is completed
setShowVerifyEmailForm(false);
}
return false;
};
return (
First name: {user.firstName}
} {user?.email &&E-Mail: {user.email}
} {user?.alias &&Alias: {user.alias}
} {user?.lastName &&Last name: {user.lastName}
} {user?.jobTitle &&Job: {user.jobTitle}
} {user?.phoneNumber &&Phone: {user.phoneNumber}
} {user?.tShirtSize &&Tshirt size: {user.tShirtSize}
} {user?.team &&Team: {user.team}
} {user?.country &&Country: {user.country}
} {user?.username &&Username: {user.username}
}
{/* Render the profile update form */}
{showUpdateForm && (
)}
{/* Render the email verification form if needed */}
{showVerifyEmailForm && (
)}
Please make sure you are on V4 of the SDK on your frontend before continuing.
## During Signup (automatic)
### Creating wallets for non-wallet authentication login
By default, embedded wallets are created automatically for users during sign-up if they don't already have a wallet on the enabled chain. All you have to do is check that the "Create on Sign up" toggle is turned on in [the Embedded Wallet configuration page](https://app.dynamic.xyz/dashboard/embedded-wallets/dynamic).
 ### Creating wallets for external wallet login
Embedded wallets can be automatically created for users signing in with external wallets, such as Metamask. To enable this feature, click the “Create on Sign up” card to expand the “Advanced Options” panel, and ensure the "Embedded Wallet for Third-Party Wallets" toggle is enabled.
### Creating wallets for external wallet login
Embedded wallets can be automatically created for users signing in with external wallets, such as Metamask. To enable this feature, click the “Create on Sign up” card to expand the “Advanced Options” panel, and ensure the "Embedded Wallet for Third-Party Wallets" toggle is enabled.

Automatic embedded wallet creation only creates a single wallet for a user on
each chain you have selected. If you want to create multiple wallets per chain
you will need to use the
[createEmbeddedWalletAccount](/react-sdk/hooks/useembeddedwallet#create-embedded-wallet-account)
method from the `useEmbeddedWallet` hook. See [creating additional wallets](/wallets/embedded-wallets/create-embedded-wallets#creating-additional-wallets)
## Before Signup (pre-generated)
Pre-generated wallets allow you to create a wallet for a user prior to their first interaction with your application using either an email, phone number or social identifier (i.e. Farcaster or Twitter).
Simply provide an identifier to our API and receive the new wallet address in the response. The user can receive funds and assets into their wallet!
```javascript
const options = {
method: "POST",
headers: {
Authorization: "Bearer ",
"Content-Type": "application/json",
},
body: '{"identifier":"me@myemail.com","type":"email", "chain":"ETH", ,"socialProvider":"emailOnly"}',
};
fetch(
"https://app.dynamicauth.com/api/v0/environments/YOUR_ENVIRONMENT_ID/embeddedWallets",
options
)
.then((response) => response.json())
.then((response) => console.log(response))
.catch((err) => console.error(err));
```
Check out the [createEmbeddedWallet
API](/api-reference/wallets/createEmbeddedWallet) to see all the
available identifier types.
## Creating wallets on additional chains
For users with an existing embedded wallet on a single chain, you can create an embedded wallet on an additional chain using the [createEmbeddedWalletAccount](/react-sdk/hooks/useembeddedwallet#create-embedded-wallet-account) method exported from the `useEmbeddedWallet` hook.
## Custom Logic (manual)
### Creating wallets any time
If you do not want to create wallets for users automatically when they sign up, you can create wallets for users using custom logic, calling the `createEmbeddedWallet` method from the `useEmbeddedWallet` hook when you want to create a wallet for a user.
```javascript
import { useEmbeddedWallet } from "@dynamic-labs/sdk-react-core";
// component declaration and all other logic you might need
const { createEmbeddedWallet } = useEmbeddedWallet();
const onCreateWalletHandler = async () => {
try {
await createEmbeddedWallet();
} catch (e) {
console.error(e);
}
};
```
### Creating additional wallets
For users with an existing embedded wallet, you can create additional embedded wallets using the [createEmbeddedWalletAccount](/react-sdk/hooks/useembeddedwallet#create-embedded-wallet-account) method exported from the `useEmbeddedWallet` hook.
Using the `createEmbeddedWalletAccount` method to create additional wallets on the same chain derives wallets from the user's existing secret recovery phrase. This means that the user can access all their wallets using the same exported recovery phrase for each chain. The private keys for each wallet are derived from the recovery phrase and are unique to each wallet.
Embedded wallets created in Live environments cannot be deleted or removed. Ensure that you only create the desired quantity of wallets for each user.
The limitations for creating additional wallets are as follows:
* Maximum of 5 wallets per chain
* Maximum of 15 wallets per user
* If Smart Wallets are enabled, each generated signer wallet will have its own AA enabled wallet
### Creating Embedded Wallet alongside Branded Wallet
Keep the "Create on Sign up" toggle in the [Embedded Wallet configuration page](https://app.dynamic.xyz/dashboard/embedded-wallets/dynamic) toggled on, and then use the `createEmbeddedWallet` method from the `useEmbeddedWallet` hook to create a wallet for a user who has signed up using a branded wallet.
You can tell if you need to create that wallet post signup by checking `userHasEmbeddedWallet` from the `useEmbeddedWallet` hook.
```javascript
import { useEmbeddedWallet } from "@dynamic-labs/sdk-react-core";
// component declaration and all other logic you might need
const { createEmbeddedWallet, userHasEmbeddedWallet } = useEmbeddedWallet();
const onCreateWalletHandler = async () => {
if (!userHasEmbeddedWallet) {
try {
await createEmbeddedWallet();
} catch (e) {
console.error(e);
}
}
};
```
## Notes
### Content Security Policy (CSP)
Embedded wallets use iframes to provide one more security layer to the wallet. If you enforce CSP on your website, you will need to add the following to your `frame-src` directive:
* [https://export.turnkey.com](https://export.turnkey.com) - used for exporting a wallet's private key or seed phrase
## What Next?
* Learn how to use/interact with the wallet in [the Using Wallets section](/wallets/using-wallets)
* Learn how to customize the transaction flow in the [Embedded Transaction UI guide](/wallets/embedded-wallets/embedded-transaction-ui)
# Creating Transactions
Source: https://docs.dynamic.xyz/wallets/embedded-wallets/creating-transactions
Since you can use embedded wallets like any other wallet, you can learn how to access and interact with the wallet in the [Using Wallets](/wallets/using-wallets) section.
The Using Wallets section also provides examples of wallet interactions for both [EVM](/wallets/using-wallets/evm) and [Solana](/wallets/using-wallets/solana), some of these examples are outlined below:
## EVM
* [Sign a message](/wallets/using-wallets/evm/sign-a-message)
* [Sign typed data](/wallets/using-wallets/evm/sign-typed-data)
* [Send a transaction](/wallets/using-wallets/evm/send-balance)
* [Sign a transaction with Wagmi](/wallets/using-wallets/evm/send-a-transaction-wagmi)
* [Fetch wallet balance](/wallets/using-wallets/evm/get-wallet-balance)
## Solana
* [Send legacy transaction](/wallets/using-wallets/solana/send-legacy-solana-transaction)
* [Send versioned transaction](/wallets/using-wallets/solana/send-versioned-solana-transaction)
# Embedded Wallets Overview
Source: https://docs.dynamic.xyz/wallets/embedded-wallets/dynamic-embedded-wallets
## Overview
You can think of an embedded wallet like a powerful web-account. An embedded wallet is a programmable web3 crypto wallet that can be issued invisibly to customers on your website or app. Customers with an embedded wallet can immediately receive digital tokens and make on-chain interactions without needing to go through the complexities of understanding the intricacies of typical EOA wallets like Metamask or Phantom, or needing to download anything to start their journey.
Dynamic-powered embedded wallets can be used in a range of scenarios - from ways to ease onboarding on your websites to working as the base for building your own full stack wallet.
If you already implemented embedded wallets at a time when passkeys and email codes were the default MFA options, please refer to [our V1 embedded wallets section](/wallets/v1-embedded/v1-embedded-overview). Otherwise - read on!
## Non Custodial
**Dynamic-powered embedded wallets are non-custodial, meaning they are always end-user owned and controlled. Only the end-user has ownership and access to their wallet private keys.**
Dynamic leverages a combination of internal and third party services including trusted execution environments (TEEs, specifically AWS Nitro Enclaves), secure key management, advanced policy engines and iframes to limit potential security threats and ensure end user self-custody. All wallet private keys are encrypted and isolated such that neither Dynamic nor the Developer have access to the end user’s wallet private keys. End-user decryption activities are all performed in trusted execution environments and only run upon end-user activity requests.
In addition, all end users of Dynamic-powered embedded wallets can always export their wallet private key to take their assets into a different wallet provider or alternative storage location. Dynamic is also working to add additional features to limit potential connections between the end-user and Dynamic or Developer services. As an example, these may include:
* Fallback back up support if Dynamic or your site is ever down
* Allowing users to disassociate their embedded wallet data with the service.
Dynamic is SOC2 Type 2 compliant and hires an independent third parties to regularly conduct audits of our code, processes and systems. Dynamic also runs evergreen bug bounty programs.
## Multi-chain
Dynamic offers embedded wallets on EVM compatible networks and Solana. If you enable both, they will both be created at once and whichever you have marked as "primary" will be shown as the primary address in their profile upon sign in.
To enable embedded wallets for EVM or Solana networks the respective chains
must also be enabled. You can find more information about enabling chains and
networks [here](/chains/enabling-chains).
## Seamless signing (session keys)
By default, Dynamic allows the end user to use session keys to authenticate and interact with their wallets. This means that the end user can sign messages and transactions without having to enter an email code or passkey.
Session keys are implemented by creating API keys in the developer website and registering those as valid authentication methods within a secure enclave. Those session keys are retained by the end user on the developer website and are never sent to Dynamic.
Session key registration requires a valid Dynamic JWT, which is obtained via a successful user authentication. Once the session keys expire, they can no longer be used to authenticate into a Dynamic-powered embedded wallet. If you are using our SDK, session keys are automatically refreshed when expired as long as the JWT is valid
Transactions requests are signed by the end user’s wallet authenticator and validated by our KMS. Upon successful validation, the end user’s private keys are used to sign the actual transaction within our KMS’s secure enclave.
Note that for added account level security, you can [enforce TOTP using an authenticator app](/authentication-methods/mfa).
## Smart Wallets
You can turn these embedded wallets into smart contract wallets using our [smart wallet](/smart-wallets/add-smart-wallets) feature. By doing so, you can sponsor your end-users' fees, add complex approval logic, and much more.
# Customizing Transaction UI
Source: https://docs.dynamic.xyz/wallets/embedded-wallets/embedded-transaction-ui
By default, when prompted to sign a transaction with an embedded wallet, a user will see a screen similar to this one:
 ## Disable Confirmation Screen
You can enable/disable this transaction confirmation screen with a single toggle in the [Embedded Wallet configuration page](https://app.dynamic.xyz/dashboard/embedded-wallets/dynamic). If you want to keep the confirmation UI but customize it, read on!
## Customize Confirmation Screen
### Modal title
By default this reads "Confirm transaction" as you can see in the image above, but you can customize it to say whatever you want. To do this, use [Translations](/design-customizations/customizing-copy-translations) and set the following:
```tsx
const locale = {
en: {
dyn_send_transaction: {
confirmation: {
title: "My New Title",
},
},
}
};
## Disable Confirmation Screen
You can enable/disable this transaction confirmation screen with a single toggle in the [Embedded Wallet configuration page](https://app.dynamic.xyz/dashboard/embedded-wallets/dynamic). If you want to keep the confirmation UI but customize it, read on!
## Customize Confirmation Screen
### Modal title
By default this reads "Confirm transaction" as you can see in the image above, but you can customize it to say whatever you want. To do this, use [Translations](/design-customizations/customizing-copy-translations) and set the following:
```tsx
const locale = {
en: {
dyn_send_transaction: {
confirmation: {
title: "My New Title",
},
},
}
};
```
### Logo/Icon
In the [general page under Settings](https://app.dynamic.xyz/dashboard/settings/general) of your Dynamic Developer Dashboard, you can set your app logo URL. This logo will be displayed in the transaction confirmation screen in place of where you currently see the Dynamic logo in the image above.
### App Name
In the same [general page under Settings](https://app.dynamic.xyz/dashboard/settings/general) as above, you can also set your app name. This name will be displayed in the transaction confirmation screen in place of where you currently see "Dynamic" in the image above.
### Origin URL
This parameter is set by Dynamic and cannot be customized for obvious security reasons. It is the URL of the website that is requesting the transaction.
## Bring your own UI
You can also build your own flows for transactions and simply use the SDK hooks to trigger the actions you need, check out [the headless section](/headless) for that!
# Wallet Reveal & Unlinking
Source: https://docs.dynamic.xyz/wallets/embedded-wallets/reveal-export
This page details the Dynamic-powered embedded wallet reveal and export process, which enables end users to retrieve and backup their wallet credentials, as well as delete them from the Dynamic-powered embedded wallet.
## Revealing a Private Key/Seed Phrase
When implementing Dynamic in headless mode, please ensure you are surfacing this flow to your end users, so that they always maintain control of their wallet.
Revealing a wallet private key/seed phrase allows end users to retrieve their wallet credentials for backup or migration to another wallet or service. This is critical to ensure a user maintains control of their wallet, in case a user loses access to the provider service, needs to recover their wallet, or wants to use a different wallet provider with their existing wallet.
## End User Experience
The Dynamic export flow reveals the private key/seed phrase in an secure isolated iframe to limit the ability of Dynamic, the developer, or anyone in the flow to view the exported key. For more details on the security of the iframe and cryptographic flows go to our FAQs.
## Programmatically Triggering Wallet Export Flow
To ensure a user maintains control of their wallet, in case a user loses access to the provider service, we recommend using our hook to place the export flow immediately after creating the account.
To open the export wallet flow on behalf of your users, you can call the `initExportProcess` method from the [`useEmbeddedReveal`](/react-sdk/hooks/useembeddedreveal) hook. This will open the flow described above. Only the end-user will be able to see the private key or seed phrase.
```jsx
import { useEmbeddedReveal } from "@dynamic-labs/sdk-react-core";
const { initExportProcess } = useEmbeddedReveal();
;
```
You can see the experience by going to [demo.dynamic.xyz](https://demo.dynamic.xyz) and creating an embedded wallet.
## Unlinking customer’s embedded wallet from your app
This feature is available on V4.
Once an end-user has revealed their private key/seed phrase, they can choose to unlink it from your site, maintaining full control over the interfaces on which their private key exists. To do this, Dynamic provides a checkbox option and confirmation screen to complete this flow.
If an end user chooses to complete this flow, their embedded wallet will no longer work within your application. They will be issued a new embedded wallet if they log in again.
## Risks and Considerations
You should always provide your end users with a path to reveal and replicate their keys from their embedded wallet. When using the headless embedded wallet flow, please ensure you add a path for users to complete this step using the programmatic option described above.
End users should be aware that replicating their wallet credentials can expose their wallet to risk if the credentials are not stored securely. Users are advised to store their credentials in a secure location and not share them with anyone. When implementing Dynamic in headless mode, we recommend communicating these warnings to users.
## FAQs
Q. What is the security of the iFrame and how do you ensure only the end-user can access these credentials?
A. We leverage joint architecture with Turnkey to secure this flow, and you can dive into the cryptographic flows here: [https://docs.turnkey.com/features/export-wallets#cryptographic-details](https://docs.turnkey.com/features/export-wallets#cryptographic-details)
Q. What happens if user reveals and replicates their private key and loses it?
A. Users can return to use the application service. If they unlinked their account from the application service during export and then lost their private key, they would not be able to retrieve that wallet.
# Transaction Simulation
Source: https://docs.dynamic.xyz/wallets/embedded-wallets/transaction-simulation
Please make sure you are on V4 of the SDK on your frontend before continuing.
Transaction Simulation can be enabled in the Embedded Wallet settings on the dashboard.
 When turned on, as well as having the Confirmation UI on, transactions will be simulated to show all asset transfers of a transaction. So, if you are swapping 0.1 SOL to USDC, you will see the assets coming in and out on the transaction UI.
 ## Future Enhancements
Our upcoming security features will include comprehensive transaction and signature analysis to protect users from potential vulnerabilities. This includes detection of token and NFT approval requests, as well as any other asset exposures in order to provide enhanced transparency during transaction flows.
# Multi Asset UI
Source: https://docs.dynamic.xyz/wallets/multi-asset
## Overview
From SDK version v2.2.0-alpha.0, the Dynamic Widget now supports multi-asset UI by default.
This means you can present your end users with the individual balances of each asset they hold in their wallet.
Balance and pricing information is refreshed every 20 min. If you need minute by minute refresh and different asset support, contact sales.
The list of tokens reflect the top 1000 tokens by DEX volume. We leverage Coingecko for pricing.
You can also choose to show the Fiat balance of those assets in whatever their primary currency is.
## Future Enhancements
Our upcoming security features will include comprehensive transaction and signature analysis to protect users from potential vulnerabilities. This includes detection of token and NFT approval requests, as well as any other asset exposures in order to provide enhanced transparency during transaction flows.
# Multi Asset UI
Source: https://docs.dynamic.xyz/wallets/multi-asset
## Overview
From SDK version v2.2.0-alpha.0, the Dynamic Widget now supports multi-asset UI by default.
This means you can present your end users with the individual balances of each asset they hold in their wallet.
Balance and pricing information is refreshed every 20 min. If you need minute by minute refresh and different asset support, contact sales.
The list of tokens reflect the top 1000 tokens by DEX volume. We leverage Coingecko for pricing.
You can also choose to show the Fiat balance of those assets in whatever their primary currency is.
Multi-asset is only supported on the following networks: Ethereum, Optimism, Polygon, Arbitrum, and Base.
## Configuration
Enabling multi-asset (turned on by default) is as simple as a toggle in the Dynamic Dashboard within [the Log in & User Profile page](https://app.dynamic.xyz/dashboard/log-in-user-profile), under the "Design Settings" section.
## UI Layout
The multi-asset UI is designed to be collapsible, so that it doesn't take up too much space on your page. It will display balances in either the native token or the fiat equivalent, depending on your configuration.
It will display in the user profile section of [the DynamicWidget](/react-sdk/components/dynamicwidget), or if you are implementing individual UI components, you can use [the UserProfile](/react-sdk/components/dynamicuserprofile) component.


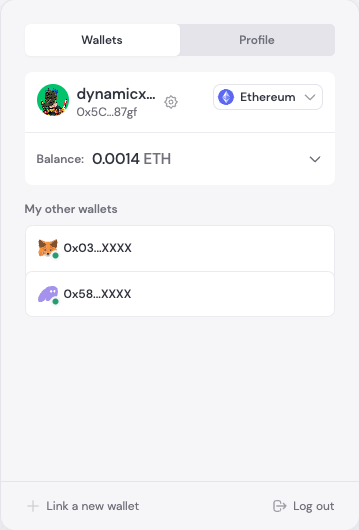

## Build it yourself
You can also build your own multi-asset UI using the hooks provided by the Dynamic SDK, you can use [the useTokenBalances hook](/react-sdk/hooks/usetokenbalances) to do so.
# Multi Wallet
Source: https://docs.dynamic.xyz/wallets/multi-wallet
## Managing multiple wallets
Your end users can of course connect one wallet during signup/login, but they can also connect multiple! Lots of users have multiple wallets but managing multiple wallets and multiple
accounts for each wallet is challenging. You have to manage event listeners, various connection states, wallets shared across accounts, and much much more. That's why we introduced [multi-wallet](https://www.dynamic.xyz/blog/multi-wallet-announcement). You can see it in action on our
[demo site](https://demo.dynamic.xyz).
Our multiwallet widget allows your users to easily:
1. Add multiple wallets
2. Add multiple accounts from the same wallet
3. Transfer wallets between your Dynamic accounts
4. It is mobile friendly
5. Keep track of the active account in a wallet
6. Swap primary wallets
7. and so much more.
To enable multiwallet, simply visit [the Log in & User Profile section of the dashboard](https://app.dynamic.xyz/dashboard/log-in-user-profile) and under "Branded Wallets", toggle MultiWallet on!
# Send Assets
Source: https://docs.dynamic.xyz/wallets/send-balance-ui
## Summary
Dynamic provides a simple and easy-to-use interface for users to send tokens to any address on EVM and Solana (available on the latest V3 of the SDK).
This allows your users to easily move funds from their wallets without leaving the dapp, while removing the burden of creating send flows and gas calculations across all EVM networks and Solana for you as a developer. Note that for Solana, we also include a priority fee to improve success rates in case of congestion on the network.
You have two options to surface this UI to your end users: the first is within the Dynamic Widget, and the second is programmatically opening the UI from your own site. We cover both options here.
## Within Dynamic Widget/Embedded Widget
### Add the widget
Simply add the [Dynamic Widget](/react-sdk/components/dynamicwidget) or [Dynamic Embedded Widget](/react-sdk/components/dynamicembeddedwidget) to your dapp and the Send Token UI will be available to your users.
```jsx
import { DynamicWidget, DynamicEmbeddedWidget } from "@dynamic-labs/sdk-react-core";
// COMPONENT INSIDE TREE WHERE DYNAMIC CONTEXT IS AVAILABLE
const Main => {
return (
 You can then choose from any available token in your wallet, add an amount and recipient address, then preview the transaction before confirming.

 ## Standalone UI (useSendBalance)
You can use our useSendBalance hook to trigger the Send Balance UI and optionally, prepopulate the form for the user.
### How it works
The useSendBalance hook depends on the DynamicContextProvider, so it has to be used as a child of the Dynamic context. When you use the hook, you will get a function named `open`. That method accepts the follow options:
| Parameter | Type | Description |
| :--------------- | :--------------- | :----------------------------- |
| recipientAddress | String | The initial recipient address |
| value | ethers.BigNumber | The initial transaction amount |
The `open` function will return a promise; If successful, the promise will be resolved with the transaction; if not successful, the promise will be rejected accompanied by the error collected from the provider.
Here is an example of a custom Send button
```typescript
import { useSendBalance } from "@dynamic-labs/sdk-react-core";
const MySendButton = () => {
const { open } = useSendBalance();
return ;
};
```
From this example, when the user clicks the button, they will be prompted to fill the amount and recipient fields, review the transaction, and they will see a confirmation at the end of the flow.
For the second example, we will pre-populate the recipient and amount fields for the user.
```typescript
import { useSendBalance } from "@dynamic-labs/sdk-react-core";
import { ethers } from "ethers";
const MySendButton = () => {
const { open } = useSendBalance();
const onCickSend = async () => {
try {
const tx = await open({
recipientAddress: "",
value: ethers.utils.parseEther("1"),
});
} catch (err) {
// Handle the promise rejection
}
};
return ;
};
```
Here, when the user clicks the button, they will be prompted with the same UI, but now it will be pre-populated with the recipient address and amount.
# Accessing Wallets
Source: https://docs.dynamic.xyz/wallets/using-wallets/accessing-wallets
Learn about primaryWallet, useUserWallets, onEmbeddedWalletCreated, and handleConnectedWallet
## Introduction
It's not neccessary for a wallet to be associated with a user when they sign up, but the likelyhood is that if a user is interacting with Web3, one will be connected at some point, whether embedded or external (branded).
### Primary Wallet
Normally, if one or more wallets are connected, a `primaryWallet` object will be available on the Dynanmic Context which you can access with [the `useDynamicContext` hook](/react-sdk/hooks/usedynamiccontext). This is a quick and easy way to access the main wallet associated with that user.
```jsx
const { primaryWallet } = useDynamicContext();
```
### useUserWallets
Going beyond the primary wallet, you might want to get every wallet associated with the given user. The best option for this is to use [the `useUserWallets` hook](/react-sdk/hooks/useuserwallets).
```jsx
import { FC } from 'react'
import { useUserWallets } from '@dynamic-labs/sdk-react-core'
export const ListConnectedWallets: FC = () => {
const userWallets = useUserWallets()
return (
)
}
```
### onEmbeddedWalletCreated
If you're using embedded wallets, you can listen for the `onEmbeddedWalletCreated` event to know when a wallet has been created for a user. This is useful for when you want to know when a user has a wallet created for them, but you don't want to have to poll the API to check.
```tsx
## Standalone UI (useSendBalance)
You can use our useSendBalance hook to trigger the Send Balance UI and optionally, prepopulate the form for the user.
### How it works
The useSendBalance hook depends on the DynamicContextProvider, so it has to be used as a child of the Dynamic context. When you use the hook, you will get a function named `open`. That method accepts the follow options:
| Parameter | Type | Description |
| :--------------- | :--------------- | :----------------------------- |
| recipientAddress | String | The initial recipient address |
| value | ethers.BigNumber | The initial transaction amount |
The `open` function will return a promise; If successful, the promise will be resolved with the transaction; if not successful, the promise will be rejected accompanied by the error collected from the provider.
Here is an example of a custom Send button
```typescript
import { useSendBalance } from "@dynamic-labs/sdk-react-core";
const MySendButton = () => {
const { open } = useSendBalance();
return ;
};
```
From this example, when the user clicks the button, they will be prompted to fill the amount and recipient fields, review the transaction, and they will see a confirmation at the end of the flow.
For the second example, we will pre-populate the recipient and amount fields for the user.
```typescript
import { useSendBalance } from "@dynamic-labs/sdk-react-core";
import { ethers } from "ethers";
const MySendButton = () => {
const { open } = useSendBalance();
const onCickSend = async () => {
try {
const tx = await open({
recipientAddress: "",
value: ethers.utils.parseEther("1"),
});
} catch (err) {
// Handle the promise rejection
}
};
return ;
};
```
Here, when the user clicks the button, they will be prompted with the same UI, but now it will be pre-populated with the recipient address and amount.
# Accessing Wallets
Source: https://docs.dynamic.xyz/wallets/using-wallets/accessing-wallets
Learn about primaryWallet, useUserWallets, onEmbeddedWalletCreated, and handleConnectedWallet
## Introduction
It's not neccessary for a wallet to be associated with a user when they sign up, but the likelyhood is that if a user is interacting with Web3, one will be connected at some point, whether embedded or external (branded).
### Primary Wallet
Normally, if one or more wallets are connected, a `primaryWallet` object will be available on the Dynanmic Context which you can access with [the `useDynamicContext` hook](/react-sdk/hooks/usedynamiccontext). This is a quick and easy way to access the main wallet associated with that user.
```jsx
const { primaryWallet } = useDynamicContext();
```
### useUserWallets
Going beyond the primary wallet, you might want to get every wallet associated with the given user. The best option for this is to use [the `useUserWallets` hook](/react-sdk/hooks/useuserwallets).
```jsx
import { FC } from 'react'
import { useUserWallets } from '@dynamic-labs/sdk-react-core'
export const ListConnectedWallets: FC = () => {
const userWallets = useUserWallets()
return (
)
}
```
### onEmbeddedWalletCreated
If you're using embedded wallets, you can listen for the `onEmbeddedWalletCreated` event to know when a wallet has been created for a user. This is useful for when you want to know when a user has a wallet created for them, but you don't want to have to poll the API to check.
```tsx
{
console.log('onEmbeddedWalletCreated was called', args);
}
}
}}
>
{/* ... rest of your app ... */}
```
## Add extra logic during any wallet connection (handleConnectedWallet)
Sometimes you may want to inject some of your own logic during the process of a wallet becoming connected. Dynamic has a concept of ["handlers"](/react-sdk/overview#handlers), which is a particular kind of callback to allow custom code to run as part of a process (i.e. signup).
`handleConnectedWallet` is a handler that runs before we establish the wallet connection. You can use this callback to run your logic and reject (by returning boolean false). For example, running a fraud check before establishing the connection.
The args returned by handleConnectedWallet is a [Wallet](/wallets/using-wallets/accessing-wallets#wallet-interface) but without the `connected` boolean.
```jsx
{
console.log("handleConnectedWallet was called", args);
// if runYourOwnLogic return true, the connection will be established, otherwise it will not
return runYourOwnLogic();
},
},
}}
>
{/* ... rest of your app ... */}
```
## What next?
Click here to learn how to interact with wallets.
# Bitcoin Wallets
Source: https://docs.dynamic.xyz/wallets/using-wallets/bitcoin/bitcoin-wallets
We covered what a wallet in general looks like in the [Accessing Wallets](/wallets/using-wallets/accessing-wallets) section and then what a wallet connector looks like in the [Interacting With Wallets section](/wallets/using-wallets/interacting-with-wallets). However, the wallet connector for Bitcoin wallets is a bit different from the EVM wallets, so we will cover that seperately here.
This is because Bitcoin wallets have different capabilities and requirements. For example, Bitcoin wallets can have multiple addresses associated with them, like payment and ordinal addresses.
## Checking if a wallet is a Bitcoin wallet
You can use the `isBitcoinWallet` helper method to check if a wallet is a Bitcoin wallet. That way, TypeScript will know which methods are available to you.
```ts
import { isBitcoinWallet } from '@dynamic-labs/bitcoin';
if (!isBitcoinWallet(wallet)) {
throw new Error('This wallet is not a Bitcoin wallet');
}
const result = wallet.sendBitcoin({
amount: 100000000n,
recipientAddress: 'SOME-ADDRESS',
});
```
## Bitcoin Wallet
| Method | Description |
| -------------------------------------------------------------------------------------------------------------------------------------- | --------------------------------------------------------------------------------------------------------------------------- |
| sendRawTransaction(rawTransactionHex: string): Promise\ | This method submits a raw transaction to the bitcoin blockchain and returns the transaction ID as the response |
| sendBitcoin(transaction: BitcoinTransaction): Promise\ | A method to send an amount of satoshis to a recipient bitcoin address |
| signMessage(messageToSign: string, \{ addressType: WalletAddressType, protocol: BitcoinSignProtocol }): Promise\ | Signs a message with a specific bitcoin address type ('ordinals' or 'payment') and/or protocol ('ecdsa' or 'bip322-simple') |
| signPsbt(request: BitcoinSignPsbtRequest): Promise\ | Signs a PSBT and returns an object with the signed PSBT |
| signPsbts(request: BitcoinSignPsbtRequest\[]): Promise\ | Signs a list of PSBTs and returns an array of signed PSBTs in base64 |
## Type Definitions
```ts
type BitcoinSignPsbtRequest = {
allowedSighash: number[];
unsignedPsbtBase64: string;
signature?: {
address: string;
signingIndexes: number[] | undefined;
disableAddressValidation?: boolean; // helpful for multi-sig
}[];
};
type BitcoinTransaction = {
amount: bigint;
recipientAddress: string;
}
type WalletAddressType = 'payment' | 'ordinal';
type WalletAdditionalAddress {
address: string;
publicKey?: string;
type: WalletAddressType;
}
type BitcoinSignPsbtResponse = {
signedPsbt: Psbt; // see reference below for what a PSBT is
};
```
## What is a satoshi?
This smallest unit allows for transactions involving very small amounts of bitcoin,
facilitating microtransactions and improving the granularity of payments in the Bitcoin network.
```
1 Bitcoin = 100,000,000 Satoshis
```
## What is a PSBT?
A partially signed bitcoin transaction (PSBT) is a standard for transactions that have not fully signed.
This allows different participants with different keys/signers to sign a transaction without revealing their private keys to others.
Multi-sig wallets utilize these. This allows for a multi-step transaction process which is both safer and more efficient.
## Examples
We’ve included a few examples of how to use the Bitcoin wallet connector in this section:
* [Send a transaction](/wallets/using-wallets/bitcoin/send-a-transaction)
* [Send a raw transaction](/wallets/using-wallets/bitcoin/send-raw-transaction)
* [Sign a message](/wallets/using-wallets/bitcoin/sign-a-message)
# Send Bitcoin
Source: https://docs.dynamic.xyz/wallets/using-wallets/bitcoin/send-a-transaction
In this example, we are going to send bitcoin using the wallet connector.
```JavaScript
import { useDynamicContext } from '@dynamic-labs/sdk-react-core';
import { isBitcoinWallet } from '@dynamic-labs/bitcoin';
const SendBitcoinButton = () => {
const { primaryWallet } = useDynamicContext();
const sendBitcoin = async () => {
if (!primaryWallet || !isBitcoinWallet(primaryWallet)) return;
// The first argument is the address you are sending to, the second argument is the amount of BTC in satoshis
const transactionId = await primaryWallet.sendBitcoin('', 1);
console.log('transactionId', transactionId);
};
return ;
};
```
# Send a raw transaction
Source: https://docs.dynamic.xyz/wallets/using-wallets/bitcoin/send-raw-transaction
In this example, we are going to send a raw transaction as a hex value to the bitcoin network.
For information on how to construct the transactionHexString, please refer to [this example](https://medium.com/@claudio_69833/how-to-create-bitcoin-transactions-with-javascript-b3b43f53ca0c).
```JavaScript
import { useDynamicContext } from '@dynamic-labs/sdk-react-core';
import { isBitcoinWallet } from '@dynamic-labs/bitcoin';
const SendRawTransaction = () => {
const { primaryWallet } = useDynamicContext();
const signMessage = async () => {
if (!primaryWallet || !isBitcoinWallet(primaryWallet)) return;
const transactionId = await primaryWallet.sendRawTransaction('transactionHexString');
console.log('transactionId', transactionId);
};
return ;
};
```
# Sign a message
Source: https://docs.dynamic.xyz/wallets/using-wallets/bitcoin/sign-a-message
In this example, we are going to sign a message for Bitcoin.
```JavaScript
import { useDynamicContext } from '@dynamic-labs/sdk-react-core';
import { isBitcoinWallet } from '@dynamic-labs/bitcoin';
const SignMessageButton = () => {
const { primaryWallet } = useDynamicContext();
const signMessage = async () => {
if (!primaryWallet || !isBitcoinWallet(primaryWallet)) return;
const signature = await primaryWallet.signMessage('example');
console.log('signature', signature);
};
return ;
};
```
You can also sign a message with a specific address type (payment or ordinal) or protocol (ecdsa or bip322-simple) by passing extra params in the `signMessage` options.
```JavaScript
import { useDynamicContext } from '@dynamic-labs/sdk-react-core';
import { isBitcoinWallet } from '@dynamic-labs/bitcoin';
const SignMessageButton = () => {
const { primaryWallet } = useDynamicContext();
const signMessageWithOrdinalsAddress = async () => {
if (!primaryWallet || !isBitcoinWallet(primaryWallet)) return;
const signature = await primaryWallet.signMessage('example', { addressType: 'ordinals' });
console.log('signature', signature);
};
const signMessageWithPaymentAddress = async () => {
if (!primaryWallet || !isBitcoinWallet(primaryWallet)) return;
const signature = await primaryWallet.signMessage('example', { addressType: 'payment' });
console.log('signature', signature);
};
const signMessageWithEcdsaProtocol = async () => {
if (!primaryWallet || !isBitcoinWallet(primaryWallet)) return;
const signature = await primaryWallet.signMessage('example', { addressType: 'ordinals', protocol: 'ecdsa' });
console.log('signature', signature);
};
return <>
;
};
```
Notes:
* Some wallets don't allow you to specify the address type or protocol. In this case, we'll just default to the address type and protocol that the wallet supports.
* If you don't specify an address type, we'll default to the address type that the wallet supports or ordinals address.
* If you don't specify a protocol, we'll default to the protocol that the wallet supports or bip322-simple.
# Sign a Partially Signed Bitcoin Transaction (PSBT)
Source: https://docs.dynamic.xyz/wallets/using-wallets/bitcoin/sign-a-psbt
# Guide to Creating a Partially Signed Bitcoin Transaction (PSBT) for Developers
This guide will walk you through the steps to create and sign a Partially Signed Bitcoin Transaction (PSBT) using a combination of JavaScript libraries and React components. The provided code example is comprehensive, but we'll break it down step-by-step to ensure you understand each part.
## Table of Contents
1. [Understanding Partially Signed Bitcoin Transactions (PSBT)](#1-understanding-partially-signed-bitcoin-transactions-psbt)
2. [Step-by-Step Guide](#2-step-by-step-guide)
* [Step 1: Import Necessary Libraries and Functions](#step-1-import-necessary-libraries-and-functions)
* [Step 2: Initialize the ECC Library](#step-2-initialize-the-ecc-library)
* [Step 3: Define Constants and Helper Functions](#step-3-define-constants-and-helper-functions)
* [Step 4: Generate the PSBT](#step-4-generate-the-psbt)
* [Step 5: Create the SignMessageViaTransaction Component](#step-5-create-the-signmessageviatransaction-component)
* [Step 6: Create the Main Component](#step-6-create-the-main-component)
3. [Full Code Example](#3-full-code-example)
***
## 1. Understanding Partially Signed Bitcoin Transactions (PSBT)
A Partially Signed Bitcoin Transaction (PSBT) is a standard format for handling Bitcoin transactions that require multiple signatures or other complex signing workflows. PSBTs enable the separation of transaction creation and signing, allowing for more flexible and secure transaction management.
### Key Features of PSBT
* **Interoperability**: PSBTs can be used across different wallets and software.
* **Flexibility**: Allows for multiple parties to contribute signatures to a single transaction.
* **Security**: Enhances security by enabling hardware wallets and other secure devices to sign transactions without exposing private keys.
***
## 2. Step-by-Step Guide to Creating a PSBT
This section provides a detailed step-by-step guide to creating a PSBT using the `bitcoinjs-lib` library in JavaScript. We'll break down each part of the provided code example and explain what it does.
### Step 1: Import Necessary Libraries and Functions
First, we import the necessary libraries and helper functions for working with Bitcoin transactions, data conversions, hashing, elliptic curve cryptography, and React components.
* **bitcoinjs-lib**: A popular JavaScript library for working with Bitcoin transactions.
* **@stacks/common**: Provides utility functions for handling data conversions.
* **@noble/hashes/sha256**: Implements the SHA-256 hashing algorithm.
* **@bitcoinerlab/secp256k1**: Provides elliptic curve cryptography functions for Bitcoin.
* **@dynamic-labs/sdk-react-core**: Provides context for accessing wallet information.
* **@dynamic-labs/wallet-connector-core**: Checks if the wallet connector is a Bitcoin connector.
* **useState**: A React hook for managing state in a functional component.
```javascript
import { DynamicWidget, useDynamicContext } from "@dynamic-labs/sdk-react-core";
import { isBitcoinWallet } from '@dynamic-labs/bitcoin';
import * as bitcoin from 'bitcoinjs-lib';
import { hexToBytes, utf8ToBytes } from '@stacks/common';
import { sha256 } from '@noble/hashes/sha256';
import ecc from '@bitcoinerlab/secp256k1';
import { useState } from "react";
```
### Step 2: Initialize the ECC Library
Before we can work with elliptic curve cryptography (ECC) functions in Bitcoin transactions, we need to initialize the ECC library. This step is crucial for enabling cryptographic operations such as signing and verifying transactions.
**bitcoin.initEccLib(ecc);**
* **Purpose**: The `bitcoinjs-lib` library relies on an ECC library to perform cryptographic operations. By default, `bitcoinjs-lib` does not include an ECC library to keep the core library lightweight and modular. We need to explicitly provide an ECC implementation.
* **Library Used**: In this example, we use the `@bitcoinerlab/secp256k1` library, which is an implementation of the secp256k1 elliptic curve, commonly used in Bitcoin.
* **Initialization**: We pass the `ecc` object from the `@bitcoinerlab/secp256k1` library to the `bitcoin.initEccLib` function to initialize the ECC library. This allows `bitcoinjs-lib` to use the ECC functions provided by the `@bitcoinerlab/secp256k1` library.
```javascript
bitcoin.initEccLib(ecc);
```
### Step 3: Define Constants and Helper Functions
Next, we define some constants and helper functions that will be used throughout the process. These include a message tag for BIP-322, a hashed version of this tag, and values for a dummy transaction input.
#### BIP-322 Message Tag and Hash
**BIP-322** is a Bitcoin Improvement Proposal that defines a standard way to sign and verify arbitrary messages using Bitcoin keys. To ensure the message being signed is unique and recognizable as a BIP-322 message, a specific tag (`bip322MessageTag`) is used. This tag is hashed twice using SHA-256 to create a unique identifier (`messageTagHash`).
```javascript
const bip322MessageTag = 'BIP0322-signed-message';
const messageTagHash = Uint8Array.from([
...sha256(utf8ToBytes(bip322MessageTag)),
...sha256(utf8ToBytes(bip322MessageTag)),
]);
```
#### Dummy Transaction Input Values
The `bip322TransactionToSignValues` object contains placeholder values for a previous transaction output. These values are used to construct a virtual transaction that is not actually spending real Bitcoins but is required to prepare the PSBT.
* **prevoutHash**: A 32-byte array of zeros, representing the hash of a non-existent previous transaction.
* **prevoutIndex**: Set to `0xffffffff`, a special value indicating that this is not a real transaction output.
* **sequence**: Set to `0`, indicating the sequence number of the transaction input.
```javascript
export const bip322TransactionToSignValues = {
prevoutHash: hexToBytes('0000000000000000000000000000000000000000000000000000000000000000'),
prevoutIndex: 0xffffffff,
sequence: 0,
};
```
#### Hashing the BIP-322 Message
The `hashBip322Message` function takes a message (as a `Uint8Array` or a string) and hashes it using the SHA-256 algorithm, along with the `messageTagHash`. This ensures that the message is uniquely identified as a BIP-322 message.
```javascript
export function hashBip322Message(message) {
return sha256(
Uint8Array.from([...messageTagHash, ...(isString(message) ? utf8ToBytes(message) : message)])
);
}
function isString(value) {
return typeof value === 'string';
}
```
### Step 4: Generate the PSBT
The `generatePsbt` function creates a Partially Signed Bitcoin Transaction (PSBT) using the provided address and message.
#### Step-by-Step Explanation:
1. **Generate Script**: Convert the Bitcoin address into a scriptPubKey. This script is used to determine the conditions under which the Bitcoin can be spent.
2. **Hash the Message**: Hash the message using the BIP-322 message hash function. This ensures the message is uniquely identified and securely hashed.
3. **Create ScriptSig**: Create the scriptSig with the hashed message. The scriptSig is part of the transaction input and contains the conditions required to spend the UTXO.
4. **Virtual Transaction**: Create a virtual transaction to spend, setting the necessary inputs and outputs. This virtual transaction simulates spending a UTXO without actually spending real Bitcoins.
5. **Create PSBT**: Create a PSBT object and add the necessary inputs and outputs. This PSBT will be signed by the wallet.
```javascript
const generatePsbt = (address, message) => {
const { prevoutHash, prevoutIndex, sequence } = bip322TransactionToSignValues;
// Generate the script for the given address
const script = bitcoin.address.toOutputScript(
address,
bitcoin.networks.bitcoin
);
// Hash the message
const hash = hashBip322Message(message);
// Create the scriptSig with the hashed message
const commands = [0, Buffer.from(hash)];
const scriptSig = bitcoin.script.compile(commands);
// Create a virtual transaction to spend
const virtualToSpend = new bitcoin.Transaction();
virtualToSpend.version = 0;
virtualToSpend.addInput(Buffer.from(prevoutHash), prevoutIndex, sequence, scriptSig);
virtualToSpend.addOutput(script, 0);
// Create the PSBT
const virtualToSign = new bitcoin.Psbt({ network: bitcoin.networks.bitcoin });
virtualToSign.setVersion(0);
const prevTxHash = virtualToSpend.getHash();
const prevOutIndex = 0;
const toSignScriptSig = bitcoin.script.compile([bitcoin.script.OPS.OP_RETURN]);
try {
virtualToSign.addInput({
hash: prevTxHash,
index: prevOutIndex,
sequence: 0,
witnessUtxo: { script, value: 0 },
});
} catch (e) {
console.log(e);
throw e;
}
virtualToSign.addOutput({ script: toSignScriptSig, value: 0 });
return virtualToSign.toBase64();
}
```
### Step 5: Create the SignMessageViaTransaction Component
The `SignMessageViaTransaction` component handles the interaction with the wallet to sign the PSBT.
#### Step-by-Step Explanation:
1. **useDynamicContext**: Hook to access the primary wallet from the context. This provides information about the connected wallet.
2. **useState**: React hook to manage the message state. This allows us to keep track of the message that we want to sign.
3. **Check Wallet Connector**: Ensure the wallet connector supports Bitcoin. If the wallet does not support Bitcoin, we return `null` and do not render the component.
4. **signMessageViaTransaction**: Function to generate the PSBT, request the wallet to sign it, and handle the signed PSBT. This function includes:
* **Get Address**: Get the Bitcoin address from the wallet.
* **Generate PSBT**: Call the `generatePsbt` function to create the PSBT.
* **Sign PSBT**: Request the wallet to sign the PSBT using the provided parameters.
* **Handle Signed PSBT**: Log the signed PSBT or handle any errors that occur during signing.
```javascript
const SignMessageViaTransaction = () => {
const { primaryWallet } = useDynamicContext();
const [message, setMessage] = useState('Hello World');
if (!isBitcoinWallet(primaryWallet)) return null;
const signMessageViaTransaction = async () => {
// Get the Bitcoin address from the wallet
const address = await primaryWallet.getAddress();
// Generate the PSBT
const psbt = generatePsbt(address, message);
// Define the parameters for signing the PSBT
const params = {
allowedSighash: [1], // Only allow SIGHASH_ALL
unsignedPsbtBase64: psbt, // The unsigned PSBT in Base64 format
signature: [{
address, // The address that is signing
signingIndexes: [0] // The index of the input being signed
}]
};
try {
// Request the wallet to sign the PSBT
const signedPsbt = await primaryWallet.signPsbt(params);
console.log(signedPsbt); // Log the signed PSBT
} catch (e) {
console.log(e); // Handle any errors that occur during signing
}
}
return (
)
}
```
### Step 6: Create the Main Component
The `Main` component renders the `DynamicWidget` for wallet connection and the `SignMessageViaTransaction` component.
#### Step-by-Step Explanation:
1. **DynamicWidget**: This component handles the wallet connection UI, allowing users to connect their wallets.
2. **SignMessageViaTransaction**: This component handles the signing of the PSBT via the connected wallet.
```javascript
const Main = () => {
return (
> | Retrieves the public client. |
| getWalletClient(chainId?: string): Promise\> | Retrieves the wallet client. |
### Read only actions
If you want to read data from the blockchain, you will want either a ["Public Client"](https://viem.sh/docs/clients/public.html) (Viem terminology), or a ["Provider"](https://docs.ethers.org/v5/getting-started/#getting-started--glossary) (Ethers terminology). Both allow you read only access to the blockchain.
```jsx
import { useDynamicContext } from '@dynamic-labs/sdk-react-core';
const { primaryWallet } = useDynamicContext();
const getEnsName = async () => {
const publicClient = await primaryWallet?.getPublicClient()
// Now you can use the public client to read data from the blockchain
const ens = await publicClient?.getEnsName({ address: primaryWallet.address })
return ens
}
```
```jsx
import { getWeb3Provider } from '@dynamic-labs/ethers-v6';
import { useDynamicContext } from '@dynamic-labs/sdk-react-core';
const { primaryWallet } = useDynamicContext();
const getBalance = async () => {
const provider = await getWeb3Provider(primaryWallet);
// Now you can use the provider to read data from the blockchain
const balance = await provider?.getBalance(primaryWallet.address);
return balance
}
```
### Write actions
If you want to write data to the blockchain, you will need a ["Wallet Client"](https://viem.sh/docs/clients/wallet.html) (Viem terminology), or a ["Signer"](https://docs.ethers.io/v5/api/signer/) (Ethers terminology). Both allow you to sign transactions with the private key.
```jsx
import { useDynamicContext } from '@dynamic-labs/sdk-react-core';
import { isEthereumWallet } from '@dynamic-labs/ethereum';
const { primaryWallet } = useDynamicContext();
const sendTransaction = async () => {
if(!primaryWallet || !isEthereumWallet(primaryWallet)) {
return;
}
const walletClient = await primaryWallet.getWalletClient();
// Now you can use the wallet client to write data to the blockchain
const tx = await walletClient?.sendTransaction({
to: '0x1234567890abcdef',
value: '1000000000000000000'
});
return tx
}
```
```jsx
import { getSigner } from '@dynamic-labs/ethers-v6';
import { useDynamicContext } from '@dynamic-labs/sdk-react-core';
const { primaryWallet } = useDynamicContext();
const sendTransaction = async () => {
const signer = await getSigner(primaryWallet);
// Now you can use the signer to write data to the blockchain
const tx = await signer?.sendTransaction({
to: '0x1234567890abcdef',
value: '1000000000000000000'
});
return tx
}
```
## Examples
We've included a few examples of how to use the EVM wallet connector in this section:
* [Get balance for all connected wallets](/wallets/using-wallets/evm/get-balance-for-all-wallets)
* [Get balance for a single wallet](/wallets/using-wallets/evm/get-wallet-balance)
* [Send a transaction](/wallets/using-wallets/evm/send-a-transaction)
* [Send a transaction with Wagmi](/wallets/using-wallets/evm/send-a-transaction-wagmi)
* [Send balance using embedded wallet](/wallets/using-wallets/evm/send-balance)
* [Sign a message](/wallets/using-wallets/evm/sign-a-message)
# Get balance for all wallets
Source: https://docs.dynamic.xyz/wallets/using-wallets/evm/get-balance-for-all-wallets
In this example, we will get the balance for each connected wallet.
For each wallet, we will get the provider with [useRpcProviders](/react-sdk/hooks/userpcproviders), to fetch the
balance by calling the `getBalance` with the wallet address.
```JavaScript
import { useUserWallets } from '@dynamic-labs/sdk-react-core';
import { useRpcProviders } from '@dynamic-labs/sdk-react-core'
import { evmProvidersSelector } from '@dynamic-labs/ethereum-core'
const App = () => {
const userWallets = useUserWallets();
const { defaultProvider } = useRpcProviders(evmProvidersSelector)
useEffect(() => {
userWallets.forEach(async (wallet) => {
if (!wallet) return;
// Get the EVM Mainnet provider
const provider = defaultProvider?.provider;
if (!provider) return;
// Fetch the wallet balance
const balance = await provider.getBalance({ address: wallet.address });
console.log('balance', balance.toString());
});
}, [userWallets, defaultProvider]);
...
}
```
# Send a transaction on Ethereum/EVM
Source: https://docs.dynamic.xyz/wallets/using-wallets/evm/send-a-transaction
```tsx
import { FC, FormEventHandler, useState } from "react";
import { parseEther } from "viem";
import { useDynamicContext } from "@dynamic-labs/sdk-react-core";
import { isEthereumWallet } from "@dynamic-labs/ethereum";
export const SendTransactionSection: FC = () => {
const { primaryWallet } = useDynamicContext();
const [txnHash, setTxnHash] = useState("");
if (!primaryWallet || !isEthereumWallet(primaryWallet)) return null;
const onSubmit: FormEventHandler = async (event) => {
event.preventDefault();
const formData = new FormData(event.currentTarget);
const address = formData.get("address") as string;
const amount = formData.get("amount") as string;
const publicClient = await primaryWallet.getPublicClient();
const walletClient = await primaryWallet.getWalletClient();
const transaction = {
to: address,
value: amount ? parseEther(amount) : undefined,
};
const hash = await walletClient.sendTransaction(transaction);
setTxnHash(hash);
const receipt = await publicClient.getTransactionReceipt({
hash,
});
console.log(receipt);
};
return (
);
};
```
# Mint an NFT on EVM with Wagmi
Source: https://docs.dynamic.xyz/wallets/using-wallets/evm/send-a-transaction-wagmi
```jsx
import { FC } from 'react';
import {
useContractWrite,
usePrepareContractWrite,
useWaitForTransaction,
} from 'wagmi';
export const ContractWriteSection: FC = () => {
const { config } = usePrepareContractWrite({
abi: [
{
inputs: [],
name: 'mint',
outputs: [],
stateMutability: 'nonpayable',
type: 'function',
},
] as const,
address: 'XXXXXXXXXXXXXXXXXXXXXXXXXXXXXXXXXXXXXXXX',
functionName: 'mint',
});
const { data, write } = useContractWrite(config);
const { isLoading, isSuccess } = useWaitForTransaction({
hash: data?.hash,
});
return (
);
};
```
# Sign a message in Ethereum/EVM
Source: https://docs.dynamic.xyz/wallets/using-wallets/evm/sign-a-message
In this example, we are creating a button to sign a message and log the signature to the console.
```JavaScript
import { useDynamicContext } from '@dynamic-labs/sdk-react-core';
const SignMessageButton = () => {
const { primaryWallet } = useDynamicContext();
const signMessage = async () => {
if (!primaryWallet) return;
const signature = await primaryWallet.signMessage('example');
console.log('signature', signature);
};
return ;
};
```
# Fetch all token balances for a wallet
Source: https://docs.dynamic.xyz/wallets/using-wallets/general/get-token-balances
The Dynamic UI components (DynamicWidget and UserProfile) have a built in UI for displaying multi asset balances, we strongly recommend using those components if you can! Learn more in [the Multi-Asset UI section](/wallets/multi-asset).
## Hook
You can fetch token balances for a user's wallet using the `useTokenBalances` hook:
```jsx
import { useTokenBalances } from "@dynamic-labs/sdk-react-core";
const { tokenBalances, isLoading, isError, error } = useTokenBalances();
```
The hook currently only supports the Ethereum, Optimism, Polygon, Arbitrum, and Base networks.
## Return Value
This hook returns an object for `tokenBalances` with the following properties:
| Property | Type | Description |
| ---------- | ------- | ---------------------------------------------------------------------- |
| networkId | integer | The network ID of the token i.e. 1 for Ethereum, 137 for Polygon, etc. |
| address | string | The address of the token. |
| name | string | The name of the token. |
| symbol | string | The symbol of the token. |
| decimals | integer | The number of decimals the token has. |
| logoURI | string | The URI of the token's logo image. |
| balance | float | The balance of the token in the user's wallet. |
| rawBalance | integer | The raw balance of the token in the user's wallet. |
## Reference
You can find the full reference for the `useTokenBalances` hook [here](/react-sdk/hooks/usetokenbalances).
## Full Example
```jsx
import { useDynamicContext, useTokenBalances } from "@dynamic-labs/sdk-react-core";
const Balances = () => {
const { primaryWallet } = useDynamicContext();
const { tokenBalances, isLoading, isError, error } = useTokenBalances();
if(!primaryWallet) return
| Field | Description |
| ----------------------------------------------- | ------------------------------------------------------------------------------------------------------- |
| additionalAddresses: WalletAdditionalAddress\[] | Additional addresses associated to the wallet (e.g. ordinals and payment addresses for bitcoin wallets) |
| address: string | Public address of the connected wallet |
| chain: string | Current BlockChain name (e.g: 'ETH', 'SOL', 'BTC', etc) |
| connector: WalletConnector | The wallet connector object |
| id: string | The wallet's unique id (matches thw wallet verified credential on connect-anf-sign) |
| isAuthenticated: boolean | True if the user is authenticated, otherwise it's false |
| key: string | The wallet key (e.g. metamask, phantom, etc) |
| Method | Description |
| --------------------------------------------------------------------- | -------------------------------------------------------------------------------------------------------------------- |
| getBalance(): Promise\ | Retrieves the balance of the wallet. |
| getNameService(): Promise\ | Retrieves the name service data associated with the wallet. |
| getNetwork(): Promise\ | Retrieves the network value. (e.g: 1, 137, 'mainnet') |
| isConnected(): Promise\ | If the wallet is connected. |
| proveOwnership(messageToSign: string): Promise\ | Proves ownership of the wallet by signing a message. |
| signMessage(messageToSign: string): Promise\ | Signs a message using the wallet. |
| switchNetwork(networkChainId: number \| string): Promise\ | Switches the network that the wallet is connected to. |
| sync(): Promise\ | Prompts the user to reconnect the wallet if not connected and only resolves when the wallet is connected and active. |
### WalletConnector Interface
The connector is akin to the wallet provider itself i.e. Metamask, Phantom, etc. It is abstracted away from any single account. Therefore you'll find methods and props that are relevant to the wallet provider itself like isInstalledOnBrowser, or getDeepLink.
Below we outline the props and methods for a wallet connector object no matter what chain the account belongs to. In each chain specific section, we also outline the props and methods for a wallet connector object for that chain.
| Field | Description |
| ---------------------------------------------------------------------------------- | ---------------------------------------------------------------------------------------------- |
| canConnectViaCustodialService: boolean | If the wallet needs to be connected via a custodial service such as Blocto, this will be true. |
| canConnectViaQrCode: boolean | If the wallet is not installed, and can be connected via a QR code, this will be true. |
| canConnectViaSocial: boolean | Whether this connector can be connected via social login. |
| chainRpcProviders: typeof ChainRpcProviders \| undefined | The RPC providers for the chain the wallet is connected to |
| connectedChain: Chain | The chain this wallet is connected to |
| endSession(): Promise\ | Close the wallet connection |
| getAddress(opts?: GetAddressOpts): Promise\ | Get the public address of the wallet |
| getAdditionalAddresses(mainAddress?: string): Promise\ | Get the additional addresses of the wallet, given the main address |
| getConnectedAccounts(): Promise\ | Get the address silently |
| getDeepLink(): string \| undefined | Get the deep link of the wallet |
| getMobileOrInstalledWallet(): WalletConnector | Whether the wallet connector should fall back to a different wallet connector |
| getNetwork(): Promise\ | Get the current network of the wallet |
| getSession(): unknown \| Promise\ | Get the session for the wallet |
| isAvailable: boolean | If the wallet provider is available (i.e. Metamask is not installed) |
| isEmbeddedWallet: boolean | If the wallet generated by a valid embedded wallet provider |
| isInitialized: boolean | Whether the connector has been initialized |
| isInstalledOnBrowser(): boolean | Check if the wallet is installed on the browser |
| isWalletConnect: boolean | Flag if it is wallet Connect |
| key: string | Override key or the normalized wallet name if needed |
| proveOwnership(messageToSign: string): Promise\ | In most cases this is an alias for `signMessage` |
| providerResources: string\[] \| undefined | Additional resources to add to the message to be signed |
| supportsNetworkSwitching():boolean | Whether the wallet supports network switching |
| switchNetworkOnlyFromWallet: boolean \| undefined | Requires switching network in the wallet itself |
## Chain specific interfaces
* [EVM Interactions](/wallets/using-wallets/evm/evm-wallets)
* [Bitcoin Interactions](/wallets/using-wallets/bitcoin/bitcoin-wallets)
* [Solana Interactions](/wallets/using-wallets/solana/solana-wallets)
# Send Solana Legacy Transaction
Source: https://docs.dynamic.xyz/wallets/using-wallets/solana/send-legacy-solana-transaction
```tsx
import React, { useState } from 'react';
import type { ISolana } from '@dynamic-labs/solana-core';
import { isSolanaWallet } from '@dynamic-labs/solana-core';
import { useDynamicContext } from '@dynamic-labs/sdk-react-core';
import type { Connection } from '@solana/web3.js';
import { PublicKey, SystemProgram, Transaction } from '@solana/web3.js';
function LegacyTransaction() {
const [address, setAddress] = useState('');
const [amount, setAmount] = useState('');
const { primaryWallet } = useDynamicContext();
const sendTransaction = async () => {
if(!primaryWallet || !isSolanaWallet(primaryWallet)) {
return;
}
const connection: Connection = await primaryWallet.getConnection();
const cluster = connection.rpcEndpoint.includes('devnet') ? 'devnet' : 'mainnet';
const fromKey = new PublicKey(primaryWallet.address);
const toKey = new PublicKey(address);
const amountInLamports = Number(amount) * 1000000000;
const transferTransaction = new Transaction().add(
SystemProgram.transfer({
fromPubkey: fromKey,
lamports: amountInLamports,
toPubkey: toKey,
}),
);
const blockhash = await connection.getLatestBlockhash();
transferTransaction.recentBlockhash = blockhash.blockhash;
transferTransaction.feePayer = fromKey;
const signer: ISolana = await primaryWallet.getSigner();
await signer
.signAndSendTransaction(transferTransaction)
.then((value: { signature: string }) => {
console.log(
`Transaction successful: https://solscan.io/tx/${value.signature}?cluster=${cluster}`,
);
})
.catch((error: Error) => {
console.error(error);
});
}
return (
)
}
export default LegacyTransaction;
```
# Send a Versioned Solana Transaction
Source: https://docs.dynamic.xyz/wallets/using-wallets/solana/send-versioned-solana-transaction
```tsx
import { isSolanaWallet } from '@dynamic-labs/solana';
import { Connection, PublicKey, SystemProgram, TransactionMessage, VersionedTransaction, VersionedTransactionResponse } from "@solana/web3.js";
const { primaryWallet } = useDynamicContext();
if(!primaryWallet || !isSolanaWallet(primaryWallet)) {
return;
}
const connection: Connection = await primaryWallet.getConnection();
const fromKey = new PublicKey(primaryWallet.address);
const toKey = new PublicKey(address);
const amountInLamports = Number(amount) * 1000000000;
const instructions = [
SystemProgram.transfer({
fromPubkey: fromKey,
lamports: amountInLamports,
toPubkey: toKey,
}),
];
const blockhash = await connection.getLatestBlockhash();
// create v0 compatible message
const messageV0 = new TransactionMessage({
instructions,
payerKey: fromKey,
recentBlockhash: blockhash.blockhash,
}).compileToV0Message();
const transferTransaction = new VersionedTransaction(messageV0);
const signer = await primaryWallet.getSigner();
await signer
.signAndSendTransaction(transferTransaction)
.then((res: any) => {
console.log(
`Transaction successful: https://solscan.io/tx/${res.signature}?cluster=devnet`,
);
})
.catch((reason: any) => {
console.error(reason);
});
```
# Tips for transactions with Solana embedded wallets
Source: https://docs.dynamic.xyz/wallets/using-wallets/solana/solana-transaction-tips
Navigating transactions on the Solana can be challenging due to network congestion. This guide is designed to equip you with the essential strategies to ensure your transactions are processed smoothly and efficiently when using Dynamic-powered Solana embedded wallets. With the high demand on Solana, it's crucial to have a well-thought-out approach, including selecting the right RPC (Remote Procedure Call) endpoint and understanding how to set priority fees. By carefully choosing an RPC, you can access less congested nodes, which can significantly speed up your transaction times. Additionally, setting appropriate priority fees ensures that your transactions are given the necessary attention by validators. This guide will walk you through these steps, providing practical tips and insights and achieve successful transactions with greater ease and reliability.
## Which Solana RPC do I use?
* We found that Helius, [Helius.dev](http://Helius.dev) was the most reliable RPC.
* Ironforge, [Ironforge.cloud](http://Ironforge.cloud) can be used to improve transaction landing rates by sending transactions to multiple RPCs at a time.
**How do I add a priority fee to my transactions?**
Validators on the Solana network are incentivized by priority fees. Higher fees can attract validators to include a transaction in the next block, thus ensuring faster confirmation times for users willing to pay more.
* Set a priority fee dynamically based on the priority fees sent in recent blocks, can be found easily from the “Helius Priority Fee API”
* [https://docs.helius.dev/solana-rpc-nodes/priority-fee-api](https://docs.helius.dev/solana-rpc-nodes/priority-fee-api)
* [https://solana.com/docs/rpc/http/getrecentprioritizationfees](https://solana.com/docs/rpc/http/getrecentprioritizationfees)
* If your transaction is being broadcast to the network, but it is not actually being confirmed, then you may need to increase your priority fee. You do not need to increase the priority fees drastically above the recent priority fees, as it is not necessary.
```jsx
// Priority fee
const addPriorityFee = ComputeBudgetProgram.setComputeUnitPrice({
microLamports: 1,
});
// Total fee will be 5,001 Lamports for 1M CU
const transaction = new Transaction()
.add(addPriorityFee)
.add(
SystemProgram.transfer({
fromPubkey: payer.publicKey,
toPubkey: toAccount,
lamports: 10000000,
}),
);
```
## What is the compute unit limit and why should I modify it?
* Solana programs have a compute limitations: **Max Compute per block**: 48 million CU
* Therefore, if you decrease/optimize the compute unit limit for your transaction, it is more likely to land since it is more likely to fit in the block. E.g, only 48 transactions with 1 million CU can fit in one block, but 96 transactions with 0.5 million CU can fit in a block.
```jsx
// Compute unit budget
const modifyComputeUnits = ComputeBudgetProgram.setComputeUnitLimit({
units: 1000000,
});
// Total fee will be 5,001 Lamports for 1M CU
const transaction = new Transaction()
.add(modifyComputeUnits)
.add(
SystemProgram.transfer({
fromPubkey: payer.publicKey,
toPubkey: toAccount,
lamports: 10000000,
}),
);
```
## General Tips
* Refresh the blockhash in your transaction before sending it, as a transaction will fail if the blockhash it references is 150 blocks old.
```jsx
const connection = await primaryWallet.getConnection();
const signer = await primaryWallet.getSigner();
const { blockhash } = await connection.getLatestBlockhash();
transaction.message.recentBlockhash = blockhash;
await signer
.signAndSendTransaction(transaction)
```
* implement your own manual method to rebroadcast transactions. After a transaction is signed, you can keep sending the transaction to the RPC for about another minute before it expires.
## More links
[https://www.helius.dev/blog/how-to-land-transactions-on-solana](https://www.helius.dev/blog/how-to-land-transactions-on-solana)
[https://solana.com/developers/cookbook/transactions/add-priority-fees](https://solana.com/developers/cookbook/transactions/add-priority-fees)
# Solana Wallets
Source: https://docs.dynamic.xyz/wallets/using-wallets/solana/solana-wallets
## Introduction
The Solana wallet connectors will generally have a couple of extra methods. Specifically, in order to interact using public actions with Solana.
## Checking if a wallet is a Solana wallet
You can use the `isSolanaWallet` helper method to check if a wallet is a Solana wallet. That way, TypeScript will know which methods are available to you.
```ts
import { isSolanaWallet } from '@dynamic-labs/solana';
if (!isSolanaWallet(wallet)) {
throw new Error('This wallet is not a Solana wallet');
}
const connection = await primaryWallet.getConnection();
```
## Solana Wallet
| Method | Description |
| ------------------------------------- | ------------------------------------------- |
| getConnection(): Promise\ | Retrieves the RPC connection |
| getSigner(): Promise\ | Retrieves the solana signer for the wallet. |
## Examples
You can find examples of how to interact with Solana wallets in the examples section:
* [Send a Legacy Solana Transaction](/wallets/using-wallets/solana/send-legacy-solana-transaction).
* [Send a Versioned Solana Transaction](/wallets/using-wallets/solana/send-versioned-solana-transaction).
# Working with environments that have both v1 and v2 embedded wallets
Source: https://docs.dynamic.xyz/wallets/v1-embedded/environments-with-v1-and-v2-embedded-wallets
This article is for developers who are working with environments that have both v1 and v2 embedded wallets. You can check the version of the wallet by checking the version parameter in the verified credential of the wallet, or by using [the dashboard](https://app.dynamic.xyz/dashboard/users/authenticated).
 ## Overview
### Key difference between V1 and v2 embedded wallets
v1 embedded wallets require transaction MFA. This means that before a transaction can be signed by the end user, they must
perform an additional MFA step. Currently we support Passkeys and One Time Codes for transaction MFA.
v2 embedded wallets allow transaction MFA to be configured as optional. This means that after an end user logs in/ signs up
and obtains a valid JWT, they will be able to perform actions with their embedded wallet without any additional MFA steps.
Currently adding transaction MFA is disabled for v2 embedded wallets. Configuring this will be possible in a future update.
### Example of signing a transaction using v1 embedded wallets
## Overview
### Key difference between V1 and v2 embedded wallets
v1 embedded wallets require transaction MFA. This means that before a transaction can be signed by the end user, they must
perform an additional MFA step. Currently we support Passkeys and One Time Codes for transaction MFA.
v2 embedded wallets allow transaction MFA to be configured as optional. This means that after an end user logs in/ signs up
and obtains a valid JWT, they will be able to perform actions with their embedded wallet without any additional MFA steps.
Currently adding transaction MFA is disabled for v2 embedded wallets. Configuring this will be possible in a future update.
### Example of signing a transaction using v1 embedded wallets
```javascript
import { useEmbeddedWallet, useDynamicContext } from "@dynamic-labs/sdk-react-core"
import { isEthereumWallet } from "@dynamic-labs/ethereum"
// component declaration and all other logic you might need
const {
createOrRestoreSession,
isSessionActive,
sendOneTimeCode,
userHasEmbeddedWallet
} = useEmbeddedWallet();
const { primaryWallet } = useDynamicContext();
const oneTimeCodeSent = useRef(false);
useEffect(() => {
const startSession = () => {
try {
if (isSessionActive) return;
createOrRestoreSession();
} catch (err) {
return;
}
};
startSession();
}, []);
const onSendOneTimeCodeHandler = async () => {
if(!isSessionActive) {
try {
await sendOneTimeCode();
oneTimeCodeSent.current = true;
return;
} catch(e) {
console.error(e)
}
}
else return;
}
const onCreateSessionHandler: FormEventHandler = async (event) => {
try {
event.stopPropagation();
event.preventDefault();
if (!primaryWallet || !userHasEmbeddedWallet()) return;
const otc = event.currentTarget.otc.value;
await createOrRestoreSession({oneTimeCode: otc})
.then((result) => setResult(result))
.catch((error) => setResult(JSON.stringify(error, null, 2)));
} catch (err) {
logger.error(err);
}
};
const handleTransaction = async () => {
if(!isEthereumWallet(primaryWallet)) return;
const provider = await primaryWallet.getWalletClient();
const transaction = {
account: primaryWallet.address as Hex,
chain: getChain(await provider.getChainId()),
to: address as Hex,
value: amount ? parseEther(amount) : undefined,
};
const hash = await provider.sendTransaction(transaction);
const client =
await primaryWallet.getPublicClient();
const { transactionHash } = await client.getTransactionReceipt({
hash,
});
console.log('Transaction: ' + transactionHash);
}
return (
<>
{!isSessionActive && (
)
```
### Socials
#### Show users linked social accounts, allow linking/unlinking
How: useSocialAccounts hook from sdk-react-core
Hook/Component: [useSocialAccounts](/react-sdk/hooks/usesocialaccounts)
Notes: None
```jsx
import { useSocialAccounts } from "@dynamic-labs/sdk-react-core";
import { SocialIcon } from '@dynamic-labs/iconic';
const Avatar = ({ avatarUrl }) => {
return (
 );
};
const Icon = ({ provider }) => {
return (
);
};
const Icon = ({ provider }) => {
return (
{isProviderLinked ? (
) : (
)}
);
};
const Socials = () => {
const providers = [
"discord",
"facebook",
"github",
"google",
"instagram",
"twitch",
"twitter",
];
return (
{providers.map((provider) => (
);
};
```
# Headless Wallet Management
Source: https://docs.dynamic.xyz/headless/headless-wallet-management
This guide covers how to implement the wallet aspect of the Dynamic Widget UI Component but using only our SDK hooks and your own UI implementation.
## Prerequisites
Like with all this series of headless guides, "headless" is defined a way to use the Dynamic SDK without the need for Dynamic UI components (i.e. DynamicWidget, DynamicUserProfile).
You still need to add the SDK and set up the Dynamic Context Provider (complete [the quickstart](/quickstart) if you haven't done so already, or refer to [an example app](/example-apps))
## Signup/Login
### Fetch available wallets
You can find the list of available wallets in the `walletOptions` prop returned by the [useWalletOptions hook](/react-sdk/hooks/usewalletoptions).
When browsing wallets in the Dynamic Widget, you might see labels beside them like "Last Used", "Multichain" or "Recommended".
Last used comes from the "dynamic\_last\_used\_wallet" value in localstorage.
"Multichain" comes from the `chainGroup` node in each wallet (Remember to also add [the WalletConnectors](/chains/enabling-chains#enabling-a-chain-network) for each chain).
"Recommendeded" from [the Recommended Wallets feature](/wallets/advanced-wallets/recommend-wallets).
### Display a wallet icon
Use the `@dynamic-labs/wallet-book` library to display a wallet icon using the exported `WalletIcon` component. This component takes a `walletKey` prop, which is the key of the wallet you want to display.
```tsx
import { WalletIcon } from '@dynamic-labs/wallet-book'
const WalletIconComponent = () => {
return
Watch a product walkthrough
Play around with the SDK
Get up and running in minutes
Be part of the Dynamic Slack group
#### Common Docs
Some of the common next steps after completing the quickstart etc. above are:
* [Configuring the Signup page](/design-customizations/signup-login)
* [Start interacting with wallets](/wallets/using-wallets/interacting-with-wallets)
* [Customizing the look and feel of the UI](/design-customizations)
* [Adding custom EVM Networks](/chains/evmNetwork)
* [Collecting custom information](/custom-fields/overview)
* [Adding smart wallet support](/smart-wallets/add-smart-wallets)
#### Support & Feedback
You can reach out to us at any time for questions, issues, concerns, product
ideas, or random thoughts. Here are some ways to do so:
Join our Slack community
Send us a tweet or DM us any time.
Email us at [hello@dynamic.xyz](mailto:hello@dynamic.xyz)
Bug our founders at any point at [founders@dynamic.xyz](mailto:founders@dynamic.xyz) (tell us anything that's on your mind - the good and the bad).
# Migrating to Dynamic
Source: https://docs.dynamic.xyz/migrations/migration-guide
Migration from one auth and embedded wallet provider to another can seem daunting. You have users, they might have wallets, and a subset of them will have assets in their wallets, making it a fun adventure of a migration. But have no fear! We can help. Below, we put together a guide on migration strategies you can think through depending on your use case. At the end of the guide you'll also find some helpful tips and techniques to ensure the migration all goes smoothly.
When in doubt, talk to us. Migrations can get complex, and we'd love to help
guide you through them. You can [set up a call with us
here](https://www.dynamic.xyz/talk-to-us)
If you don't want to migrate yet, but want to take advantage of Dynamic on top of your existing provider, you can also use [our Third Party Authentication feature](/authentication-methods/third-party-auth).
We put together a simple flow chart to help you identify the right migration strategy:
 ## Migration Path A: You only have a front-end "connect wallet" flow
### Common scenarios
You built your own front end wallet connector or use Rainbowkit/ConnectKit. There is no SIWE, no issuing JWTs, and mostly just a front end.
### Recommended approach
You pretty much just swap out the modals. If you use wagmi, add our [wagmi connector](/react-sdk/using-wagmi#-install-wagmi) and follow our [rainbowkit guide](/migrations/tutorials/rainbowkit), but in general, no migration needed. After the initial update to the Dynamic modal, you can stay on our [connect-only mode](/wallets/advanced-wallets/connect) and not store any user info with Dynamic, or alternatively start adding more sophisticated features.
## Migration Path B: You store wallet info somewhere and a wallet is a user
### Common scenarios
You built your own front end wallet connector or use Rainbowkit/ConnectKit, and in addition implemented a SIWE on your own, authenticating users and creating sessions for them.
### Recommended approach
For front end changes, you can follow path A above. In addition, you can use our [create wallet](/api-reference/wallets/createWallet) endpoint to generate users and add wallet records to them. When they first log in, they will verify wallet ownership via SIWE (we provide that and return a JWT - you don't need to do this), and you're done.
## Migration Path C: You have users, but no embedded wallets
### Common scenarios
You use Auth0, Firebase or another web2 user management system, or alternatively created something on your own. You store your users' emails and basic info.
### Recommended approach
You'll need to import your users into Dynamic
1. [Bulk upsert your users into Dynamic](/api-reference/users/bulkCreateUser), including their info capture/kyc information and their data
2. For any profile information that Dynamic does not yet explicitly support, you can add these in the user.metadata, which is a key-value object
3. When they log in, we verify their emails
And that's it. You're done. When your users log in next time around, we will verify their email addresses/social login information independently as part of the auth flow, and issue a JWT once you have successfully logged in.
## Migration Path D: You have users, and they have embedded EOA wallets
### Common scenarios
You use an embedded wallets provider, or have built a simple KMS-based key management system on your own
### Recommended approach
**There are really two options here:**
1. Keep current users in their existing embedded wallets and generate Dynamic wallets for new users
2. Migrate existing wallet users to Dynamic
**Keep current users:**
1. Switch to Dynamic auth
2. When user logs in with email, check if they have an existing account:
* If so, redirect them to old login flow
* If they don't, create a Dynamic-powered embedded wallet for them
```typescript
import { useEmbeddedWallet } from "@dynamic-labs/sdk-react-core";
// component declaration and all other logic you might need
const { createEmbeddedWallet } = useEmbeddedWallet();
const onCreateWalletHandler = async () => {
try {
await createEmbeddedWallet();
} catch (e) {
console.error(e);
}
};
```
**Migrate users:**
1. You'll need to import your users into Dynamic (the previous section)
2. When a user logs in, check if they have a wallet in the previous system
3. Check if wallet was ever used/is empty
4. If it isn't, prompt user to transfer funds to new Dynamic wallet (this can feel like an account upgrade flow for the users)
5. Next time that the user logs in, they go to their Dynamic wallet
## Migration Path E: You have users, and they have AA wallets
### Considerations
1. Your users have an EOA embedded wallet, but it only serves as a signer for an AA layer (safe, zerodev etc).
2. Hence, you'll want to add the Dynamic-powered embedded wallet as a second signer to the AA layer, or alternatively swap signers from the old embedded wallet one to the Dynamic one
**Main activities**
You'll want to have the end user add their new Dynamic wallet as a second signer to the smart contract wallet, or alternatively have them replace the current signer with a second signer
**Steps**
## Migration Path A: You only have a front-end "connect wallet" flow
### Common scenarios
You built your own front end wallet connector or use Rainbowkit/ConnectKit. There is no SIWE, no issuing JWTs, and mostly just a front end.
### Recommended approach
You pretty much just swap out the modals. If you use wagmi, add our [wagmi connector](/react-sdk/using-wagmi#-install-wagmi) and follow our [rainbowkit guide](/migrations/tutorials/rainbowkit), but in general, no migration needed. After the initial update to the Dynamic modal, you can stay on our [connect-only mode](/wallets/advanced-wallets/connect) and not store any user info with Dynamic, or alternatively start adding more sophisticated features.
## Migration Path B: You store wallet info somewhere and a wallet is a user
### Common scenarios
You built your own front end wallet connector or use Rainbowkit/ConnectKit, and in addition implemented a SIWE on your own, authenticating users and creating sessions for them.
### Recommended approach
For front end changes, you can follow path A above. In addition, you can use our [create wallet](/api-reference/wallets/createWallet) endpoint to generate users and add wallet records to them. When they first log in, they will verify wallet ownership via SIWE (we provide that and return a JWT - you don't need to do this), and you're done.
## Migration Path C: You have users, but no embedded wallets
### Common scenarios
You use Auth0, Firebase or another web2 user management system, or alternatively created something on your own. You store your users' emails and basic info.
### Recommended approach
You'll need to import your users into Dynamic
1. [Bulk upsert your users into Dynamic](/api-reference/users/bulkCreateUser), including their info capture/kyc information and their data
2. For any profile information that Dynamic does not yet explicitly support, you can add these in the user.metadata, which is a key-value object
3. When they log in, we verify their emails
And that's it. You're done. When your users log in next time around, we will verify their email addresses/social login information independently as part of the auth flow, and issue a JWT once you have successfully logged in.
## Migration Path D: You have users, and they have embedded EOA wallets
### Common scenarios
You use an embedded wallets provider, or have built a simple KMS-based key management system on your own
### Recommended approach
**There are really two options here:**
1. Keep current users in their existing embedded wallets and generate Dynamic wallets for new users
2. Migrate existing wallet users to Dynamic
**Keep current users:**
1. Switch to Dynamic auth
2. When user logs in with email, check if they have an existing account:
* If so, redirect them to old login flow
* If they don't, create a Dynamic-powered embedded wallet for them
```typescript
import { useEmbeddedWallet } from "@dynamic-labs/sdk-react-core";
// component declaration and all other logic you might need
const { createEmbeddedWallet } = useEmbeddedWallet();
const onCreateWalletHandler = async () => {
try {
await createEmbeddedWallet();
} catch (e) {
console.error(e);
}
};
```
**Migrate users:**
1. You'll need to import your users into Dynamic (the previous section)
2. When a user logs in, check if they have a wallet in the previous system
3. Check if wallet was ever used/is empty
4. If it isn't, prompt user to transfer funds to new Dynamic wallet (this can feel like an account upgrade flow for the users)
5. Next time that the user logs in, they go to their Dynamic wallet
## Migration Path E: You have users, and they have AA wallets
### Considerations
1. Your users have an EOA embedded wallet, but it only serves as a signer for an AA layer (safe, zerodev etc).
2. Hence, you'll want to add the Dynamic-powered embedded wallet as a second signer to the AA layer, or alternatively swap signers from the old embedded wallet one to the Dynamic one
**Main activities**
You'll want to have the end user add their new Dynamic wallet as a second signer to the smart contract wallet, or alternatively have them replace the current signer with a second signer
**Steps**
This is non-trivial, and we recommend that we chat before starting this
process. [You can book time here](https://www.dynamic.xyz/talk-to-us)
## Extra Migration Techniques/Tips
### Asset Transfers
If your users have assets in their existing embedded wallets, then you'll want to ensure they move those over to their new Dynamic-powered embedded wallets. To do this, you'll want to build a migration flow for your users either using your own UI to prompt asset transfer (recommended), or by sending them to a tool such as [BulkSender](https://bulksender.app/).
### Webhooks
As you import your users into Dynamic, you may want to notify other systems and take further action - webhooks allow you to do exactly this. We have events such as user.created, user.updated, wallet.created and many more (find the full list [here](/developer-dashboard/eventTypes)).
Setting them up is as simple as providing a URL to post to [in the Dynamic Dashboard](https://app.dynamic.xyz/dashboard/developer/webhooks) and selecting which events you'd like to subscribe to (there's a full guide [here](/developer-dashboard/webhooks)).
# Migrating Users via CSV
Source: https://docs.dynamic.xyz/migrations/tutorials/importing
Dynamic.xyz offers a versatile platform for managing users and their associated data. If you're transitioning from another system, dynamic.xyz's API simplifies the process of migrating these users. The API is flexible and does not require any specific field to create a user, you only need at least one field. This guide will demonstrate how to migrate users from a data source, such as a CSV file, into dynamic.xyz's user management system using TypeScript.
### Step 1: Get an API Token
You'll first need to obtain an API token from the dynamic.xyz dashboard. Follow the instructions provided in the [API reference](/api-reference/overview#get-an-api-token-from-dashboard) to get your token.
### Step 2: Prepare Your Data Source
Prepare a data source, such as a CSV file, with your users' data. In this guide, we'll use a CSV file as an example, but remember that you can use any data source that you can read programmatically. The file needs to contain at least one field for each user.
### Step 3: Write a Script to Send Requests
You can use a script to read from your data source and send POST requests to the dynamic.xyz create user API endpoint. Here's an example script in TypeScript using `axios` and `csv-parser`:
```typescript
import axios from "axios";
import fs from "fs";
import csv from "csv-parser";
// Replace with your actual API token and environment ID
const API_TOKEN = "YOUR_API_TOKEN";
const ENVIRONMENT_ID = "<>";
// URL for the API endpoint
const url = `https://app.dynamic.xyz/api/v0/environments/${ENVIRONMENT_ID}/users`;
// Set up headers for the request
const headers = {
"Content-Type": "application/json",
Authorization: `Bearer ${API_TOKEN}`,
};
// Open the CSV file and read the data
fs.createReadStream("users.csv")
.pipe(csv())
.on("data", async (row) => {
// Prepare the user data for the request
const user_data = {
field: row["field"], // replace 'field' with the actual field name from your CSV
};
// Send the POST request to the API
try {
const response = await axios.post(url, user_data, { headers });
console.log(
`User created successfully: ${JSON.stringify(response.data)}`
);
} catch (error) {
console.error(`Failed to create user. Error: ${error}`);
}
});
```
In the above TypeScript code, replace `'users.csv'` with the path to your actual data source, and replace `'YOUR_API_TOKEN'` and `'YOUR_ENVIRONMENT_ID'` with your actual API token and environment ID. Also, replace `'field'` with the name of the actual field you're using from your data source.
Please note that this is a basic script and does not handle errors robustly. In a production environment, you'd want to add error handling code to deal with potential issues such as network errors, API rate limits, and incorrect data in your data source.
Remember to install the necessary libraries if you haven't already done so:
```shell
npm install axios csv-parser
```
For more information on the user creation API endpoint, refer to the [API reference](/api-reference/users/createUser).
# Migration from RainbowKit
Source: https://docs.dynamic.xyz/migrations/tutorials/rainbowkit
Rainbowkit is a popular wallet adapter library built on Wagmi. That said, it has several limitations in terms of flexibility, customizability etc. As your company scales, it makes sense to explore transitioning to Dynamic for wallet auth. In this guide, we'll cover how you can quickly swap out Rainbowkit for Dynamic.
### A few notes
1. Rainbowkit uses wagmi for all functions. Dynamic can leverage wagmi as well, requiring a quick connector to coordinate between the libraries.
2. Rainbowkit requires that you manage your own authentication. Dynamic, on the other hand, comes with auth built in and will return a JWT if you select the connect and auth option.
### Overview
To start, we will assume your current setup looks similar to this:
```jsx
const App = () => {
return (
);
};
```
In this setup, you have 3 dependencies:
1. Ethers.js
2. Wagmi
3. Rainbowkit
### Step 1: Set up the Dynamic SDK
```bash Shell
npm install @dynamic-labs/sdk-react-core
```
> 📘 Note: Dynamic comes with ethers.js as part of its package, meaning you can remove any independent ethers.js installation.
You can read the full Dynamic set up guide [here](/quickstart).
### Step 2: Set up the Dynamic Wagmi connector
```bash Shell
npm install @dynamic-labs/wagmi-connector
```
You can read the full wagmi guide [here](/react-sdk/using-wagmi).
### Step 3: Configure Dynamic instead of Rainbowkit
#### Replace `RainbowKitProvider` with `DynamicContextProvider`
> 📘 Note: you'll need to grab a Dynamic environment ID from your [developer dashboard](https://app.dynamic.xyz)
First, we will swap out the Rainbowkit provider with the Dynamic one.
```jsx
const App = () => {
return (
);
};
```
#### Replace `WagmiConfig` with `DynamicWagmiConnector`
As mentioned in the full wagmi guide above, the `DynamicWagmiConnector` replaces `wagmiConfig` in the Dynamic setup. Note that the Dynamic provider wraps the Wagmi connector, vs wagmi wrapping the Rainbowkit adapter.
```jsx
const App = () => {
return (
);
};
```
#### Replace `ConnectButton` with `DynamicWidget`
Dynamic uses the Dynamic widget to manage wallets, connect, user profile etc. We will replace the Rainbowkit ConnectButton with it:
```jsx
export const App = () => {
return (
);
};
```
**That's it! you should now have Dynamic working instead of Rainbowkit.**
### Things to know
#### Authenticating with Dynamic vs Rainbowkit
As mentioned above, Dynamic comes built in with authentication. That means that as part of a Dynamic setup, you receive optional access to user management functions, as well as a JWT that contains verified credentials for the user.
Optionally, you can chose to keep the only connect-only experience of Rainbowkit. To do so, you can add to the settings \`initialAuthenticationMode: 'connect-only'. You can read more about connect-only vs authentication[here.](/wallets/advanced-wallets/connected-vs-authenticated)
#### Chains and customization
Rainbowkit configures chains within code using wagmi. Dynamic, on the other hand, pulls its configuration from your [developer dashboard](https://app.dynamic.xyz/dashboard/configurations).
# Quickstart
Source: https://docs.dynamic.xyz/quickstart
Let's get you up and running with a full signup/login UI! Just [sign up](https://app.dynamic.xyz) and follow the guide below!
You can also refer to one of [our sample apps](/example-apps) if you want to
clone a full application rather than embed into an existing one!
## Select your SDK
## Install the SDK
EthereumWalletConnectors also includes all EVM compatible chains including
layer 2's i.e. Base as well as [Dynamic Embedded
Wallets](/wallets/embedded-wallets/dynamic-embedded-wallets). Learn more about WalletConnectors [here](/react-sdk/providers/dynamiccontextprovider#walletconnectors).
## Initialize the SDK
If you are using Wagmi, make sure to read our [full Wagmi
guide](/react-sdk/using-wagmi) for more setup instructions.
If you're using Vite, you'll need to check out [the polyfills guide](/troubleshooting/react/vitejs-polyfills-necessary-for-dynamic-sdk).
If you see any other errors, it's worth checking out [Dynamic Doctor](/troubleshooting/dynamic-doctor) for quick debugging tips!
To quickly test the login flow, you can enable [Test
Accounts](/developer-dashboard/test-accounts) in Sandbox mode.
## Celebrate & Learn More!
That's it! You should now have an initial working version of the Dynamic login flow. You can now configure different kinds of signup flows including [Embedded wallets](/wallets/embedded-wallets/dynamic-embedded-wallets) and [Email, Social & SMS](/authentication-methods/email-social-sms).
You can also [join our Slack Community](https://www.dynamic.xyz/slack) to ask us
anything on your mind.
# Account Abstraction with ZeroDev
Source: https://docs.dynamic.xyz/react-native/account-abstraction
When using account abstraction in your project to sponsor gas, batch transactions, or any other account abstraction features, you will likely want to get a ZeroDev kernel client to perform these operations.
You can use the `@dynamic-labs/zerodev-extension` package to create a ZeroDev kernel client for a wallet.
Here is how you can set up and create a kernel client.
The `@dynamic-labs/zerodev-extension` depends on the Viem Extension, so before going through this setup, make sure to have the Viem Extension set up and working. [Viem Extension Setup](/react-native/viem)
# Setup
## Install ZeroDevExtension
Install the @dynamic-labs/zerodev-extension package:
```bash Shell
npx expo install @dynamic-labs/zerodev-extension@alpha
```
```bash Shell
npm install @dynamic-labs/zerodev-extension@alpha
```
```bash Shell
yarn add @dynamic-labs/zerodev-extension@alpha
```
## Resolve File Resolution Error (Optional)
When running the ZeroDevExtension in your React Native application, you might encounter an error where Metro cannot resolve the `paymasterClient.js` file. This issue occurs because Metro tries to load `paymasterClient.js`, but the actual file is named `paymasterClient.ts`.
To fix this, you need to customize Metro’s resolver in your `metro.config.js` file to handle TypeScript file extensions properly.
### Generate metro.config.js for Expo Projects
If you don’t have a `metro.config.js` file in your project, you can generate one using the following command:
```bash
npx expo customize metro.config.js
```
### Customize Metro Resolver
Add the following code to your `metro.config.js` file to instruct Metro to resolve `.ts` files when it cannot find the corresponding `.js` files:
```js
// metro.config.js
/**
* Custom resolver to handle ZeroDev imports
*/
config.resolver.resolveRequest = (context, moduleName, platform) => {
try {
return context.resolveRequest(context, moduleName, platform);
} catch (error) {
if (moduleName.endsWith(".js")) {
const tsModuleName = moduleName.replace(/\.js$/, ".ts");
return context.resolveRequest(context, tsModuleName, platform);
}
throw error;
}
};
```
This modification allows Metro to attempt to resolve `.ts` files when it fails to find `.js` files, which fixes the resolution error for the `paymasterClient` file.
## Events Polyfill
ZeroDevExtension requires a polyfill for the Node.js events module. You can install the [events](https://www.npmjs.com/package/events) polyfill using one of the following commands:
```bash Shell
npx expo install events
```
```bash Shell
npm install events
```
```bash Shell
yarn add events
```
## Integrate with your Dynamic client
To include the ZeroDev module in your Dynamic client, you need to extend the client with the ZeroDev extension:
```typescript
import { createClient } from "@dynamic-labs/client";
import { ViemExtension } from "@dynamic-labs/viem-extension";
import { ZeroDevExtension } from "@dynamic-labs/zerodev-extension";
const dynamicClient = createClient({
environmentId: "",
})
.extend(ViemExtension())
.extend(ZeroDevExtension());
```
Now your setup is complete, and you have the ZeroDev module available in your Dynamic client.
# Usage
Now that you have the ZeroDev module in your Dynamic client, you can get the ZeroDev kernel client by using the `dynamicClient.zeroDev.createKernelClient` method. Here is an example:
```typescript
// dynamicClient.ts
const dynamicClient = createClient({
environmentId: "",
})
.extend(ViemExtension())
.extend(ZeroDevExtension());
// getPrimaryWalletKernelClient.ts
const getPrimaryWalletKernelClient = async () => {
const primaryWallet = dynamicClient.wallets.primaryWallet;
if (!primaryWallet) {
throw new Error('No primary wallet');
}
const kernelClient = await dynamicClient.zeroDev.createKernelClient({
wallet: primaryWallet
});
return kernelClient;
}
```
# Examples
## Batch transaction example
This example demonstrates how you can use a ZeroDev kernel client to perform a batched transaction:
```typescript
import { encodeFunctionData } from 'viem';
const contractAddress = '0x123';
const contractABI = [
{
inputs: [{ internalType: 'address', name: '_to', type: 'address' }],
name: 'mint',
outputs: [],
stateMutability: 'nonpayable',
type: 'function',
},
];
const sendBatchedTransactions = async () => {
const primaryWallet = dynamicClient.wallets.primaryWallet;
if (!primaryWallet) {
throw new Error('No primary wallet');
}
const kernelClient = await client.zeroDev.createKernelClient({
wallet: primaryWallet,
});
const { account } = kernelClient;
const hash = await kernelClient.sendUserOperation({
account,
userOperation: {
callData: await account.encodeCallData([
{
data: encodeFunctionData({
abi: contractABI,
args: [primaryWallet.address],
functionName: 'mint',
}),
to: contractAddress,
value: BigInt(0),
},
{
data: encodeFunctionData({
abi: contractABI,
args: [primaryWallet.address],
functionName: 'mint',
}),
to: contractAddress,
value: BigInt(0),
},
]),
},
});
return hash;
}
```
# Setting up the Dynamic Client
Source: https://docs.dynamic.xyz/react-native/client
The Dynamic Client is a vanilla javascript package that allows users to quickly set up all the configurations
needed to get an interface that allows them to interact with our features.
It provides a very simple, bare bones client object through the call to `createClient`.
This client can then be extended with many other features, like React Native support and viem integration.
## Installation
Simply run the following in your terminal:
```bash Shell
npm install @dynamic-labs/client@alpha
```
```bash Shell
npx expo install @dynamic-labs/client@alpha
```
```bash Shell
yarn install @dynamic-labs/client@alpha
```
## Set up
Now create your client with the following code:
```typescript
import { createClient } from '@dynamic-labs/client'
export const dynamicClient = createClient({
environmentId: 'YOUR-ENVIRONMENT-ID',
// Optional:
appLogoUrl: 'https://demo.dynamic.xyz/favicon-32x32.png',
appName: 'Dynamic Demo',
})
```
You can read more about our client package [here](/react-native/package-references/client).
# Deeplink URLs
Source: https://docs.dynamic.xyz/react-native/deeplink-urls
In order to use most of our react native features (such as social connections), you will first
have to set up the list of mobile deeplink URLs dynamic may use to redirect back to your app.
For security reasons, when deeplinking back to your app, we must verify whether the app's deeplink URL
is included in this list. If it isn't, Dynamic will not perform the deeplink.
## How to set up your app for deeplinking
### Configuring your app's custom scheme
First, you should follow Expo's guide on enabling deeplinking for your app
[here](https://docs.expo.dev/guides/linking/#linking-to-your-app).
### Registering your app's deeplink URL with Dynamic
Afterwards, head to your Dynamic dashboard's
[Security page](https://app.dynamic.xyz/dashboard/security) and enable "Whitelist Mobile Deeplink".
Click "Save changes".
Next, click the cog in this same section to open up the
[Mobile Deeplink URL page](https://app.dynamic.xyz/dashboard/security#mobile-deeplink-urls), and there
you must add your app's deeplink URL with the same custom scheme you configured in the previous step.
It might look something like this: `myappcustomscheme://`.
With this, you're done! Dynamic is ready to deeplink back to your app.
# Using Dynamic's UI
Source: https://docs.dynamic.xyz/react-native/dynamic-ui
Besides all of our headless methods, we also provide a compreehensive set of UI modals that can be easily leveraged
to achieve the same functionalities.
## Using Dynamic's modals
You can leverage our authentication flow modal to sign your users in — this will bring our sign in modal on top of
your app, and once the user has successfully signed in, it will automatically close.
You can show the authentication modal by calling:
```typescript
dynamicClient.ui.auth.show()
```
To hide the authentication modal programmatically, you can use:
```typescript
dynamicClient.ui.auth.hide()
```
After the user has signed in successfully, you can also bring up our user profile interface, which allows your user
to view their wallet's address and balance, as well as editing their fields like email and phone number.
To show the user profile modal, call:
```typescript
dynamicClient.ui.userProfile.show()
```
To hide the user profile modal programmatically, use:
```typescript
dynamicClient.ui.userProfile.hide()
```
You can read more about our UI modules [here](/react-native/package-references/client#ui-module).
# Email and SMS verification
Source: https://docs.dynamic.xyz/react-native/email-and-sms-verification
The dynamic client authentication module enables user authentication via email or SMS.
Notice that email and SMS login methods **must be respectively enabled** in
your environment's dashboard settings first!
## Sending and verifying OTPs
The methods below can be used to send/resend and verify one time passwords
```typescript
// Send, retry and then verify OTP to an email
await dynamicClient.auth.email.sendOTP('someone@gmail.com')
await dynamicClient.auth.email.resendOTP()
await dynamicClient.auth.email.verifyOTP('received-token')
// Send, retry and then verify OTP to a phone number
await dynamicClient.auth.sms.sendOTP({
dialCode: '1',
iso2: 'us',
phone: '2793334444',
})
await dynamicClient.auth.sms.resendOTP()
await dynamicClient.auth.sms.verifyOTP('received-token')
```
### Example
The example below demonstrates a React component that can send, resend and verify OTPs through email.
You can follow the same pattern for phone numbers but collect phone number, iso2 and dial code instead
of email address.
```typescript
import { dynamicClient } from '';
const EmailSignIn: FC = () => {
const [email, setEmail] = useState('')
const [otp, setOtp] = useState('')
const [otpSent, setOtpSent] = useState(false)
const handleSendOTP = async () => {
await dynamicClient.auth.email.sendOTP(email)
setOtpSent(true)
}
const handleResendOTP = () => {
dynamicClient.auth.email.resendOTP()
}
const handleVerifyOTP = () => {
dynamicClient.auth.email.verifyOTP(otp)
}
return (
{!otpSent ? (
) : (
)}
)
}
```
You can read more about these modules [here](/react-native/package-references/client#auth-email-submodule).
# Embedded wallets
Source: https://docs.dynamic.xyz/react-native/embedded-wallets
The dynamic client provides an interface to easily interact with and create embedded wallets for your users.
Notice that embedded wallets **must be enabled** in your environment's
dashboard settings first!
## Creating and Getting the Wallet
This interface allows you to create new embedded wallets, check if any already exist and fetch the current wallet.
See the following example which renders a prompt to create a wallet or renders its address if it already exists:
```typescript
import { dynamicClient } from '';
import { useReactiveClient } from '@dynamic-labs/react-hooks';
const EmbeddedWallet: FC = () => {
const { wallets } = useReactiveClient(dynamicClient)
const wallet = wallets.userWallets[0]
return (
{wallet && wallets.embedded.hasWallet ? (
Your wallet address: {wallet.address}
) : (
)}
)
}
```
## Creating a Wallet for a Specific Chain
The `createWallet` method also allows you to create an embedded wallet for a specific chain
See the example below:
```typescript
import { dynamicClient } from '';
import { useReactiveClient } from '@dynamic-labs/react-hooks';
const AddEvmWalletButton: FC = () => {
return (
)
}}
>
{children}
```
# Architecture & Security
Source: https://docs.dynamic.xyz/wallets/embedded-wallets/architecture-security
## Authentication and JWT
End users must be logged in and issued a JWT by Dynamic's backend API to create and use embedded wallets. This JWT acts as an authentication token allowing the browser to identify a logged in user to the backend. The JWT is signed by a private key that is stored encrypted using our KMS. A developer could validate Dynamic's JWT using a standard JWKS endpoint to retrieve the public key. Unauthenticated requests or requests with an invalid JWT for creating or accessing an embedded wallet will be rejected by the Dynamic API.
## Wallet private key storage
All private keys are encrypted, and never stored in raw form. End user private keys are not accessible to Dynamic, the developer, or the key management service. All decryption functions to use private keys must be user-initiated and done so in secure enclaves (i.e Trusted Execution Environments).
Dynamic does not sign transactions on a end-user’s behalf, and end-users have to take explicit actions to sign transactions. Dynamic also does not offer APIs to sign transactions for end-users.
## Iframes
For data that must never be exposed except to the end-user i.e. private keys, it is sent encrypted through an API call to an iframe in the end-users browser, and only decrypted on the client device. This ensures that at all times, no-one but the end-user will ever be able to access that data, and only on their own device.
## Recovery of Wallets
Recovering a wallet is tied to the authentication method enabled by the application developer. For example, if an application developer allows login with email, the user can always recover their wallet by having access to their email. They can use standard email recovery procedures from their email client to support regaining access.
Adding additional recovery options through other authentication methods.
Dynamic allows users to link other verified credentials to their account such as phone number, Google or other Social Media login methods. If users have multiple credentials assigned, they can be used to recover their wallet if a single method is lost.
Retrieving Wallet Key if Dynamic or Application Developer are down. (Coming soon)
Dynamic will be adding additional fall back support in case an application developer or Dynamic services are down. A custom URL will be available so end-users can log in and export their private key.
## Trusted Execution Environments (AWS Nitro Enclaves)
A core component of Dynamic-powered embedded wallets is the isolation of any sensitive key material or credentials. All sensitive operations that involve an embedded wallet’s private key occur within secure AWS nitro enclaves.
Additionally, token private keys never exist outside of the AWS secure enclave unencrypted. There is no avenue of unilateral access to the secure enclave from any employee of Dynamic, nor our KMS.
## Sessions, Signatures, Transactions
By default, Dynamic allows the end user to use session keys to authenticate and interact with their wallets.
Session keys are implemented by creating api keys in the developer website and registering those as valid authentication methods within a secure enclave. Those session keys are retained by the end user on the developer website and are never sent to Dynamic.
Session key registration requires a valid Dynamic JWT, which is obtained via a successful user authentication. Once the session keys expire, they can no longer be used to authenticate into a Dynamic-powered embedded wallet. If you are using our SDK, session keys are automatically refreshed when expired as long as the JWT is valid
Transactions requests are signed by the end user’s wallet authenticator and validated by our KMS. Upon successful validation, the end user’s private keys are used to sign the actual transaction within the KMS’s secure enclave.
Note that for added account level security, you can [enforce TOTP using an authenticator app](/authentication-methods/mfa).
# Creating Embedded Wallets
Source: https://docs.dynamic.xyz/wallets/embedded-wallets/create-embedded-wallets
No matter how your user signs up, whether it's using social login i.e. Telegram, email/phone login or even with a branded wallet i.e. Metamask, you can create an embedded wallet for them using Dynamic. Simply decide when you want this wallet created and follow the guides below.
{isProviderLinked ? (
{connectedAccountInfo?.publicIdentifier ?? provider}
{enabled && (
)}
)
}
```
### Networks
#### Display current and available networks
How: Use evmNetworks and getNetwork to fetch, use supportsNetworkSwitching and switchNetwork to switch
Hook/Component: [useDynamicContext](/react-sdk/hooks/usedynamiccontext) & [getNetwork](/react-sdk/utilities/getnetwork)
Notes: This example is for Evm networks only
```jsx
import { useDynamicContext, getNetwork } from '@dynamic-labs/sdk-react-core'
const CustomNetworkPicker = () => {
const [currentNetwork, setCurrentNetwork] = useState(null)
const { primaryWallet } = useDynamicContext()
const handleNetworkChange = async (event) => {
const chainId = parseInt(event.target.value)
if (primaryWallet?.connector?.supportsNetworkSwitching()) {
try {
return await primaryWallet?.connector?.switchNetwork({
networkChainId: chainId,
})
} catch (error) {
console.error('Error switching network', error)
}
}
}
useEffect(() => {
if (!currentNetwork)
getNetwork(primaryWallet?.connector).then((network) => {
setCurrentNetwork(network)
})
}, [primaryWallet])
return (
<>
{currentNetwork && (
)}
)
}
```
### Primary Wallet
Primary wallet is the wallet that is defined as the active one of all your connected wallets. All interactions, such as signing or creating transactions, will be made with this wallet. In addition, when leveraging our multiasset functionality, this is the wallet that will be display all available tokens.
#### Display primary wallet address
How: Fetch the primary wallet info from context
Hook/Component: [useDynamicContext](/react-sdk/hooks/usedynamiccontext)
Notes: There can be a moment after logging in when it’s not populated yet
```jsx
import { useDynamicContext } from '@dynamic-labs/sdk-react-core'
const { primaryWallet } = useDynamicContext()
const copyWalletAddress = () => {
navigator.clipboard.writeText(primaryWallet?.address)
}
return (
)
```
#### Display primary wallet icon
How: Utilize the Walletbook library
Hook/Component: WalletIcon (not publicly documented yet)
Notes: Requires the primaryWallet.connector object.
```jsx
import { primaryWallet } from '@dynamic-labs/sdk-react-core'
import { WalletIcon } from '@dynamic-labs/wallet-book'
const WalletIconWrapped = ({ connector }) => {
return (
{balance}
``` #### Show all tokens and balances How: Mapping return from usetokenbalances hook Hook/Component: [https://docs.dynamic.xyz/react-sdk/hooks/usetokenbalances](https://docs.dynamic.xyz/react-sdk/hooks/usetokenbalances) Notes: Multi-asset is only supported on the following networks - Ethereum, Optimism, Polygon, Arbitrum, and Base. ```jsx import { useTokenBalances } from '@dynamic-labs/sdk-react-core' const TokenBalances = () => { const tokenBalances = useTokenBalances() return (
{tokenBalances.map((token) => (
))}
)
}
```
#### Detect Wallet Locking
The wallet object has a field called `connected` which indicates whether the wallet is locked or not, and you can use this to trigger your own workflow to warn the user.
### Multi-Wallet
#### Show all linked wallets and allow unlinking
How: Mapping return from useUserWallets hook and handleUnlinkWallet from useDynamicContext
Hook/Component: [https://docs.dynamic.xyz/react-sdk/hooks/useuserwallets](https://docs.dynamic.xyz/react-sdk/hooks/useuserwallets) & [https://docs.dynamic.xyz/react-sdk/hooks/usedynamiccontext](https://docs.dynamic.xyz/react-sdk/hooks/usedynamiccontext)
Notes: Doesn’t yet show if a wallet is the primary wallet. Unlinking is also handled here.
```jsx
import { useDynamicContext, useUserWallets } from '@dynamic-labs/sdk-react-core'
import { Tooltip } from 'react-tooltip'
const LinkedWallets = () => {
const { handleUnlinkWallet } = useDynamicContext()
const userWallets = useUserWallets()
return (
<>
{userWallets.length > 0 && (
)}
)
}
```
#### Detect which wallet is primary
How: You can grab it directly from useDynamicContext
Hook/Component: [useDynamicContext](/react-sdk/hooks/usedynamiccontext)
```jsx
import { useDynamicContext, useUserWallets } from '@dynamic-labs/sdk-react-core'
const { primaryWallet } = useDynamicContext()
console.log(primaryWallet)
```
#### Allow user to link a new wallet
How: Pop up our linking modal using a hook (setShowLinkNewWalletModal)
Hook/Component: [useDynamicModals](/react-sdk/hooks/usedynamicmodals)
Notes:
* You will need to also use the DynamicMultiWalletPromptsWidget component
```jsx
import {
useDynamicModals,
DynamicMultiWalletPromptsWidget,
} from '@dynamic-labs/sdk-react-core'
const LinkWallet = ({ text }) => {
const { setShowLinkNewWalletModal } = useDynamicModals()
return (
<>
{token.symbol}
{token.balance}
{userWallets.map((wallet) => (
))}
)
}
```
## Wallet Interactions
To learn how to send balance, sign messages etc., please check out [the Wallet Interaction guides](/wallets/using-wallets/interacting-with-wallets) where we split into Read actions and Write actions, and we provide per chain examples for common functionality.
# Welcome
Source: https://docs.dynamic.xyz/introduction/welcome
Welcome to Dynamic! We're so excited that you're here!
### Versioning
This documentation is for V4 of the SDK. Therefore we assume you have [the latest version of V4](https://www.npmjs.com/package/@dynamic-labs/sdk-react-core?activeTab=versions) installed.
If you are looking for V3, please go [here](https://v3.docs.dynamic.xyz)
Please also make sure you have all @dynamic/labs packages on exactly the same version to avoid any issues, and use [Dynamic Doctor](/troubleshooting/dynamic-doctor) for easy debugging. Happy building!
### What is Dynamic?
Dynamic offers smart and beautiful login flows for crypto-native users, simple
onboarding flows for everyone else, and powerful developer tools that go beyond
authentication.
## Migration Path A: You only have a front-end "connect wallet" flow
### Common scenarios
You built your own front end wallet connector or use Rainbowkit/ConnectKit. There is no SIWE, no issuing JWTs, and mostly just a front end.
### Recommended approach
You pretty much just swap out the modals. If you use wagmi, add our [wagmi connector](/react-sdk/using-wagmi#-install-wagmi) and follow our [rainbowkit guide](/migrations/tutorials/rainbowkit), but in general, no migration needed. After the initial update to the Dynamic modal, you can stay on our [connect-only mode](/wallets/advanced-wallets/connect) and not store any user info with Dynamic, or alternatively start adding more sophisticated features.
## Migration Path B: You store wallet info somewhere and a wallet is a user
### Common scenarios
You built your own front end wallet connector or use Rainbowkit/ConnectKit, and in addition implemented a SIWE on your own, authenticating users and creating sessions for them.
### Recommended approach
For front end changes, you can follow path A above. In addition, you can use our [create wallet](/api-reference/wallets/createWallet) endpoint to generate users and add wallet records to them. When they first log in, they will verify wallet ownership via SIWE (we provide that and return a JWT - you don't need to do this), and you're done.
## Migration Path C: You have users, but no embedded wallets
### Common scenarios
You use Auth0, Firebase or another web2 user management system, or alternatively created something on your own. You store your users' emails and basic info.
### Recommended approach
You'll need to import your users into Dynamic
1. [Bulk upsert your users into Dynamic](/api-reference/users/bulkCreateUser), including their info capture/kyc information and their data
2. For any profile information that Dynamic does not yet explicitly support, you can add these in the user.metadata, which is a key-value object
3. When they log in, we verify their emails
And that's it. You're done. When your users log in next time around, we will verify their email addresses/social login information independently as part of the auth flow, and issue a JWT once you have successfully logged in.
## Migration Path D: You have users, and they have embedded EOA wallets
### Common scenarios
You use an embedded wallets provider, or have built a simple KMS-based key management system on your own
### Recommended approach
**There are really two options here:**
1. Keep current users in their existing embedded wallets and generate Dynamic wallets for new users
2. Migrate existing wallet users to Dynamic
**Keep current users:**
1. Switch to Dynamic auth
2. When user logs in with email, check if they have an existing account:
* If so, redirect them to old login flow
* If they don't, create a Dynamic-powered embedded wallet for them
```typescript
import { useEmbeddedWallet } from "@dynamic-labs/sdk-react-core";
// component declaration and all other logic you might need
const { createEmbeddedWallet } = useEmbeddedWallet();
const onCreateWalletHandler = async () => {
try {
await createEmbeddedWallet();
} catch (e) {
console.error(e);
}
};
```
**Migrate users:**
1. You'll need to import your users into Dynamic (the previous section)
2. When a user logs in, check if they have a wallet in the previous system
3. Check if wallet was ever used/is empty
4. If it isn't, prompt user to transfer funds to new Dynamic wallet (this can feel like an account upgrade flow for the users)
5. Next time that the user logs in, they go to their Dynamic wallet
## Migration Path E: You have users, and they have AA wallets
### Considerations
1. Your users have an EOA embedded wallet, but it only serves as a signer for an AA layer (safe, zerodev etc).
2. Hence, you'll want to add the Dynamic-powered embedded wallet as a second signer to the AA layer, or alternatively swap signers from the old embedded wallet one to the Dynamic one
**Main activities**
You'll want to have the end user add their new Dynamic wallet as a second signer to the smart contract wallet, or alternatively have them replace the current signer with a second signer
**Steps**
### Creating wallets for external wallet login
Embedded wallets can be automatically created for users signing in with external wallets, such as Metamask. To enable this feature, click the “Create on Sign up” card to expand the “Advanced Options” panel, and ensure the "Embedded Wallet for Third-Party Wallets" toggle is enabled.
## Future Enhancements
Our upcoming security features will include comprehensive transaction and signature analysis to protect users from potential vulnerabilities. This includes detection of token and NFT approval requests, as well as any other asset exposures in order to provide enhanced transparency during transaction flows.
# Multi Asset UI
Source: https://docs.dynamic.xyz/wallets/multi-asset
## Overview
From SDK version v2.2.0-alpha.0, the Dynamic Widget now supports multi-asset UI by default.
This means you can present your end users with the individual balances of each asset they hold in their wallet.
Balance and pricing information is refreshed every 20 min. If you need minute by minute refresh and different asset support, contact sales.
The list of tokens reflect the top 1000 tokens by DEX volume. We leverage Coingecko for pricing.
You can also choose to show the Fiat balance of those assets in whatever their primary currency is.
// ONLY USE ONE OR THE OTHER
)
}
```
### End user experience
Once logged in, on the Wallets screen of the widget, you will notice a "Send" button. Clicking on this button will take you to the Send Token UI.
You can then choose from any available token in your wallet, add an amount and recipient address, then preview the transaction before confirming.
Wallets
{userWallets.map((wallet) => ({wallet.address}
))}Mint NFT
{isSuccess && (
Successfully minted your NFT!
)}
No wallet connected
;
if (isLoading) return Loading...
;
if (isError) return Error: {error.message}
;
return (
{tokenBalances.map((token) => (
 ))}
))}
);
};
```
# Switch user's primary wallet
Source: https://docs.dynamic.xyz/wallets/using-wallets/general/switch-primary-wallet
The [useSwitchWallet hook](/react-sdk/hooks/useswitchwallet) gives you the ability to switch the user's primary wallet.
All it needs is a wallet ID as a parameter, and it resolve upon success. You can find the ID on any wallet object in Dynamic i.e. on the primaryWallet or those returned by [useUserWallets](/react-sdk/hooks/useuserwallets):
```jsx
import React from 'react';
import { useSwitchWallet, useUserWallets } from '@dynamic-labs/sdk-react-core';
const WalletSwitcher = () => {
const switchWallet = useSwitchWallet();
const userWallets = useUserWallets();
return (
{token.name}
{token.symbol}
{token.balance}
{userWallets.map(wallet => (
))}
);
};
```
# Interacting with wallets
Source: https://docs.dynamic.xyz/wallets/using-wallets/interacting-with-wallets
There are two aspects of the wallet object that are useful to know about:
1. The wallet object itself
2. The connector object
### Wallet Interface
The wallet is akin to a single account on your Wallet provider. For example, in Metamask, you can have multiple accounts, each with their own public address.
You can also have multiple chains associated with a single account in your wallet provider, for example in Magic Eden, you can have "Account 1", which has a public address for Solana, another for Bitcoin, etc. Each of these chain addresses are mapped to a different wallet object in Dynamic.
You'll find props and methods for a wallet object are specific to interacting with a single account/sub-account (i.e. for a single chain) on your wallet provider.
For example, getBalance, or signMessage interact with a single account/subaccount.
Below we outline the generic props and methods for a wallet object no matter what chain the account belongs to.
In each chain specific section, we also outline the props and methods for a wallet object for that chain.
Legacy Transaction
setAddress(e.target.value)} /> setAmount(e.target.value)} />
## Overview
### Key difference between V1 and v2 embedded wallets
v1 embedded wallets require transaction MFA. This means that before a transaction can be signed by the end user, they must
perform an additional MFA step. Currently we support Passkeys and One Time Codes for transaction MFA.
v2 embedded wallets allow transaction MFA to be configured as optional. This means that after an end user logs in/ signs up
and obtains a valid JWT, they will be able to perform actions with their embedded wallet without any additional MFA steps.
Currently adding transaction MFA is disabled for v2 embedded wallets. Configuring this will be possible in a future update.
### Example of signing a transaction using v1 embedded wallets
{!oneTimeCodeSent.current && }
{oneTimeCodeSent.current && (
)}
)}
{isSessionActive && (
)}
)
```
```javascript
import { useEmbeddedWallet, useDynamicContext } from “@dynamic-labs/sdk-react-core”
// component declaration and all other logic you might need
const { createEmbeddedWallet,
getPasskeys,
userHasEmbeddedWallet } = useEmbeddedWallet();
const { primaryWallet } = useDynamicContext();
const [passkeys, setPasskeys] = useState([]);
useEffect(() => {
const fetchPasskeys = async () => {
const passkeys = await getPasskeys();
setPasskeys(passkeys);
};
fetchPasskeys();
}, []);
const handleTransaction = async () => {
if (!isEthereumWallet(primaryWallet)) return;
const provider = await primaryWallet.getWalletClient();
const transaction = {
account: primaryWallet.address as Hex,
chain: getChain(await provider.getChainId()),
to: address as Hex,
value: amount ? parseEther(amount) : undefined,
};
// The dynamic SDK will intercept this viem call to prompt the user for their passkey at this point.
const hash = await provider.sendTransaction(transaction);
const client =
await primaryWallet.getPublicClient();
const { transactionHash } = await client.getTransactionReceipt({
hash,
});
console.log('Transaction: ' + transactionHash);
}
return (
<>
{passkeys.length > 0 && (
)}
)
```
### Example of signing a transaction using v2 embedded wallets
```javascript
import { useEmbeddedWallet, useDynamicContext } from “@dynamic-labs/sdk-react-core”
// component declaration and all other logic you might need
const { primaryWallet } = useDynamicContext();
const handleTransaction = async () => {
if (!isEthereumWallet(primaryWallet)) return;
const provider = await primaryWallet.getWalletClient();
const transaction = {
account: primaryWallet.address as Hex,
chain: getChain(await provider.getChainId()),
to: address as Hex,
value: amount ? parseEther(amount) : undefined,
};
const hash = await provider.sendTransaction(transaction);
const client =
await primaryWallet.getPublicClient();
const { transactionHash } = await client.getTransactionReceipt({
hash,
});
console.log('Transaction: ' + transactionHash);
}
return (
<>
);
```
### Example of signing a transaction if your environment has both v1 and v2 embedded wallets
`Note: getWalletVersion is only available in 3.0.0-alpha.30 and above`
```javascript
import { useEmbeddedWallet, useDynamicContext } from “@dynamic-labs/sdk-react-core”
// component declaration and all other logic you might need
const {
createOrRestoreSession,
isSessionActive,
sendOneTimeCode,
userHasEmbeddedWallet,
getWalletVersion,
} = useEmbeddedWallet();
const { primaryWallet } = useDynamicContext();
const version = getWalletVersion();
const oneTimeCodeSent = useRef(false);
useEffect(() => {
if (version === EmbeddedWalletVersion.V1) {
const startSession = () => {
try {
if (isSessionActive) return;
createOrRestoreSession();
} catch (err) {
return;
}
};
startSession();
}
}, [version]);
const onSendOneTimeCodeHandler = async () => {
if(!isSessionActive) {
try {
await sendOneTimeCode();
oneTimeCodeSent.current = true;
return;
} catch(e) {
console.error(e)
}
}
else return;
}
const onCreateSessionHandler: FormEventHandler = async (event) => {
try {
event.stopPropagation();
event.preventDefault();
if (!primaryWallet || !userHasEmbeddedWallet()) return;
const otc = event.currentTarget.otc.value;
await createOrRestoreSession({oneTimeCode: otc})
.then((result) => setResult(result))
.catch((error) => setResult(JSON.stringify(error, null, 2)));
} catch (err) {
logger.error(err);
}
};
const handleTransaction = async () => {
if (!isEthereumWallet(primaryWallet)) return;
const provider = await primaryWallet.getWalletClient();
const transaction = {
account: primaryWallet.address as Hex,
chain: getChain(await provider.getChainId()),
to: address as Hex,
value: amount ? parseEther(amount) : undefined,
};
const hash = await provider.sendTransaction(transaction);
const client =
await primaryWallet.getPublicClient();
const { transactionHash } = await client.getTransactionReceipt({
hash,
});
console.log('Transaction: ' + transactionHash);
}
return (
<>
{!isSessionActive && version === EmbeddedWalletVersion.V1 && (
{!oneTimeCodeSent.current && }
{oneTimeCodeSent.current && (
)}
)}
{isSessionActive || version === EmbeddedWalletVersion.V2 (
)}
);
```
# Headless Embedded Wallets With OTP
Source: https://docs.dynamic.xyz/wallets/v1-embedded/headless/headless-embedded-otp
## Summary
This guide will show you how to create an embedded wallet for a user, then help them secure it once they are ready to make their first transaction using One Time Codes, and optionally adding a passkey.
When using one time codes, we'll also create a session for that user so they can transact for a further period of time without any extra steps. for more information on the differences between passkeys and one codes, please see [this guide](/wallets/embedded-wallets/dynamic-embedded-wallets#signing-and-security-methods).
We will assume that the user has already signed up. If you need to handle the signup part headlessly, we recommend reading the [headless email guide](/headless/headless-email).
Here are the steps we need to follow:
1. Check for active session
2. Create the embedded wallet
3. Secure the wallet pre-transaction
4. Create a session for the user
For all of these steps we will need just one hook - [`useEmbeddedWallet`](/react-sdk/hooks/useembeddedwallet).
## Pre-requisites
* You have already set up the Dynamic SDK and wrapped your app with the `DynamicContextProvider`.
* You have enabled Dynamic-powered embedded wallets and toggled "Create on Sign up" on in the configuration.
* You do not have the DynamicWidget component in your application code.
## Session Notes
For security reasons, sessions are held in an iframe which gets deleted after page refresh and user log out.
To overcome sending users one-time codes each time they don't have an active session, we're able to restore it and developers should always try to do it before starting the one-time codes flow.
You'll see this in the code examples below, where we check for an active session before sending the one-time code i.e.
```jsx
useEffect(() => {
const startSession = () => {
try {
if (isSessionActive) return;
createOrRestoreSession();
} catch (err) {
return;
}
};
startSession();
}, []);
```
## Full code examples
You must add the following to your root CSS file to hide the iframe
```css
iframe[id*="dyn-secure-enclave-element-id"] {
display: none;
}
```
```javascript
import { useEmbeddedWallet, useDynamicContext } from “@dynamic-labs/sdk-react-core”
// component declaration and all other logic you might need
const { createEmbeddedWallet,
createOrRestoreSession,
isSessionActive,
sendOneTimeCode,
userHasEmbeddedWallet } = useEmbeddedWallet();
const oneTimeCodeSent = useRef(false);
useEffect(() => {
const startSession = () => {
try {
if (isSessionActive) return;
createOrRestoreSession();
} catch (err) {
return;
}
};
startSession();
}, []);
const onSendOneTimeCodeHandler = async () => {
// You do not need to call createEmbeddedWallet
// if the Create on Sign up setting is enabled in the
// Dynamic dashboard as the embedded wallets will be generated
// automatically on user sign up.
if(!userHasEmbeddedWallet()) await createEmbeddedWallet();
if(!isSessionActive) {
try {
await sendOneTimeCode();
oneTimeCodeSent.current = true;
return;
} catch(e) {
console.error(e)
}
} else return;
}
const onCreateSessionHandler: FormEventHandler = async (event) => {
try {
event.stopPropagation();
event.preventDefault();
if (!primaryWallet || !userHasEmbeddedWallet()) return;
const otc = event.currentTarget.otc.value;
await createOrRestoreSession({oneTimeCode: otc})
.then((result) => setResult(result))
.catch((error) => setResult(JSON.stringify(error, null, 2)));
} catch (err) {
logger.error(err);
}
};
return (
<>
{!isSessionActive && (
{!oneTimeCodeSent.current && }
{oneTimeCodeSent.current && (
)}
)}
)
```
```javascript
import { useEmbeddedWallet, useDynamicContext } from “@dynamic-labs/sdk-react-core”
// component declaration and all other logic you might need
const { createEmbeddedWallet,
createPasskey,
getPasskeys,
userHasEmbeddedWallet } = useEmbeddedWallet();
const onCreatePasskeyHandler: FormEventHandler = async (event) => {
try {
event.stopPropagation();
event.preventDefault();
if (!primaryWallet || !userHasEmbeddedWallet()) return;
const otc = event.currentTarget.otc.value;
return await createPasskey(otc)
} catch (err) {
console.error(err);
}
};
return (
<>
{!oneTimeCodeSent.current && }
{oneTimeCodeSent.current && (
)}
)
```
# Headless embedded wallets using Passkeys
Source: https://docs.dynamic.xyz/wallets/v1-embedded/headless/headless-embedded-passkey
## Summary
This guide will show you how to create a secured embedded wallet with a passkey, completely headlessly. We will use the createPasskey and createEmbeddedWallet methods, available from [the useEmbeddedWallet hook](/react-sdk/hooks/useembeddedwallet).
Here are the steps we need to follow:
1. Ensure the user is logged in
2. Create a passkey for the user
3. Create the embedded wallet with the passkey provided from the previous step
## Pre-requisites
* You have already set up the Dynamic SDK and wrapped your app with the `DynamicContextProvider`.
* You have enabled Dynamic-powered embedded wallets and toggled "Manual Mode" on in the configuration.
* You do not have the DynamicWidget component in your application code.
## Step by step
### Ensure the user is logged in
You can do this by implementing signup/login i.e. via [email](/headless/headless-email), or via [SMS](/headless/headless-sms).
### Create a passkey for the user
To create a passkey for the user, we will use the createPasskey method from the useEmbeddedWallet hook. This method will request the user create a passkey through their device UI and return a WebAuthnAttestation object to be used next while creating the embedded wallet.
Method signature:
```typescript
createPasskey(): Promise
```
Implementation:
```tsx
const { createPasskey } = useEmbeddedWallet();
const createPasskeyHandler = async () => {
const webAuthnAttestation = await createPasskey({});
console.log(webAuthnAttestation);
};
```
### Create the embedded wallet
To create the embedded wallet, we will use the `createEmbeddedWallet` method from the `useEmbeddedWallet` hook. This method will create the wallet with the passkey we generated in the previous step.
Method signature:
```typescript
createEmbeddedWallet(chains?: ChainEnum[], options?: { webAuthnAttestation: WebAuthnAttestation }): Promise
```
Implementation:
```tsx
const { createEmbeddedWallet } = useEmbeddedWallet();
const createWalletHandler = async () => {
const wallet = await createEmbeddedWallet(['EVM'], { webAuthnAttestation });
console.log(wallet);
};
```
## Full code example
```tsx
export const CreateEmbeddedWalletWithPasskey: FC = () => {
const { createEmbeddedWallet, createPasskey } = useEmbeddedWallet();
const [result, setResult] = useState(undefined);
const onSubmitHandler = async (event: React.FormEvent) => {
event.preventDefault();
event.stopPropagation();
const webAuthnAttestation = await createPasskey({});
createEmbeddedWallet([ChainEnum.EVM, ChainEnum.Sol], { webAuthnAttestation })
.then((result) => setResult(JSON.stringify(result, null, 2)))
.catch((error) => setResult(JSON.stringify(error, null, 2)));
};
return (
);
};
```
# Headless embedded wallets using Passkeys
Source: https://docs.dynamic.xyz/wallets/v1-embedded/headless/headless-passkey-embedded
This flow is only available from V2.1.0-alpha.9 of the SDK
## Summary
This guide will show you how to create a secured embedded wallet with a passkey, completely headlessly. We will use the createPasskey and createEmbeddedWallet methods, available from [the useEmbeddedWallet hook](/react-sdk/hooks/useembeddedwallet).
Here are the steps we need to follow:
1. Ensure the user is logged in
2. Create a passkey for the user
3. Create the embedded wallet with the passkey provided from the previous step
## Pre-requisites
* You have already set up the Dynamic SDK and wrapped your app with the `DynamicContextProvider`.
* You have enabled Dynamic-powered embedded wallets and toggled "Manual Mode" on in the configuration.
* You do not have the DynamicWidget component in your application code.
## Step by step
### Ensure the user is logged in
You can do this by implementing signup/login i.e. via [email](/headless/headless-email), or via [SMS](/headless/headless-sms).
### Create a passkey for the user
To create a passkey for the user, we will use the createPasskey method from the useEmbeddedWallet hook. This method will request the user create a passkey through their device UI and return a WebAuthnAttestation object to be used next while creating the embedded wallet.
Method signature:
```typescript
createPasskey(): Promise
```
Implementation:
```tsx
const { createPasskey } = useEmbeddedWallet();
const createPasskeyHandler = async () => {
const webAuthnAttestation = await createPasskey({});
console.log(webAuthnAttestation);
};
```
### Create the embedded wallet
To create the embedded wallet, we will use the `createEmbeddedWallet` method from the `useEmbeddedWallet` hook. This method will create the wallet with the passkey we generated in the previous step.
Method signature:
```typescript
createEmbeddedWallet(chains?: ChainEnum[], options?: { webAuthnAttestation: WebAuthnAttestation }): Promise
```
Implementation:
```tsx
const { createEmbeddedWallet } = useEmbeddedWallet();
const createWalletHandler = async () => {
const wallet = await createEmbeddedWallet(['EVM'], { webAuthnAttestation });
console.log(wallet);
};
```
## Full code example
```tsx
export const CreateEmbeddedWalletWithPasskey: FC = () => {
const { createEmbeddedWallet, createPasskey } = useEmbeddedWallet();
const [result, setResult] = useState(undefined);
const onSubmitHandler = async (event: React.FormEvent) => {
event.preventDefault();
event.stopPropagation();
const webAuthnAttestation = await createPasskey({});
createEmbeddedWallet([ChainEnum.EVM, ChainEnum.Sol], { webAuthnAttestation })
.then((result) => setResult(JSON.stringify(result, null, 2)))
.catch((error) => setResult(JSON.stringify(error, null, 2)));
};
return (
);
};
```
# One-time codes
Source: https://docs.dynamic.xyz/wallets/v1-embedded/transactional-mfa/one-time-codes
This feature is only for Dynamic-powered embedded wallets, as opposed to third-party providers.
Both new and existing Dynamic-powered embedded wallets will be able to use one-time codes if enabled in your Dynamic dashboard.
You can now allow your end users to transact using one-time email verification codes rather than passkeys. This means:
* It's even simpler for customers to transact - especially if they use older devices and browsers.
* It's much easier to embed Dynamic across many domains where a passkey would be needed for each.
* You can use passkeys as a 2FA method and not as the initial signing method for transactions.
## Background
Passkeys offer an intuitive and step-forward experience for developers and users alike by utalizing popular keychain managers like iCloud or 1Password to safely secure and enable cross-device experience. In some cases however, the experience of passkeys is still a few steps too advanced and developers want an alternative for their users to complete transactions using even more familiar functions. One-time codes offer a great solution.
Additionally, for customers that use Dynamic as an embedded solution across domains, the one-time code option offers flexibility as users would otherwise need to set up a passkey for each domain they interact with.
## How it works
Using an authenticated email, Dynamic sends a secure one-time code (encoded in base65) at the time a transaction is initiated. This code must be pasted by the end-user and will grant them access to sign for transactions for their wallet. An encrypted key is stored in local storage based on a defined length of time (in the dashboard) so users can continue transacting without an additional prompt.
One-time codes can also be combined with passkeys:
1. Users can utilize one-time codes for their initial transaction, and get prompted to add a passkey afterward.
2. One-time codes can be used as a fallback for users who run into issues with their passkey.
## Restrictions
1. If the user closes their session, the key will expire on its own.
2. If the user traverses devices during this session, it will require a new code.
## How to set it up
Go to the [email, social & embedded wallet section of the dashboard](https://app.dynamic.xyz/dashboard/configurations#emailsocialsignin), enable Dynamic-powered embedded wallets.

Inside the embedded wallet configuration section, under "Signing & Security Methods", toggle on "One-time code" either on it's own or with Passkeys.

Choose your session key length or keep the default of thirty minutes

## End user experience
No matter what configuration you have for one time codes/passkeys, the user logs in and has an embedded wallet created invisibly. From then on, the experience depends on how you have set up the further configuration.
Users can utilize one-time codes in three simple steps.
With one-time codes enabled, when the end user attempts to perform an action with their wallet they will be prompted to enter a one-time code sent to their email.

Users will receive an email with a one-time code that they can paste into the modal.

Once the code is confirmed, a session will be created. Users can continue performing actions with their wallet without an additional code until their session expires.

## FAQ
The user logs in and has an embedded wallet created invisibly. At their first
transaction or signing request, a one-time code is sent to their email. Once
confirmed, the transaction will be processed. Users can continue transactions
without an additional code until their session expires.
If you do not enable one-time codes, customers must set up a passkey before
their transaction will process.
No. Wallets are non-custodial. The session key is never accessible by the
developer.
This is a configurable field. It can be set to expire instantly or up to a few
hours. It is your responsibility to evaluate how long the session key should
last.
# Transactional MFA
Source: https://docs.dynamic.xyz/wallets/v1-embedded/transactional-mfa/overview
Dynamic offers multiple options for security at the transaction level when using the Dynamic-powered embedded wallets. These options include no MFA (Multi-factor authentication), Passkey MFA, and One-Time Codes MFA. It's important to note that transactional MFA is distinct from authentication MFA, which is used when the user logs in. This means a user can be protected with MFA during login and also required to confirm actions when signing messages or transactions.
## One-Time Email Codes MFA
One-Time Email Codes MFA provides an additional layer of security by requiring the user to enter a one-time code when performing a transaction. This code is typically sent to the user’s registered email.
**How it Works:**
When a transaction is initiated, a one-time code is sent to the user’s registered email. The user must enter this code to proceed with the transaction. This ensures that even if an unauthorized party gains access to the user’s device, they would still need the one-time code to complete a transaction.
**Configuration:**
* You can enable One-Time Codes MFA in the Wallet Transactions section under [the Embedded Wallets tab](https://app.dynamic.xyz/dashboard/embedded-wallets/dynamic)
* You can adjust the length of time before a session with OTC expires by clicking the gear to the right of the feature section once you've toggled it on.
## Passkey MFA
Passkey MFA provides the most secure transactional MFA option. We strongly recommend this option for applications that handle money or trading.
Passkey MFA enhances security by requiring the user to authenticate using a passkey when performing a transaction. This method leverages the user's device-based authentication mechanisms (e.g., biometrics, device PIN) to confirm their identity.
**How it Works:**
When a transaction is initiated, the user is prompted to authenticate using their device’s passkey mechanism. This could be a fingerprint scan, facial recognition, or entering a device PIN. Once authenticated, the transaction proceeds as normal.
**Configuration:**
* You can enable Passkey MFA in the Wallet Transactions section under [the Embedded Wallets tab](https://app.dynamic.xyz/dashboard/embedded-wallets/dynamic)
* You can control whether a Passkey is required at signup or not by clicking the gear to the right of the feature section once you've toggled it on.
* You can control whether a user can add more than one Passkey in the same configuration section as mentioned above.
**Important Notes**
Passkeys are scoped to top level domains - This means that they will work on
app.example.com, example.com, and market.example.com, but will require a new passkey if interacting on on
app.example.xyz or notexample.com. If a customer interacts with your application on a different domain, the user's account and wallet will appear as expected. Dynamic will detect that they are attempting to interact with a wallet on a new domain and prompt them to add a new passkey or use a one-time (if enabled) to complete the transaction.
If you decide to migrate your domain, your
end users will need to generate new passkeys. We can walk you through that
process as you implement.
Passkeys are supported on the following browsers:
Android: Chrome, Brave
MacOS v13+ Safari, Chrome, Brave
iOs v16+: Safari, Chrome, Brave
Windows: Chrome, Edge
**Not Supported:**
Chromebook: Not supported
Opera Mini
For customers that are on an unsupported browser, we recommend they update to the a recent version
(Requirement: 1password installed on both desktop and phone)
Delayed syncing across mobile: Passkey may not sync to the mobile device when it is created first on desktop. User may have to adjust their 1pass password settings in IOS to allow 1password to auto-fill browsers.
Not pairing: Even if the 1password is installed on both devices, iOS sometimes does not check 1password for passkeys. This prevents a user from accessing their passkey on their mobile device. To remediate, open password options under settings on your iOS device. Make sure that 1Password is selected to auto-fill for passwords and passkeys. If its already selected, deselect and re-enable in order to refresh it.
Passkeys are assigned at wallet creation, meaning the same passkey can be used for all embedded wallets created at the time of passkey creation. Adding additional embedded wallet chains will require users to use their passkey. Support for adding an embedded wallet on a new chain for existing embedded wallet users will be availalbe in the coming weeks.
## Transaction and Message Signing UI
Dynamic offers a customizable transaction and message signing UI, enhancing the user experience by providing clear and intuitive confirmation prompts. These prompts ensure users are aware of and can confirm actions before they are executed, adding an extra layer of transparency and security.
**Features of Transaction and Message Signing UI:**
* Provides clear, user-friendly confirmation prompts for transactions and message signing.
* Helps prevent accidental or unauthorized actions by requiring user confirmation.
* Can be customized to match the look and feel of your application.
**Turning Off Signing Confirmation UI:**
You can disable the transaction and message signing UI via [an option in the Dynamic dashboard](https://app.dynamic.xyz/dashboard/embedded-wallets/dynamic). This can be useful in scenarios where speed is a priority, and the risk of unauthorized actions is minimal, or when you control your own UI to show a similar confirmation screen.
# Passkeys
Source: https://docs.dynamic.xyz/wallets/v1-embedded/transactional-mfa/passkeys
By default, the user will authenticate with their embedded wallet using Passkeys (which interact via secure enclaves). Passkeys and secure enclaves are ideal for mobile-first application experiences and cross-device use cases.
By simple analogy, passkeys and secure enclaves are similar to a safety deposit box vault. That is, your end users have a key to access their locked box (i.e., wallet), while enjoying the benefits of having the box secured with vault-level security. The safety deposit box is inside the vault, but only the end user, with their key, can access the contents inside the box.
Once a user completes authentication (email or social), they will receive a prompt to create a passkey (TouchID, FaceID), after which they will automatically get a wallet, and can sign transactions using that passkey.
Since passkeys are synced using a keychain (e.g. iCloud, Google Password Manager, 1Password), end-users can use their passkeys across other devices once they authenticate.
## Technical Deep Dive
You have installed the Dynamic SDK, chosen your end-user auth method, and enabled embedded wallets. The End User comes to your website and initiates account creation, what actually happens now?
1. Dynamic authenticates the End User via Email OTP or Social Sign-in.
2. After authentication, the user is prompted to create a passkey, which leads to embedded wallet creation.
3. The user’s device requests a biometric. A passkey is generated.
4. Dynamic sends a Challenge (a random sequence of numbers of letters), which is automatically signed, forming a signature to confirm user control. The user's credential is safeguarded in their device's enclave.
5. Post-signature, Dynamic instructs, our non custodial key management provider to create a wallet.
6. Turnkey checks passkey details and links them with the user, an action encrypted in an AWS Nitro Enclave. Dynamic receives a UUID to associated the key with its user.
7. With a confirmed wallet, users can secure transactions using the passkey.

## Important notes
Passkeys are scoped to top level domains - This means that they will work on
app.example.com, example.com, and market.example.com, but will require a new passkey if interacting on on
app.example.xyz or notexample.com. If a customer interacts with your application on a different domain, the user's account and wallet will appear as expected. Dynamic will detect that they are attempting to interact with a wallet on a new domain and prompt them to add a new passkey or use a one-time (if enabled) to complete the transaction.
If you decide to migrate your domain, your
end users will need to generate new passkeys. We can walk you through that
process as you implement.
You can utilize [our export feature](/wallets/embedded-wallets/reveal-export) to export both recovery phrase and private key.
Passkeys are supported on the following browsers:
Android: Chrome, Brave
MacOS v13+ Safari, Chrome, Brave
iOs v16+: Safari, Chrome, Brave
Windows: Chrome, Edge
**Not Supported:**
Chromebook: Not supported
Opera Mini
For customers that are on an unsupported browser, we recommend they update to the a recent version
(Requirement: 1password installed on both desktop and phone)
Delayed syncing across mobile: Passkey may not sync to the mobile device when it is created first on desktop. User may have to adjust their 1pass password settings in IOS to allow 1password to auto-fill browsers.
Not pairing: Even if the 1password is installed on both devices, iOS sometimes does not check 1password for passkeys. This prevents a user from accessing their passkey on their mobile device. To remediate, open password options under settings on your iOS device. Make sure that 1Password is selected to auto-fill for passwords and passkeys. If its already selected, deselect and re-enable in order to refresh it.
Passkeys are assigned at wallet creation, meaning the same passkey can be used for all embedded wallets created at the time of passkey creation. Adding additional embedded wallet chains will require users to use their passkey. Support for adding an embedded wallet on a new chain for existing embedded wallet users will be availalbe in the coming weeks.
## FAQ
Passkeys are a new type of passwordless authentication designed to be more
secure and convenient than traditional passwords. They are based on the Web
Authentication (WebAuthn) standard, which uses public key cryptography to
create a secure link between a user's device and a website or app. They were
developed by the FIDO alliance (made up of companies like Apple, Google,
Microsoft, Amazon, 1Password, among others).
Unlike traditional passwords,
which create friction and pose phishing risks, passkeys leverage a familiar
pattern of using a biometric (FaceID, or TouchID) to securely create and store
a credential to the user’s device.
Dynamic uses passkeys as a security method to authenticate and gate access to
embedded wallet private keys. Specifically, passkeys are used to ensure that
your users are in control of their private keys by leveraging secure enclaves.
By simple analogy, passkeys and secure enclaves are similar to a safety
deposit box vault. That is, your end users have a key to access their locked
box (i.e., wallet), while enjoying the benefits of having the box secured with
vault-level security. The safety deposit box is inside the vault, but only the
end user, with their key, can access the contents inside the box. After
authenticating via email or social, users are prompted to create a passkey
with their device (e.g., biometrics). This grants them a wallet and enables
transaction signing with that passkey. The wallet’s private key is encrypted
at rest, and only decrypted within secure enclaves with a signature from the
user’s passkey.
Passkeys come with multiple built in security benefits. Specifically, unlike a
password or passcode, a user doesn't have to remember information with a
passkey, and that information can't be phished from the user. In addition,
because passkeys are tied to your iCloud or Google accounts, they are
protected by Apple and Google's security. Even if your sim gets swapped, an
attacker would farther have to gain access to your iCloud account or Google
keychain in order to get access to your passkey
# V1 Embedded Wallets Overview
Source: https://docs.dynamic.xyz/wallets/v1-embedded/v1-embedded-overview
This section is for V1 Embedded Wallet users i.e. those with Email codes or Passkey MFA enabled.
If you want to upgrade to the new V2 Embedded Wallets, please check the embedded wallet section in your dashboard and you'll see an option to upgrade.
Upgrading will not impact any existing user wallets. Meaning, only new users will receive V2 wallets. Existing users will continue using existing settings (passkeys / one time codes).
If you are going to maintain users with V1 Embedded Wallets and V2 embedded wallets, please refer to the following guide: [Working with environments that have both v1 and v2 embedded wallets](/wallets/v1-embedded/environments-with-v1-and-v2-embedded-wallets)
If you have users with v1 embedded wallets and you want to upgrade them to v2, please refer to the [useUpgradeEmbeddedWallet](/react-sdk/hooks/useupgradeembeddedwallet) hook.